Removed Tabs
- IT Support
- MAF Intern (Unlicensed)
Warehouse Details
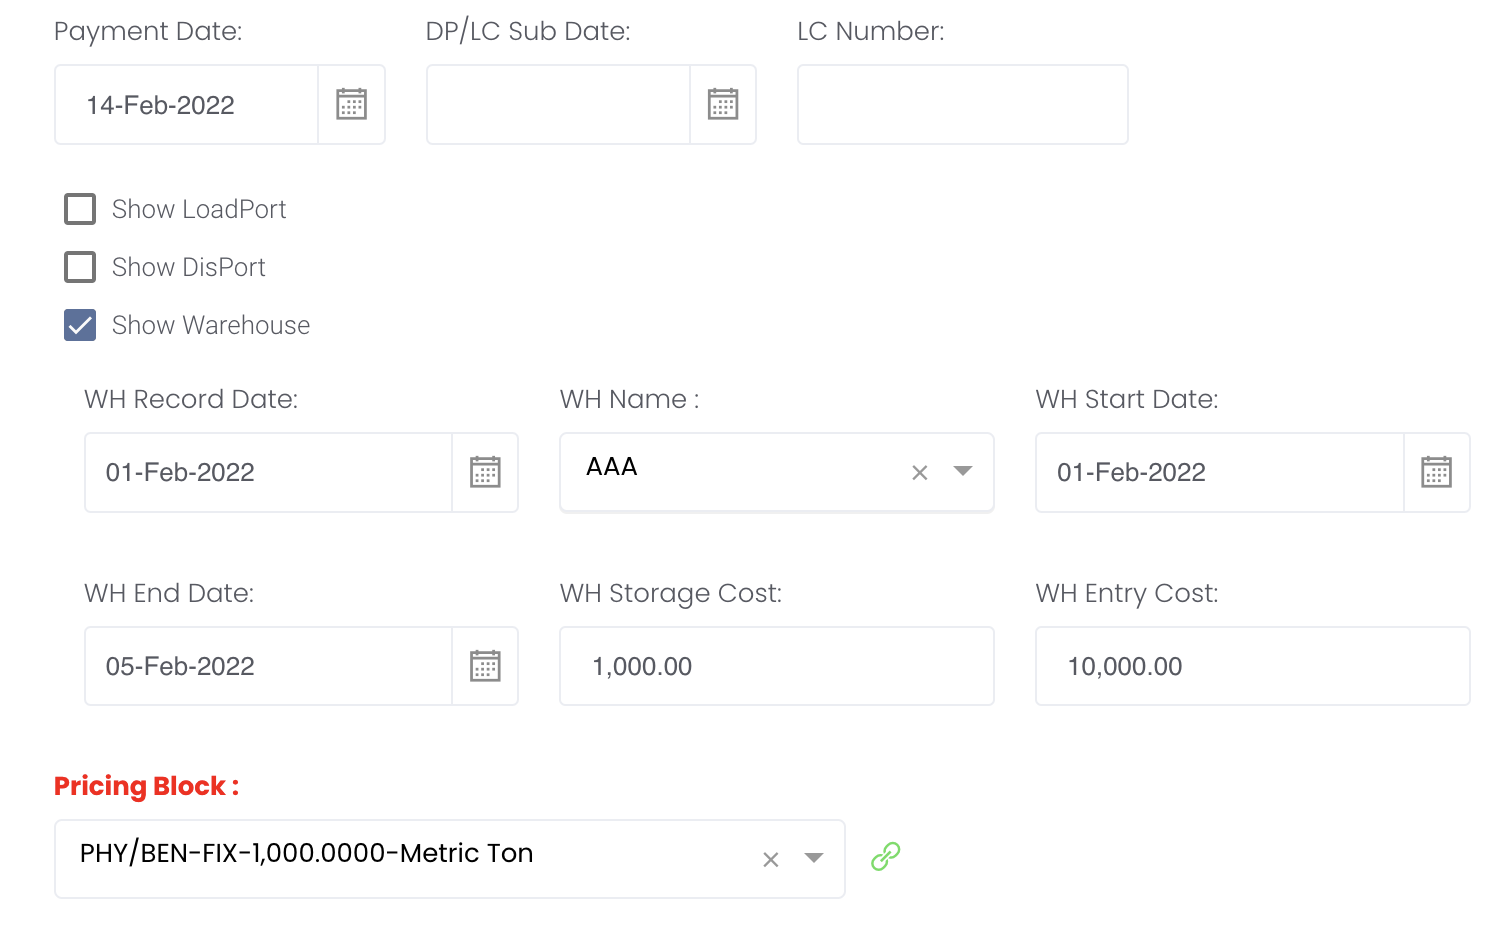
Before you begin to input warehouse details, you will be required to set up your warehouse name (WH Name) in the Company Data>Warehouses page.
To fill in warehouse details, tick "Show Warehouse" in the trade execution page. Pleas note that if you fill in "WH Record Date", "WH Name" must be filled in too, and vice versa. Otherwise, you may leave it empty.
- WH Start Date must not be later than WH End Date. WH Start Date and WH End Date can be the same.
- WH Storage and Entry Cost cannot be negative
The warehouse details will appear in the Physical Trade Inventory in the Dashboard for your reference.
FX Exposure
NO NUM: Refers to nominal amount/number and the master row of NO NUM is the sum of all children row. So if master row only has one child row, then master row value = child value.
If open position is +5, contract size = 1000 Metric Ton, price now is 100 USD/metric Ton, the NO NUM (nominal amount) = 5 * 1000 * 100 = 500,000 (this can be validated using the filters to view the summary amount in OPEN POSITIONS table)
Group
Each licence entitles the user to create 1 group and invite up to 5 users (including the inviting user) into the group.
Demurrage
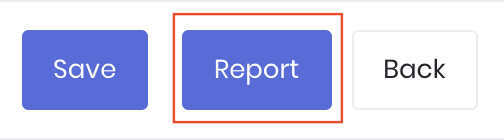
b. For Demurrage Claims only: Generating a report by clicking 'Report' at the end of the Demurrage Calculations page and a PDF report will be generated in another tab. Scroll to the end of the demurrage report and you will be able to see a token (MAF Link Token: XXXXXXXXXXXX).
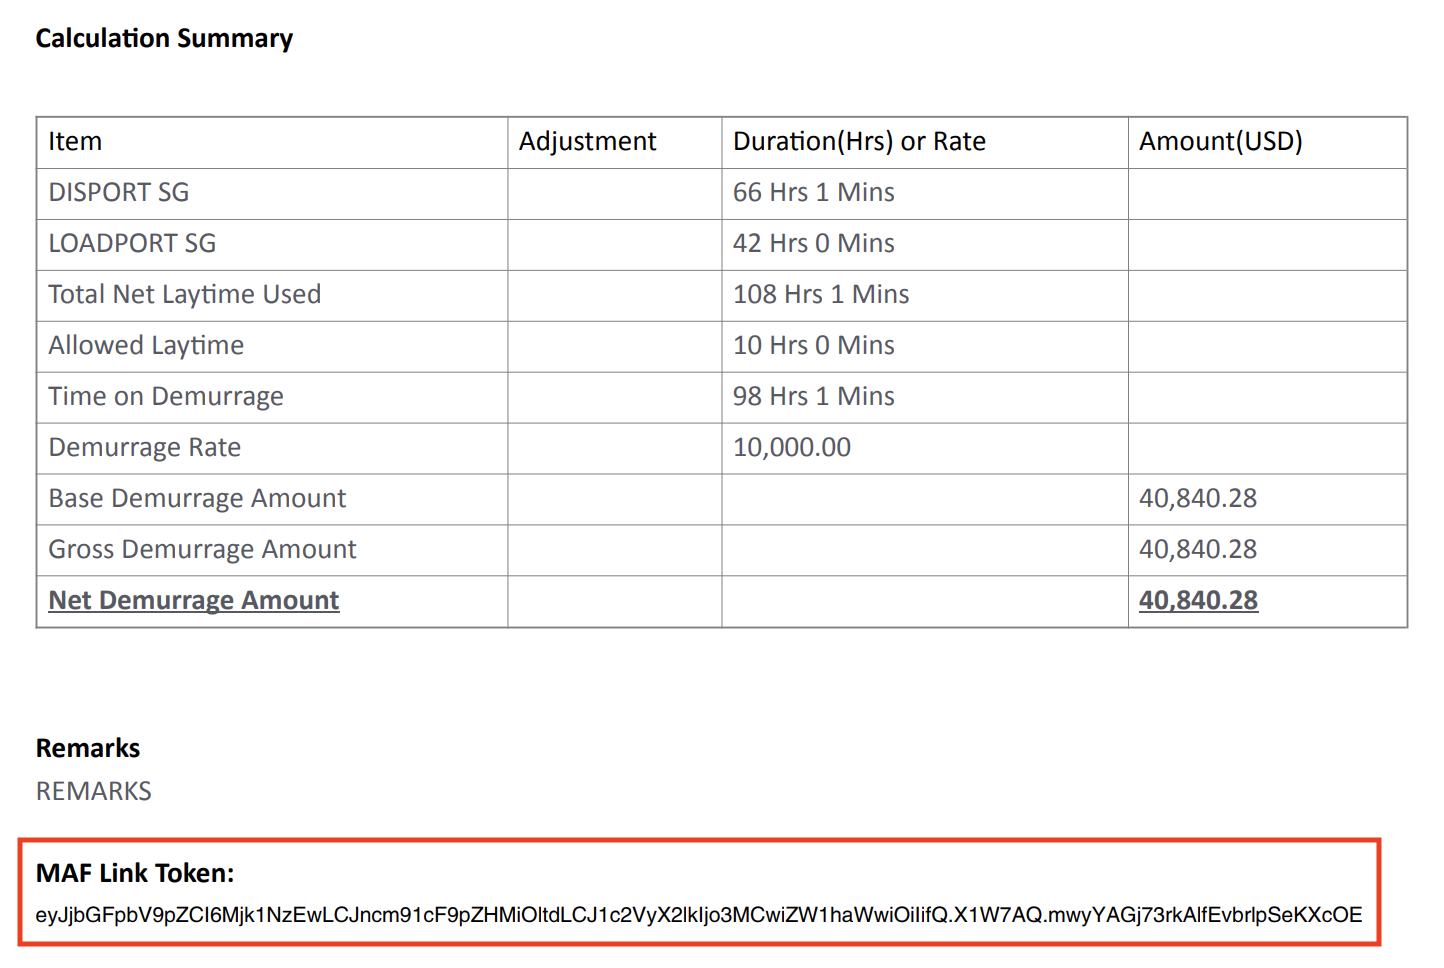
Alternatively, for demurrage claims, your counterparties can also obtain the token directly from the demurrage report.
For demurrage claims, it also means that obtaining the MAF Link token from a demurrage report will allow you to edit the data in that report and save in your account.
Close Expired Positions
To close expired positions (paper trades only) manually in this page, tick the checkbox(es) of the trade(s) and click on 'CLOSE POSITIONS' at the top right corner above the table.

A pop-up box will appear, indicating the last available 'Settlement Price' and 'Date' to close the positions. You are free to edit the fields as necessary.
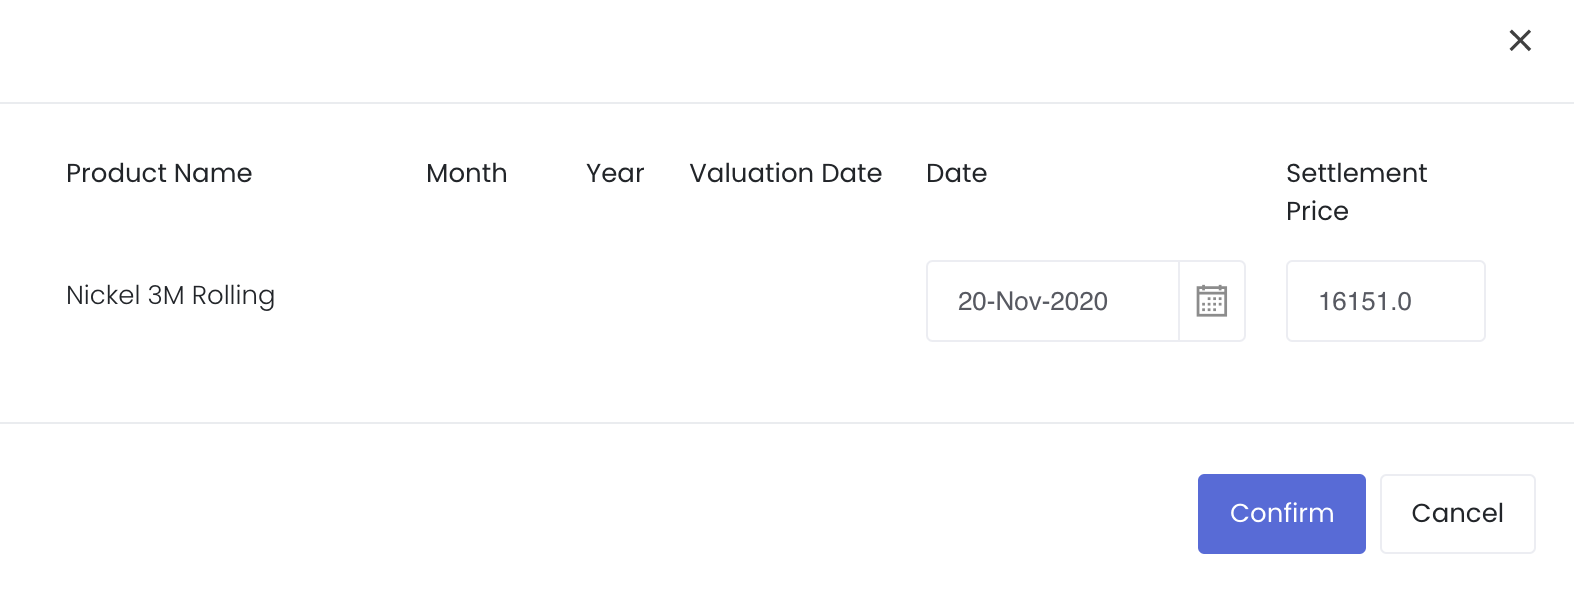
Click 'Confirm' and the system will automatically generate opposite trades with the same settlement price and date to close the selected expired positions. 'Trader Name' of these closed trades will be displayed as "MAF".
It could take a few seconds for the system to close the expired positions and you may be required to refresh the page to view the latest updates. We will add a notification to update you with the status in the near future.
Return to Overview
The 'General Ledger' allows you to record and monitor any transactions related to your portfolio(s), outside of profits/losses of trades within the portfolio(s) – this can include funds in/out, taxes, commissions, and various other incomes or expenses.
All the inflows and outflows related to the portfolio(s) are captured and recorded in the 'General Ledger'. This allows you to keep track of the cashflows of your trading operations, and is used when generating CTA or portfolio performance reports. You will be able to view, add, edit or delete the transactions, all in one table.
To access, click 'Portfolio' from the navigation sidebar on the left, followed by 'General Ledger'.
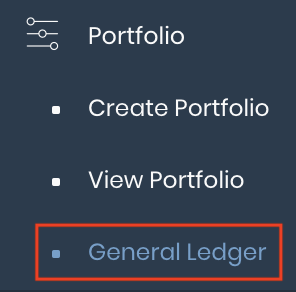
TABLE OF CONTENTS:
Accessing the Ledger
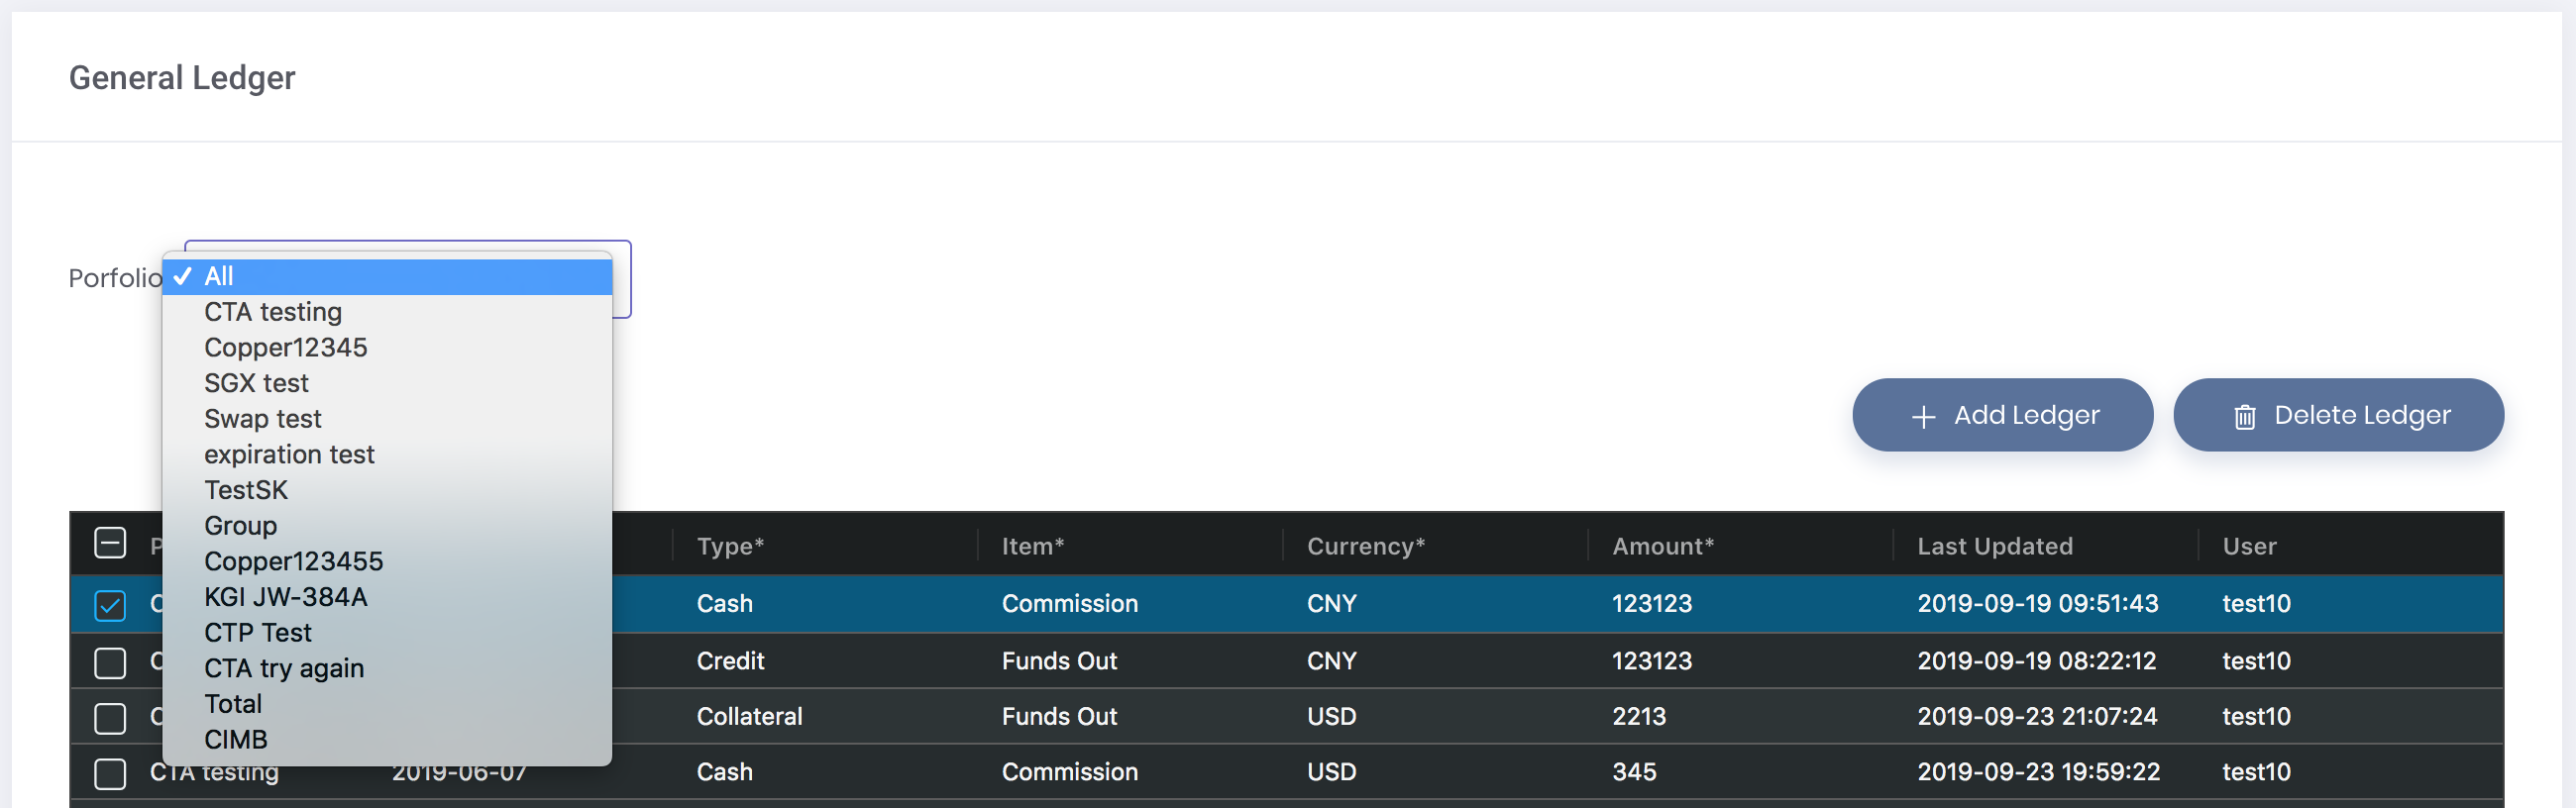
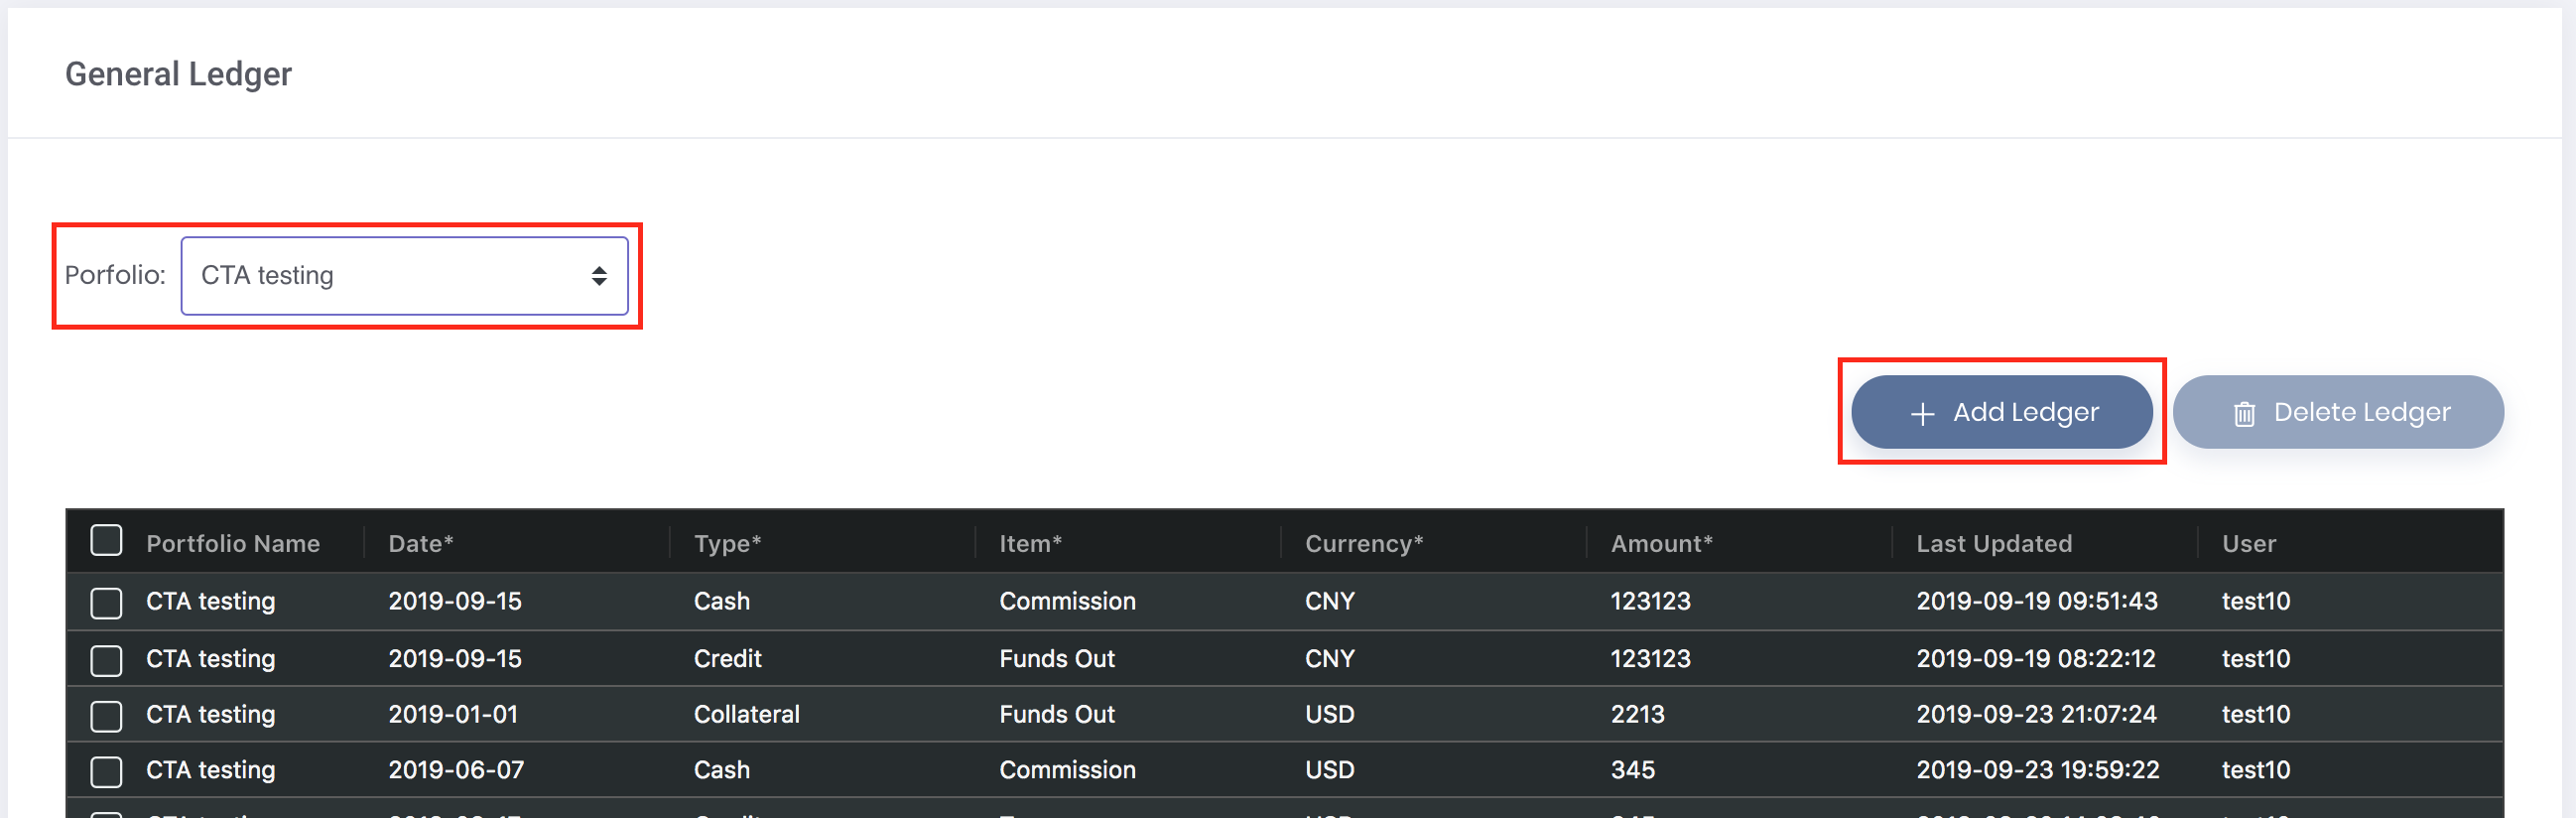
You can easily access your desired portfolio's ledger by selecting the portfolio from the drop-down list in the top left corner of the page, and the associated general ledger information will be displayed.
Adding a Ledger
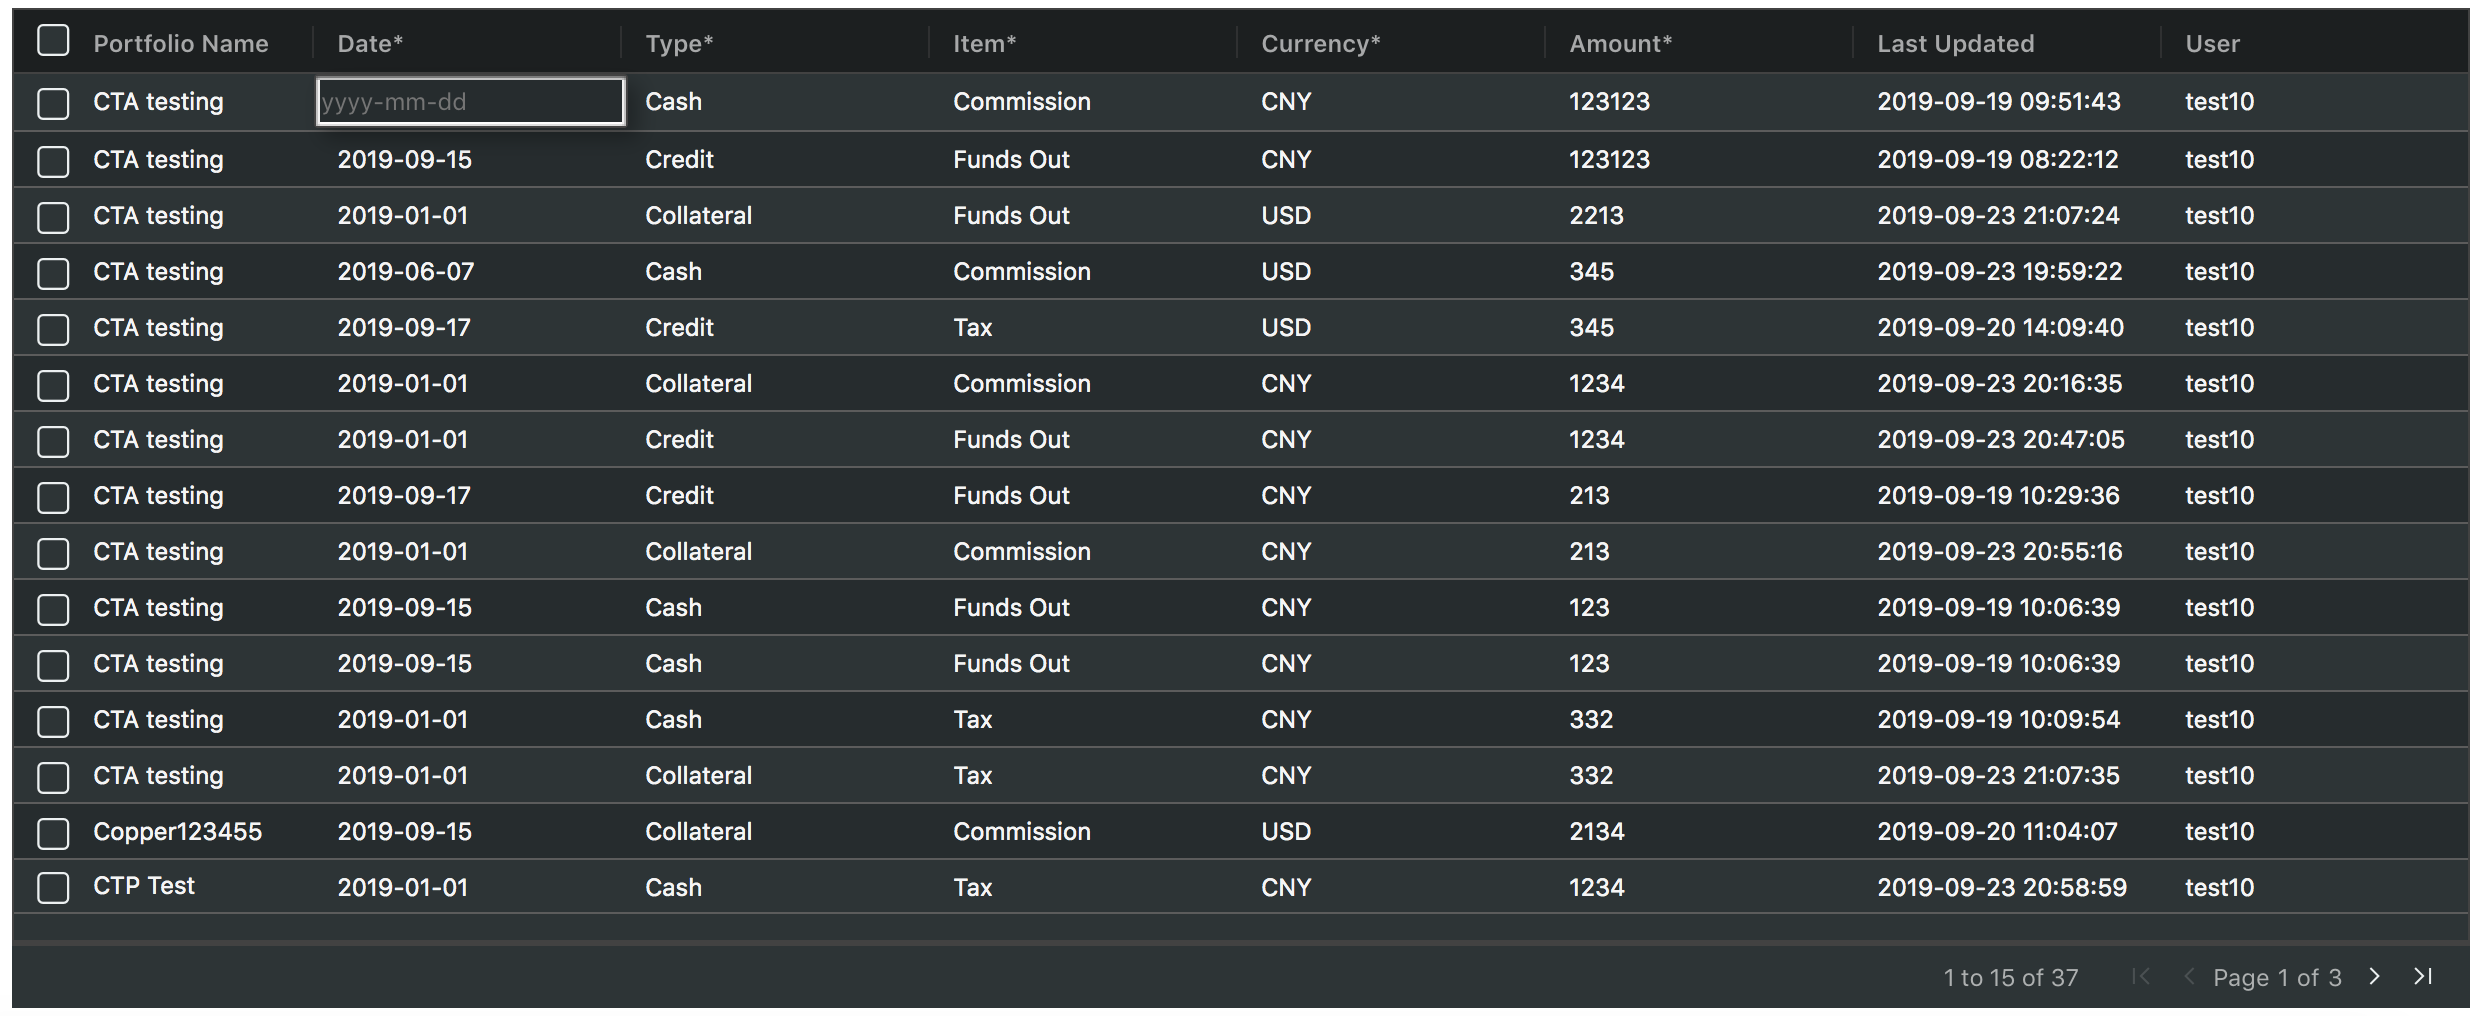
You will be able to add a ledger row by clicking on '+ Add Ledger' and an empty row with its corresponding portfolio name will appear in the table. You will then be able to fill in the information in the table by double-clicking its individual field(s) and filling it in accordingly.
Editing a Ledger
You will be able to edit any information (with the * sign) in your general ledger. Simply just double-click on the chosen field and edit accordingly.
Deleting a Ledger
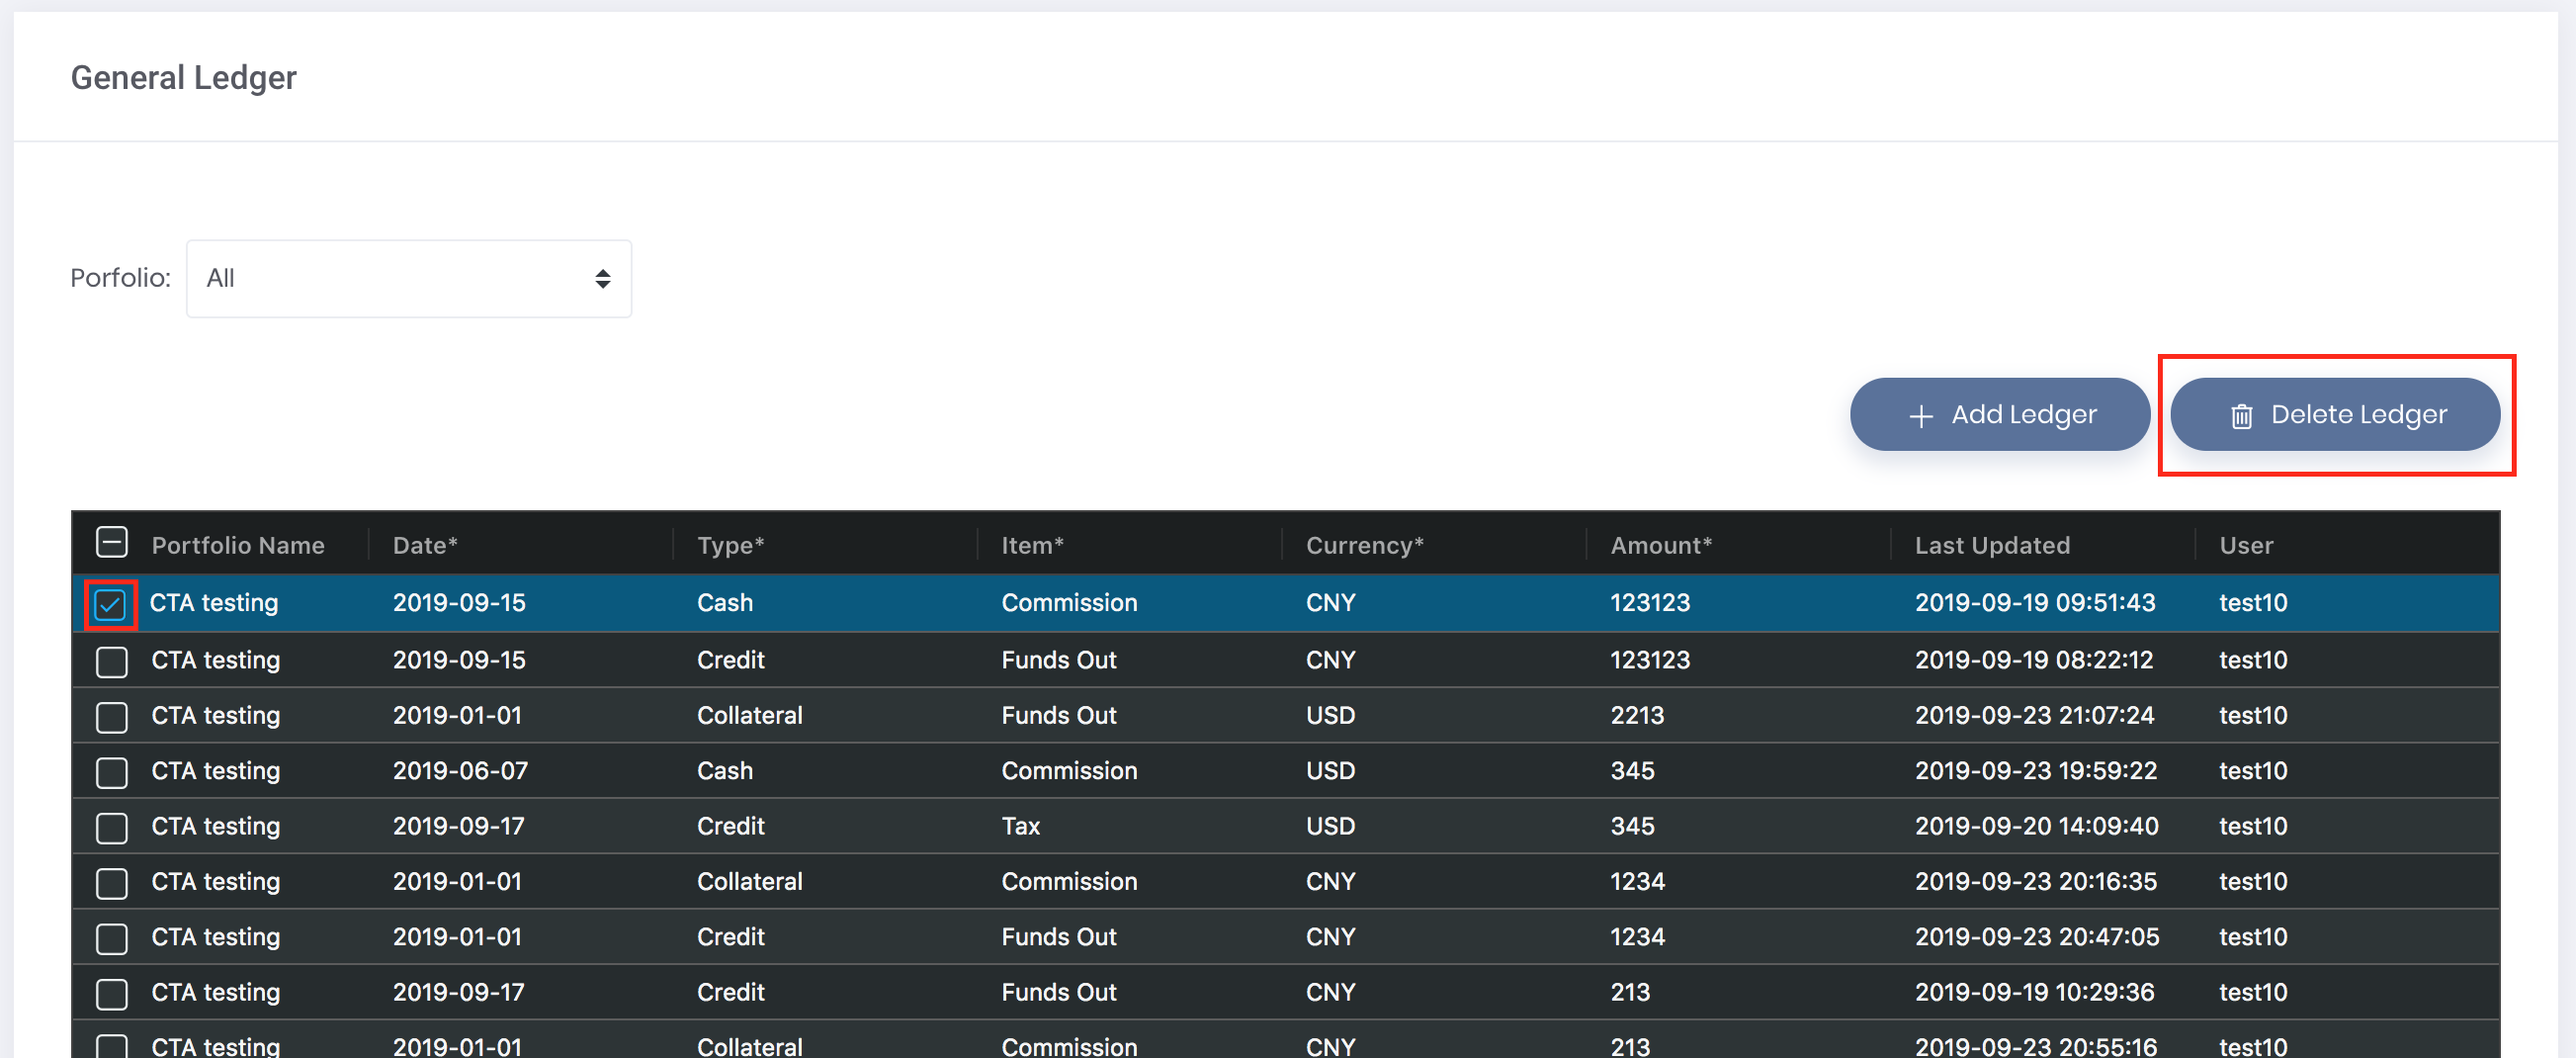
If you will like to delete a ledger row, click on the row's checkbox located on the extreme left of the table. Click on 'Delete Ledger' located on the top right corner of the page, and click on 'Yes, delete!'. Do note that this is an irreversible action. If you do not wish to delete the row, click on 'No, cancel!'.
Saving a Ledger
Once you have filled in the details, scroll down to the bottom of the page and click on the ‘Save’ button to save your ‘General Ledger’. Otherwise, click 'Reset' to cancel any changes you have made.
Functionality
Please refer to Table Settings for table functionalities.
Definition of Terms
Please refer to List of Definitions: Portfolio Details
Additional Definitions:
- 'Save': Saving of the changes made
- 'Resetl': Do not save the changes made and revert back to the original state
Click to access:
3. TERMS DETAILS TAB
To access this section, click on 'Trade', following by 'Physical Trades' from the navigation sidebar on the left. Click on the 'TERM DETAILS' tab at the top of the page to access this section.
This section displays the details of your term contracts and whether they have been fulfilled:
- 'TOTAL QTY': Total quantity to be fulfilled according to the contract.
- 'TRADED QTY': Quantity fulfilled so far.
- 'OUTSTANDING QTY': Outstanding quantity not fulfilled yet ('TOTAL QTY'-'TRADED QTY').
You may refer to the 'Physical Trades List' table below in the page to view the physical trades that contribute to the changes in quantity.
Several functions are available to assist in the selection of data:
- Search bar: Search for keywords in the search bar for relevant data to be displayed
- Table Headers: 'Sort' and 'Filter'data using the functions in the table headers (Please refer to Table Settings for table functionalities).
Click here to learn how to create a term contract.
Please refer to List of Definitions: Trades for the definitions of the fields.

In general, you need to identify the type of contracts when inputting your data:
1. SPOT:
Scenario A: Purchase/Sale contract with agreed total quantity eg 800 but it is split into 2 shipments with 2 quantities and different prices (500 and 300). You can create 1 trade as per normal and in the 'Benchmark' pricing page, let the quantity for the 1st pricing block be 500 and add the 2nd pricing block to include the quantity 300. You will need to make sure the quantity in the previous page matches exactly (800) to the total quantity in the pricing blocks.
Scenario B: Alternatively, if you have 2 trades with quantity 500 and 300 under the same contract, you can also key it as 2 separate trades and name it as "P1/P2" (purchase contract) or "S1/S2" (sale contract). You will be able to see the outstanding quantity that is not purchased/sold yet under DEALS tab.
The effects and outcome of Scenario A and B are the same, so it depends on which method is more suitable according to your requirements.
2. TERM:
Scenario C: Purchase/Sale contract with agreed total quantity eg 1500 and only 1000 has been purchased/sold, remaining 500 has not been purchased/sold and details are unknown yet. You will key this as a term contract to allow you to monitor the quantity that has been completed and the outstanding quantity that is not purchased/sold under TERM DETAILS tab. You will first need to key in the trade as per normal for the 1500 quantity, and key in the 500 later once you have the details.
- INVENTORY: Display the details of your inventory.
- STORAGE SETTINGS: Manage the details of your storage and its settings.
E. Stock In/Out
STOCK IN
1. If you have a purchase trade transaction ('PURCHASE') and have storage in the Storage Settings, you will be able to store and manage the stocks in your inventory. Under 'Actions' in the table, click the 'Settings' button (represented by a 'gear' icon) of the row and click 'Stock In'. To set up your storage settings, click here.
For example, Company A purchased 10,000 metric tons of Lead from Company B.

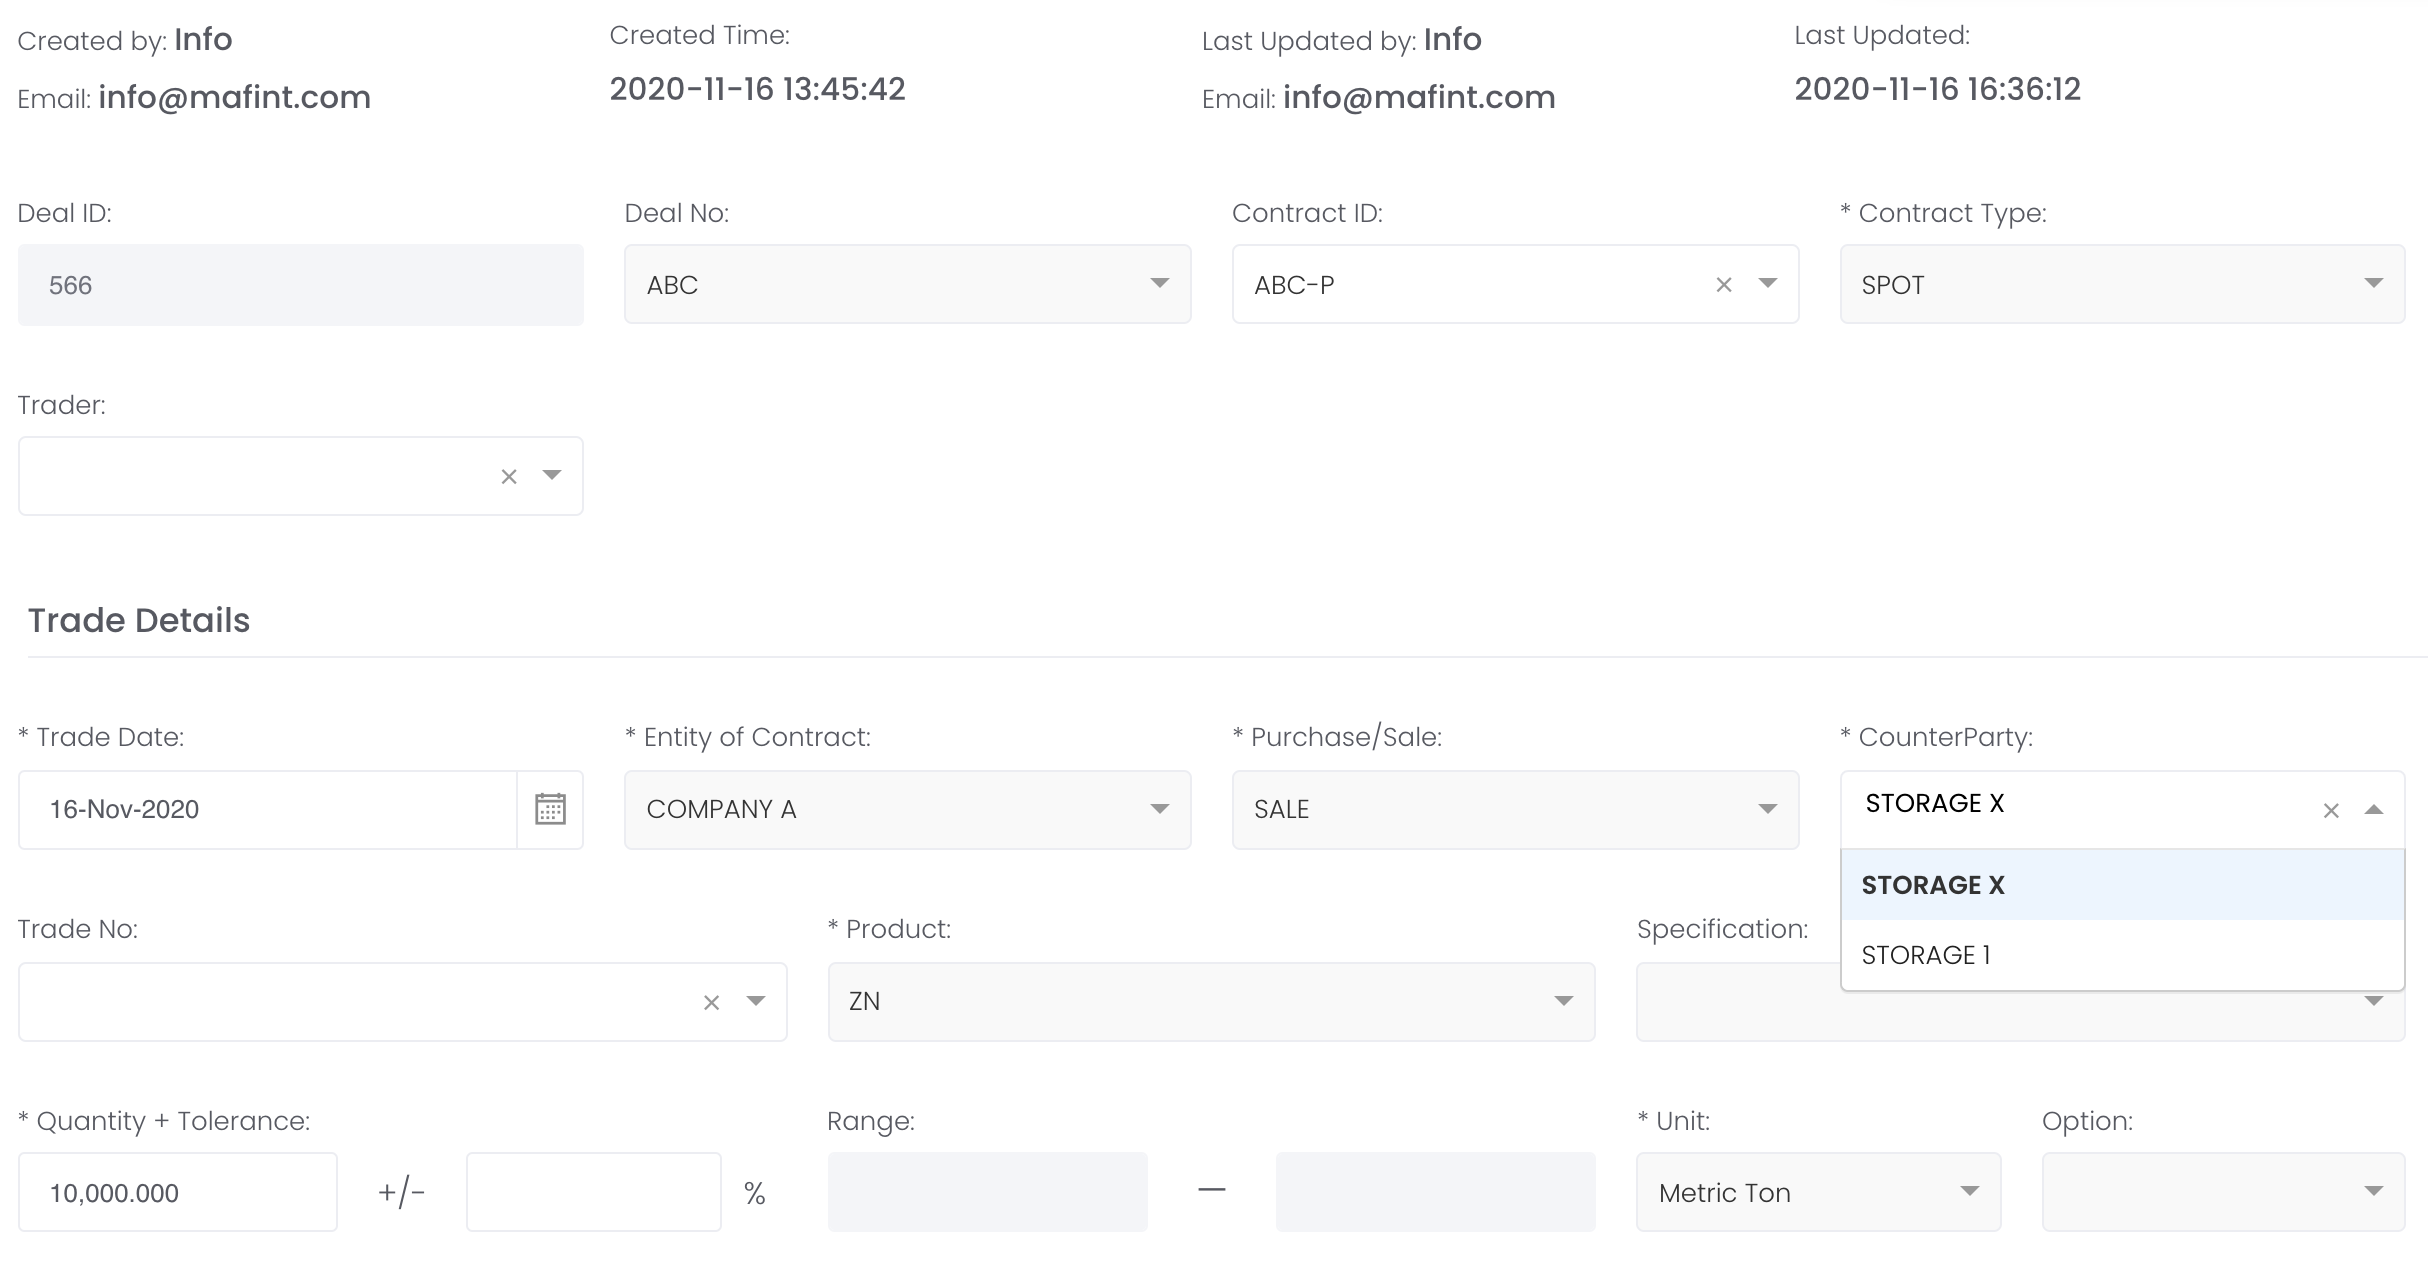
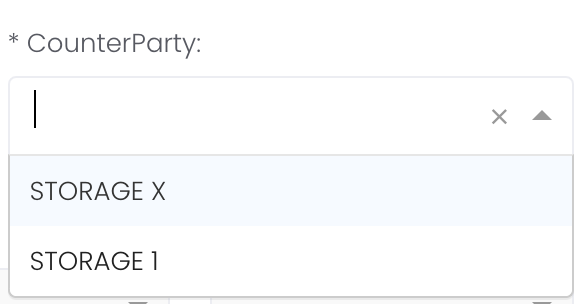
2. You will be directed to a new 'Create New Physical Trade' page to key in the details. Some fields will be automatically filled up and you will be required to fill in 'Counterparty' before moving to the next step. 'Counterparty' will be the name of your storage as set up here. You may change 'Quantity + Tolerance' and other details as necessary.
Complete the pricing stage of the trade and click 'Submit'.
Company A stocks in 10,000 metric tons of Lead into Storage X ('Storage Name'), at float/ave pricing of Lead 3M, with 1 day pricing period of 18 Nov 2020.
3. 2 linked trades will be automatically generated in the 'View Physical Trades' table to signify:
a. You ('Entity of Contract') storing/selling ('SALE') your stocks in/to storage name ('Counterparty')
Company A stores 10,000 metric tons of Lead in Storage X by selling to Storage X.

b. Storage name ('Counterparty') purchasing ('PURCHASE') your stocks from you ('Entity of Contract'). Your storage name will be the name of 'Deal No.'.
Storage X purchases 10,000 metric tons of Lead from Company A to store.

These 2 trades are linked and editing/deleting either trade will automatically update/delete the other. Click here to learn how to edit/view your trades.
SUMMARY
Trade 1: Purchase; Self to Counterparty
(eg Trade ID: 792)
Trade 2: Sale; Self to Storage
(eg Trade ID: 793)
Trade 3: Purchase; Storage to Self
(eg Trade ID: 794)
To monitor the quantity and positions of your stocks in your inventory, click here. A portfolio with the name of your storage ('Storage Name') will also be automatically generated to allow you to monitor the P/L positions of your inventory. Repeat Step 1 to 3 for any stock-in purposes.
STOCK OUT
1. If you sell your stocks, you can record the transactions by clicking on the 'Stock Out' button of the storage trade (Trade 3 above, Deal No. = Storage Name, Purchase/Sale = Purchase).

2. You will be directed to a new 'Create New Physical Trade' page to key in the details. Some fields will be automatically filled up and you will be required to fill in:
- 'Counterparty' to indicate the party you are selling to.
- 'Quantity' to indicate the quantity you are selling.
Once done, you can move onto the pricing stage and click 'Submit' when completed. Click on the 'INVENTORY' tab at the top of the page to view outstanding quantity and P/L positions.
Company A sells 2,000 metric tons of Lead in Storage X to Company C.

There are 8,000 metric tons of Lead left in Company A's inventory. The same steps can be taken until all stocks are sold out.

Your inventory and portfolio will automatically be updated with the changes associated with both 'Stock In' and 'Stock Out' functions. Repeat Step 1 and 2 until your stocks are sold out.
You may refer to List of Definitions: Trades for the definitions.
5. STORAGE SETTINGS TAB
This section allows you to set up your storage details to store your inventory.
Several functions are available to assist in the selection of data:
- Search bar: Search for keywords in the search bar for relevant data to be displayed
- Table Headers: 'Sort' and 'Filter'data using the functions in the table headers (Please refer to Table Settings for table functionalities).
To create a new row, click on the '+ Add Row' button located above the table.
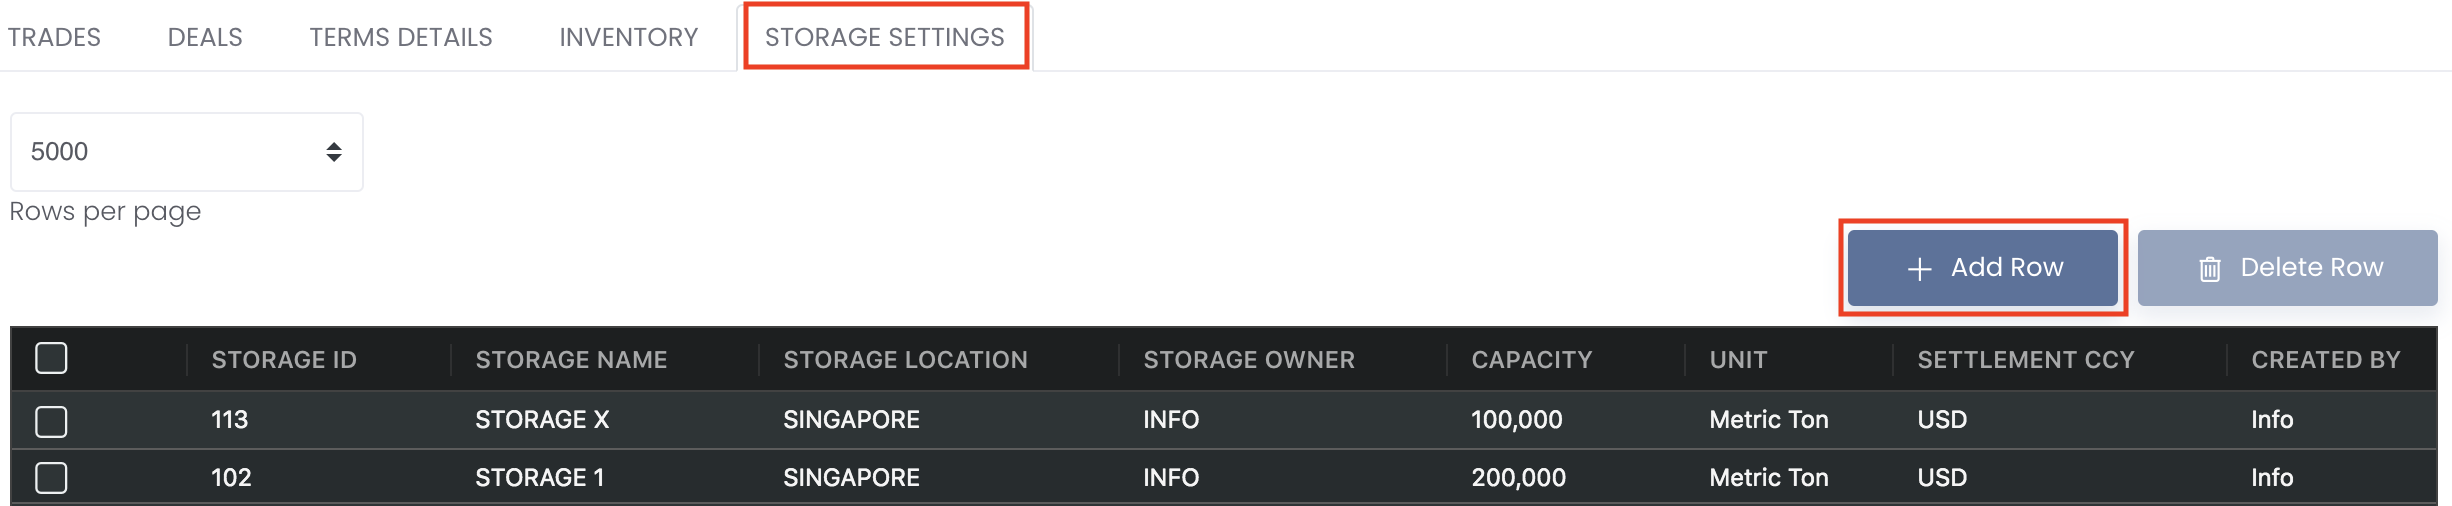
To delete a row, tick the checkbox of the row and click on the 'Delete Row' button located above the table. You may also select multiple rows to delete.
Only the 'Storage Name', 'Unit' and 'Settlement Currency' are compulsory items (highlighted in red) and you can only save the table after these fields are filled.
'Storage Location', 'Storage Owner' and 'Capacity' are optional fields that can be keyed in for your own reference.
Click 'Save Data' and your storage name will automatically appear in the drop-down list of 'Counterparty' when you perform the stock in function.
Please refer to the list of definitions for the definitions of the fields below:
| Storage ID | Unique Storage ID tagged to each portfolio, auto-generated by system | 75 |
| Storage Name | Name of the storage space you will be keeping your inventory in | Storage A |
| Storage Location | Where the storage space is located at | Building A |
| Storage Owner | Who owns the storage space | Samsung |
| Capacity | Amount of storage space that is available | 5,000 |
| Unit | Unit of trade | Kilogram |
| Settlement Currency | Currency used to settle the trade | USD |
| Created By | User who creates the deal | Trish |
| Created On | Date/Time when deal was created | |
| Last Modified By | User who updated the trade last | Alex |
| Last Modified On | Date the trade was last updated on |
4. INVENTORY TAB
This section displays the details of your inventory such as the outstanding quantity and P/L positions. All of your storage details as set up in Storage Settings will be displayed here.
'OUTSTANDING QTY' reflects the quantity of stocks that are available in your inventory (yet to be sold) and the associated P/L positions are calculated and displayed based on the pricing mode you have chosen here. This quantity will decrease accordingly once more stock out positions are taken.
You may refer to the 'Physical Trades List' table below to view the details of the physical trades that contribute to your inventory.
Several functions are available to assist in the selection of data:
- Search bar: Search for keywords in the search bar for relevant data to be displayed
- Table Headers: 'Sort' and 'Filter'data using the functions in the table headers (Please refer to Table Settings for table functionalities).
Please refer to list of definitions below:
Type | Description | Example |
|---|---|---|
| Deal ID | Unique Deal ID tagged to each portfolio, auto-generated by system | 763 |
| Deal No | Deal number of trade | MAF2001 |
| Outstanding Quantity | Outstanding/Remaining quantity of the trade, yet to be purchased/sold | 33,400 |
| Unit | Unit of trade | Kilogram |
| Currency | Currency of trade | Yen |
| Realised P/L | Amount of profit/loss that has been converted to cash | +10,000 |
| Unrealised P/L | Potential profit/loss that is on paper but has yet to be converted to cash | +15,000 |
| Commission | Commission paid by user to the broker | 15 |
| Total P/L | Total amount of profit/loss from realised and unrealised profit/loss | 25,000 |
| Created By | User who creates the deal | Alex |
| Created On | Date/Time when deal was created | |
| Last Updated By | User who updated the trade last | Brad |
| Last Updated On | Date the trade was last updated on |

Additional Note:
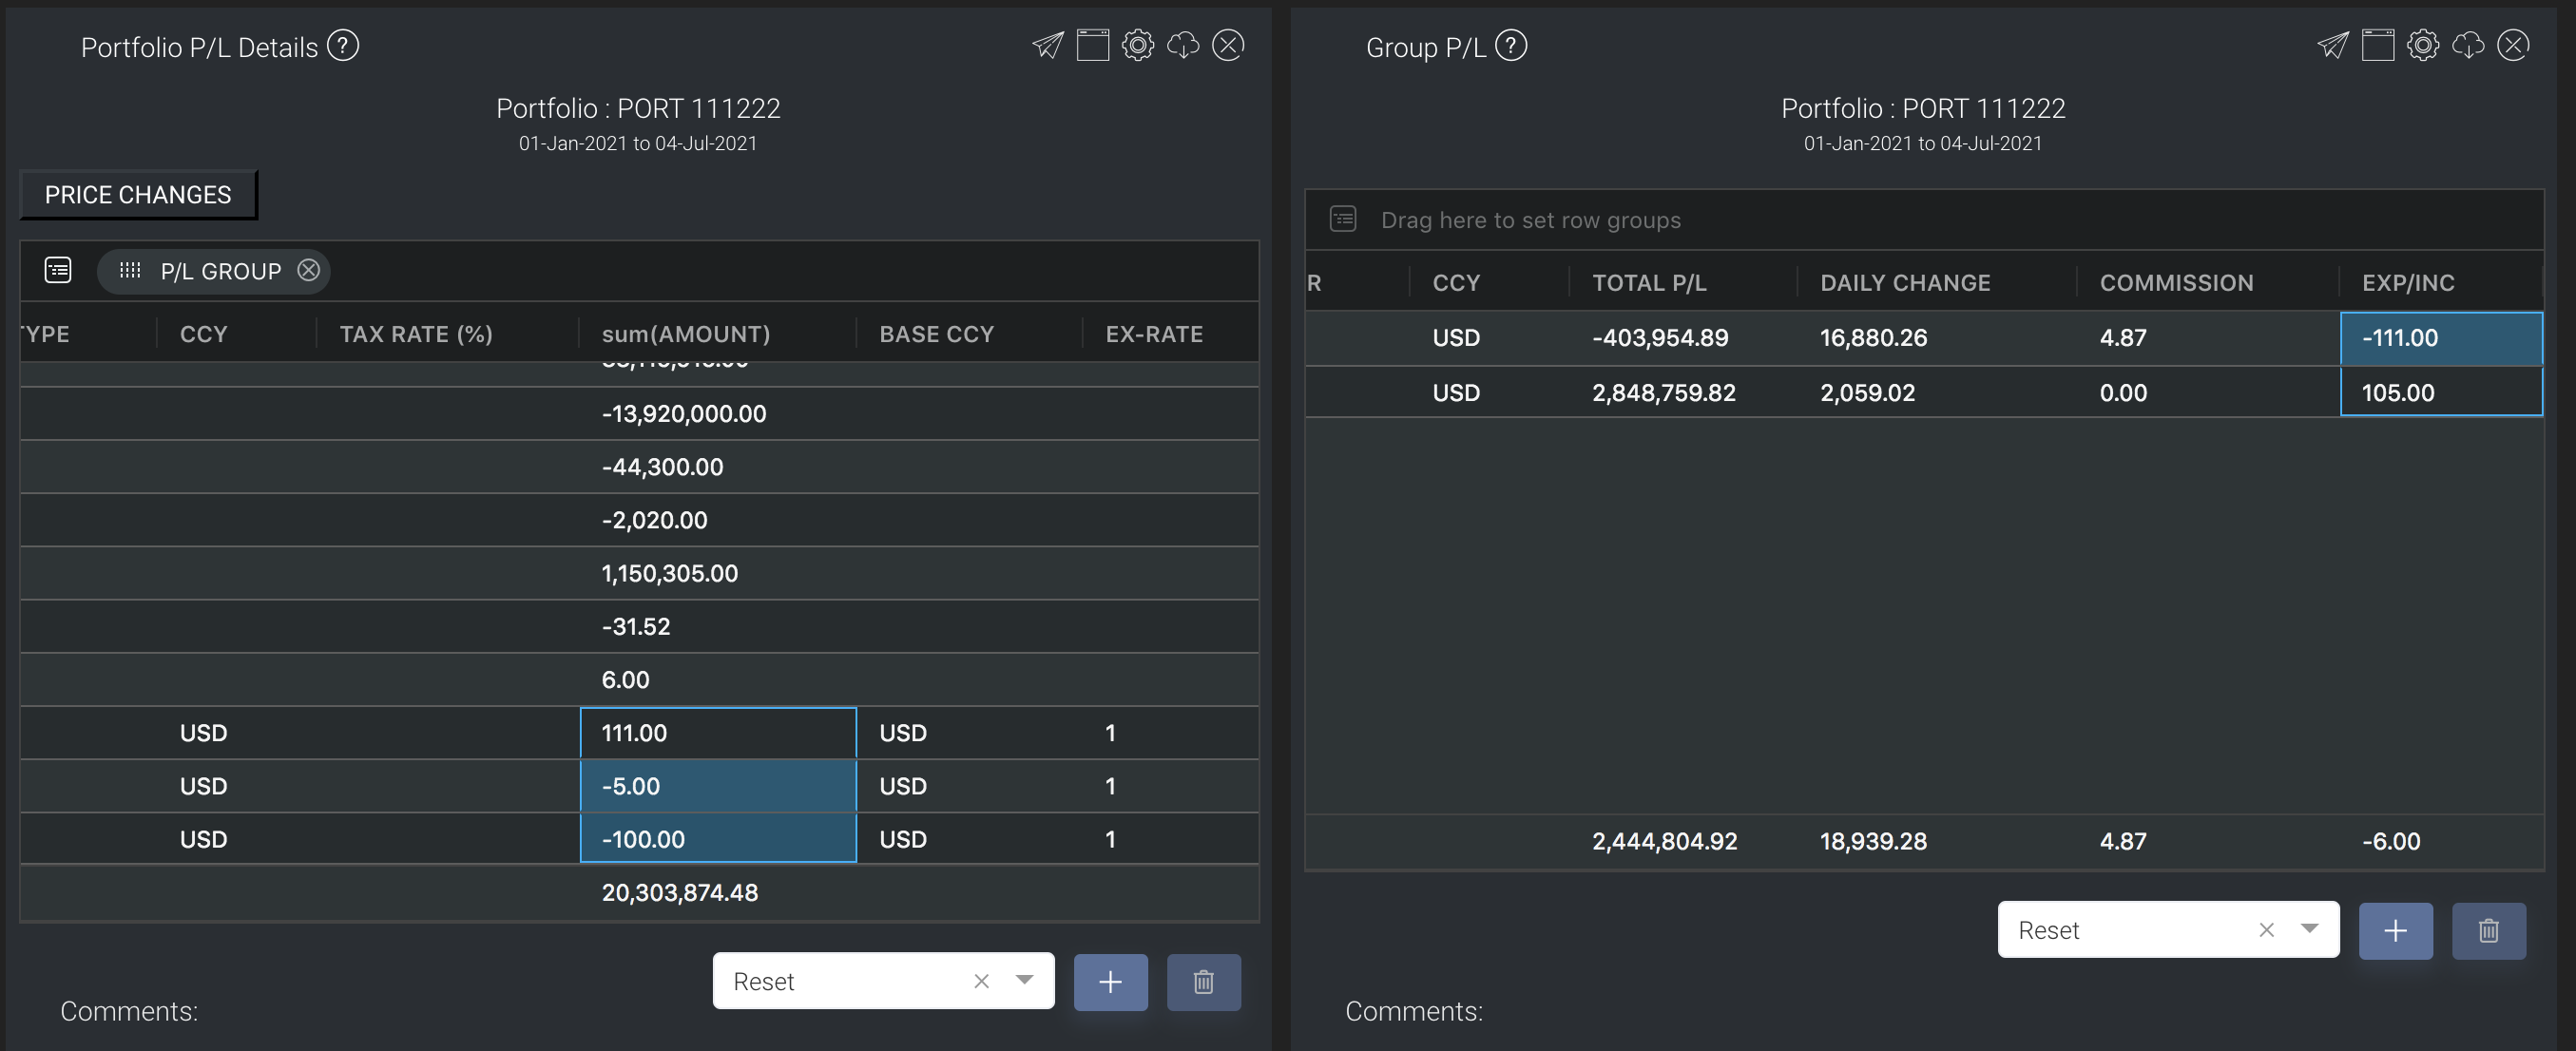
In EXPENSE/INCOME table, expense amount should be input as a negative value, and income amount should be input as a positive value.
This amount will be reflected accordingly in the Portfolio P/L Details model but in the opposite direction (+ will become - and vice versa) in the Group P/L model.
In GENERAL LEDGER table, expense amount should be input as a positive value, and income amount should be input as a positive value.
This amount will be reflected in the opposite direction as -1 * original ![]() or
or ![]() sign (+ will become - and vice versa) in Portfolio P/L Details model but reflected as per normal in the Group P/L model.
sign (+ will become - and vice versa) in Portfolio P/L Details model but reflected as per normal in the Group P/L model.
With these different calculation methods, the total P/L value will be the same.