Managing Paper Trades
- IT Support
- MAF Intern (Unlicensed)
Return to Overview
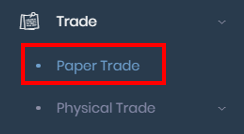
After you have created your paper trade(s), you will be able to view them in 'Paper Trade' (under 'Trade' from the navigation sidebar on the left).
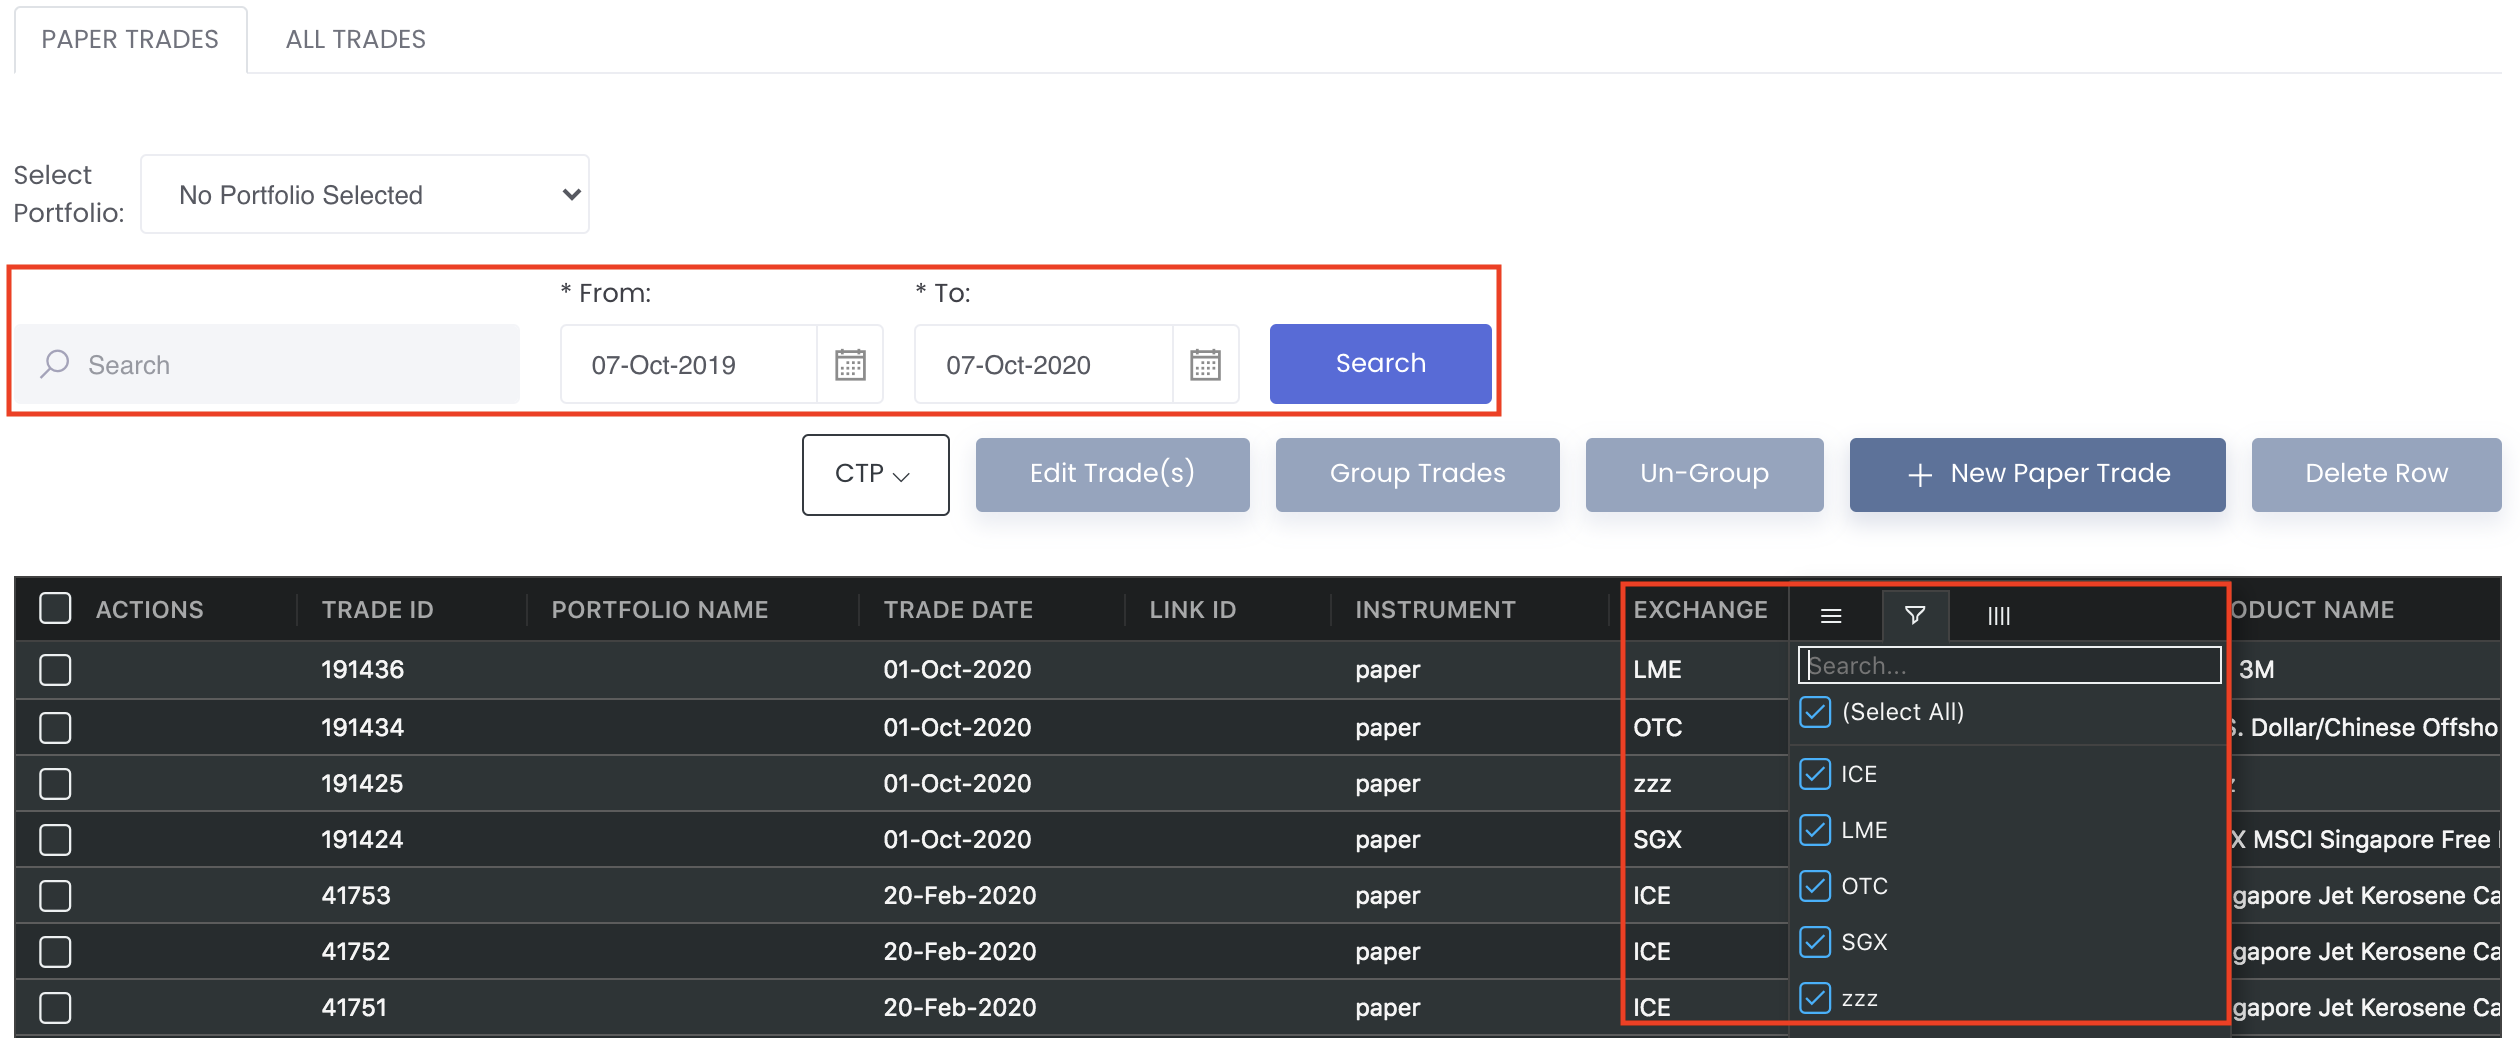
There are 2 tabs to select from:
- PAPER TRADES: Displays the details of your paper trades data (editable table).
- ALL TRADES: Displays the details of both your paper and physical trades (non-editable table, for viewing purposes only).
- AUTO TRADES CAPTURE: Displays the details of your paper trades data captured automatically from your email via Straight-Through Processing (STP).
TABLE OF CONTENTS:
Paper Trades Tab
Displays the details of your paper trades data in the table (editable table).
Navigating Paper Trades Data Page
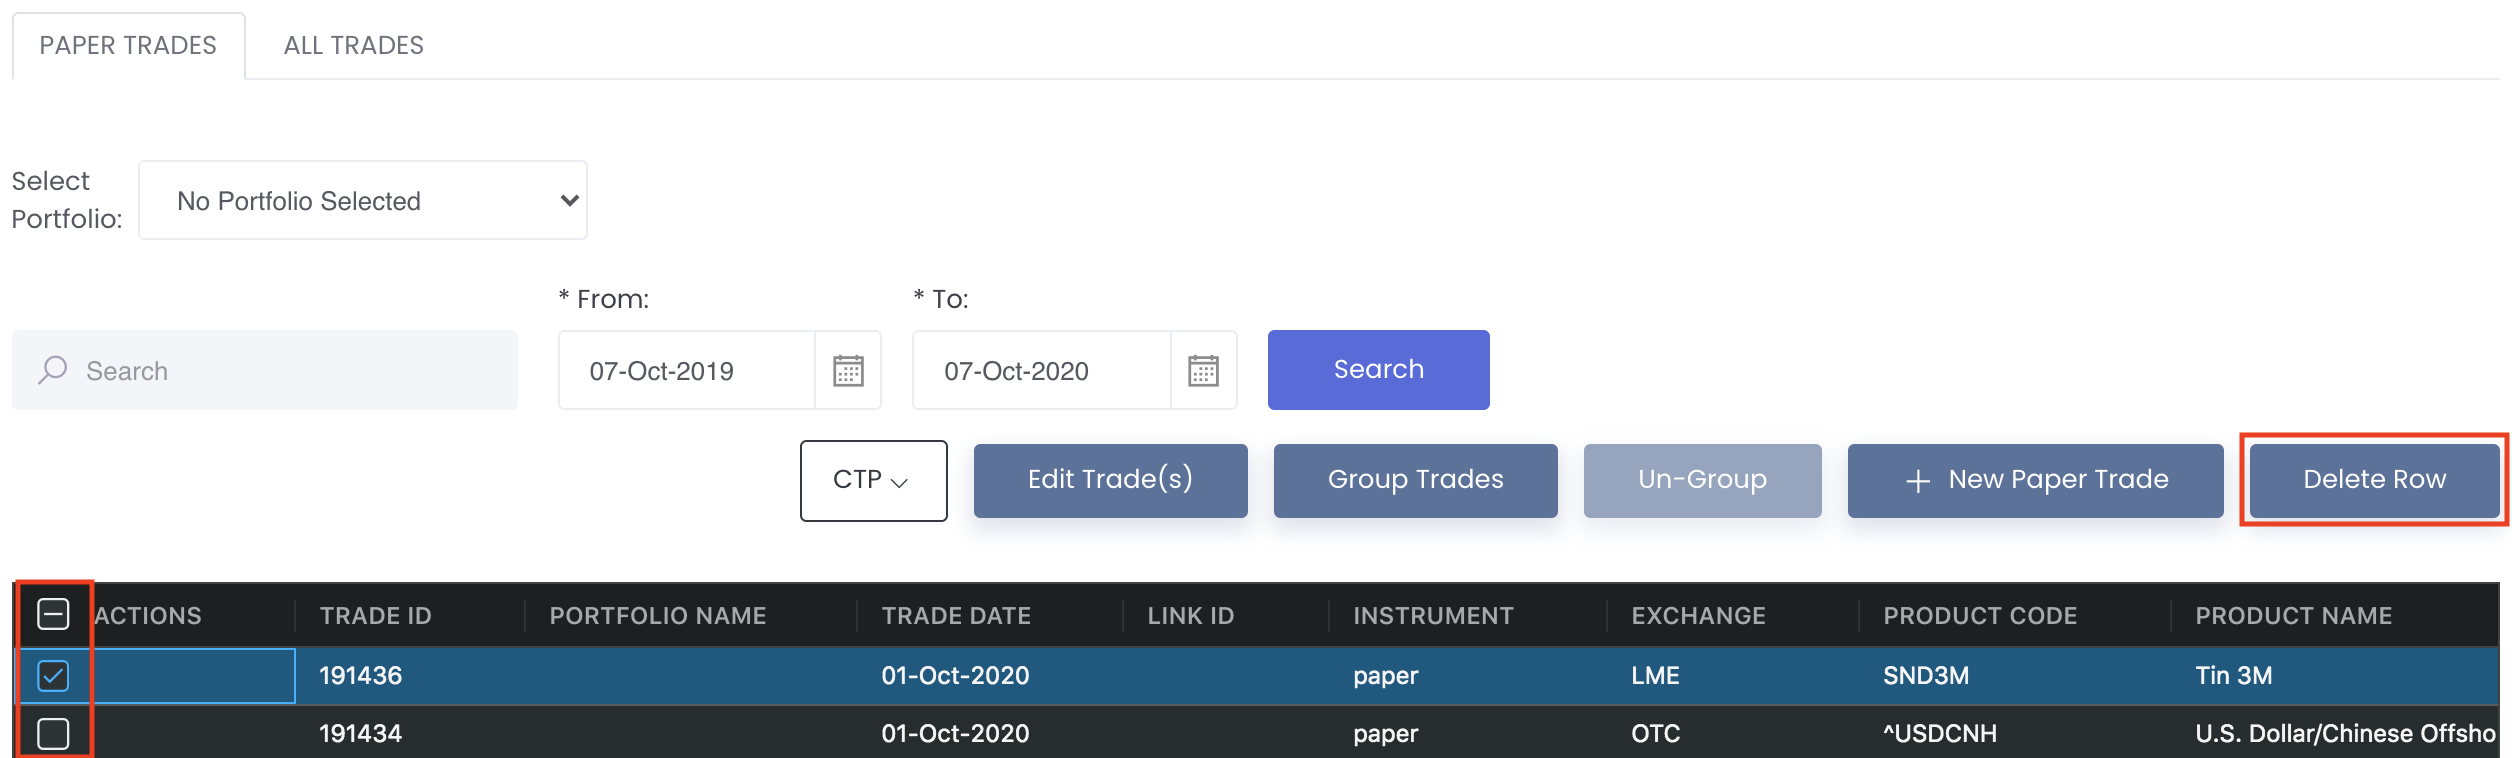
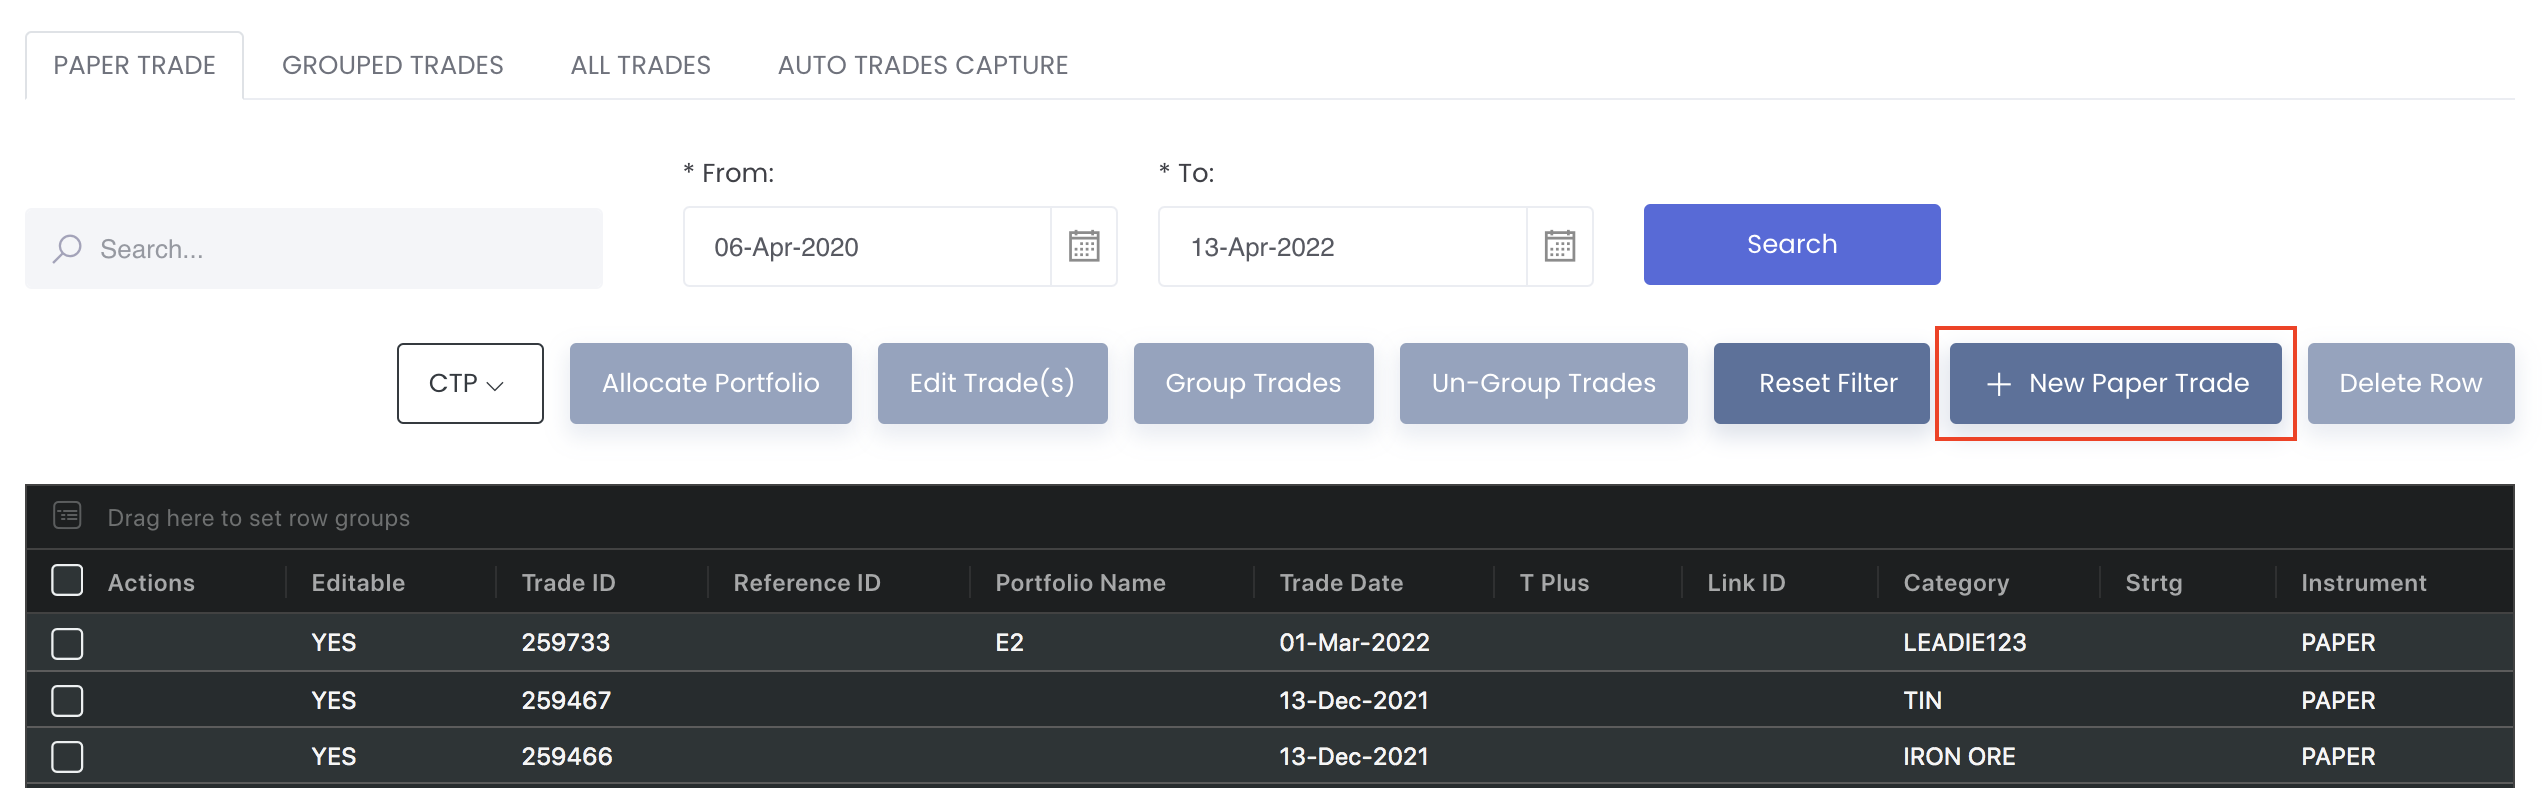
All paper trades created will be displayed in the 'Paper Trades' table.
Several functions are available to assist in the selection and usage of the market data:
- 'Search': Search for keywords in the search bar for relevant data to be displayed.
- Table Headers: 'Sort' and 'Filter' data using the functions in the table headers (Please refer to Table Settings for table functionalities).
- Export Data: Right click in the table to export all the data into .CSV or Excel file.
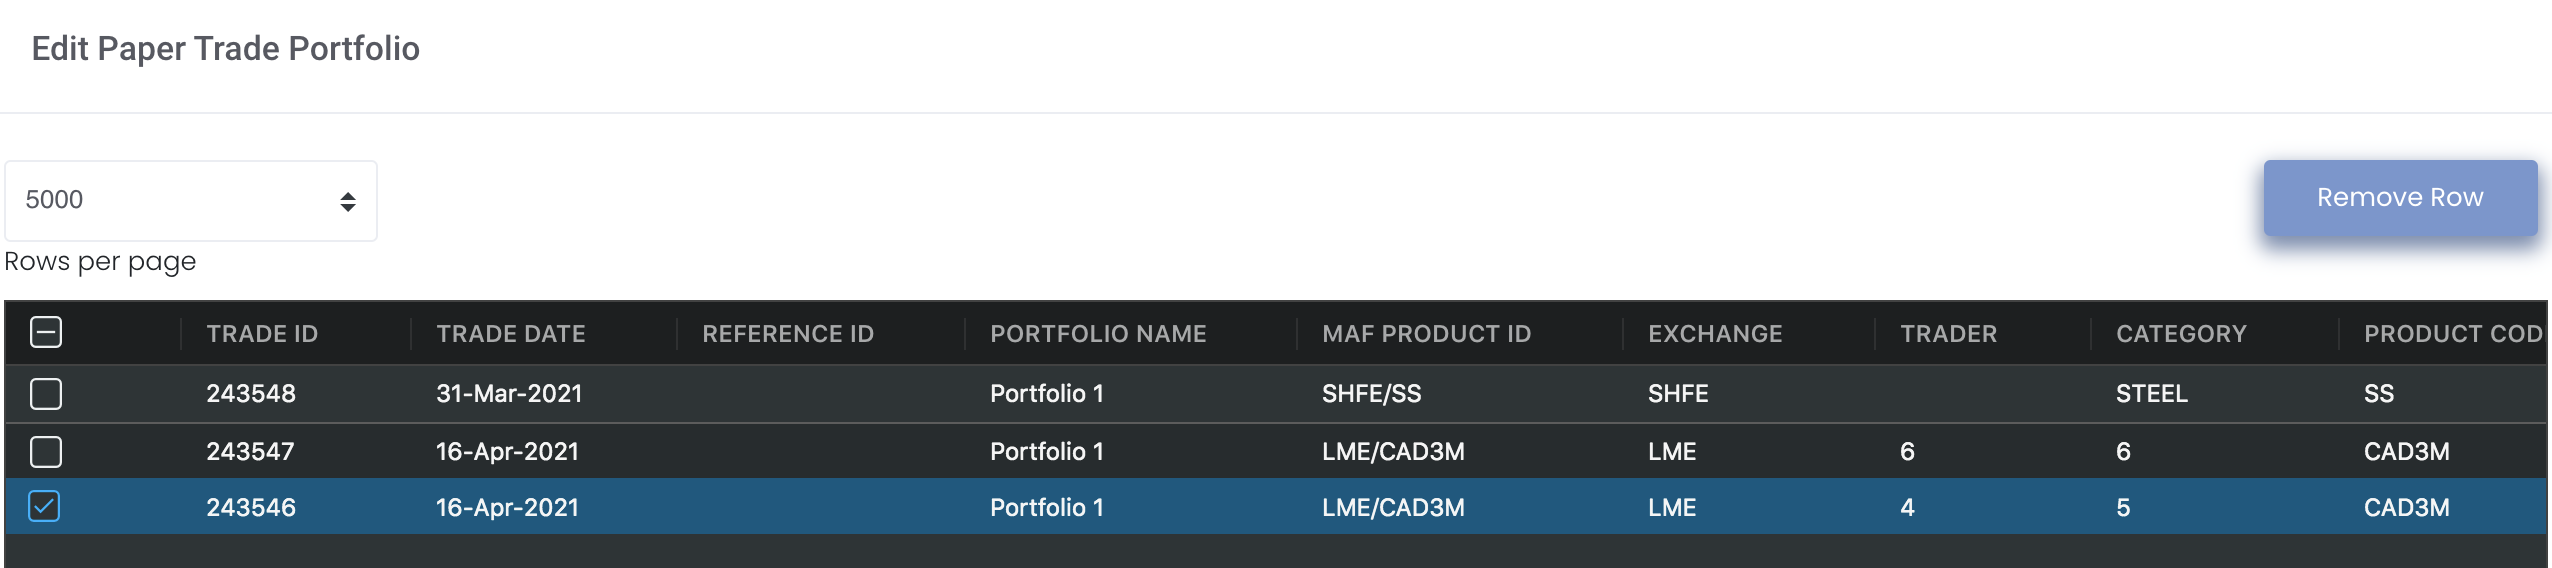
- Delete Data: Tick the checkbox of the paper trade and click 'Delete Row' at the top right corner of the table. Do note that this is an irreversible action. If you do not wish to delete the data, click on 'No, cancel!’.
You can also utilise the filters function at the top of the table to filter your paper trade. The 'From' and 'To' dates are set 1 week by default, ranging from 1 week before to today's date. You may adjust the dates and click 'Search' for the data to be filtered and displayed in the table accordingly. Note: The dates you set will remain unchanged unless you log out and re-login, and the dates will reset to default.
Note: Once you have selected the dates, they will be saved during the login session for your convenience. Once you log out and login again, the dates will reset to default. You may then adjust the dates again according to your needs.
Note: For Paper/Physical Trade - If product is used in paper/physical trade, cannot delete the product in Product Data table. Will have to remove the product from the paper/physical trade before deleting.
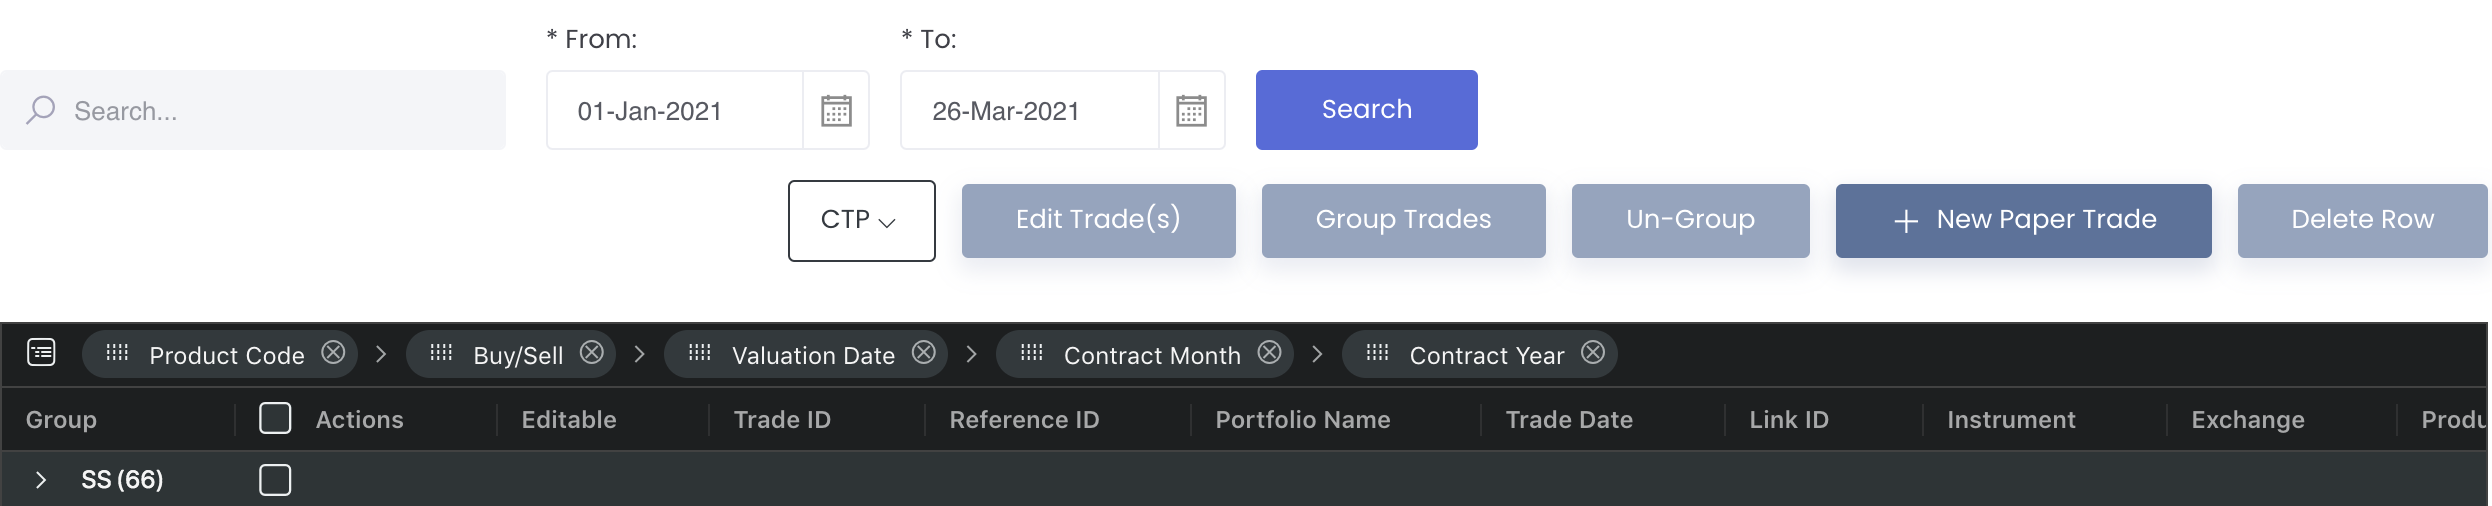
You can also check out the grouping function in the table which acts like a pivot table (click here to learn more) and can be categorised and organised by groups according to your needs. You can click here to learn how to customise the table by arranging and filtering the columns based on your preference.
Various information on each of your trades is provided in the table. You may refer to the List of Definitions: Trades page for a list of definitions for the column headings.
Allocating Trades to Portfolio(s)
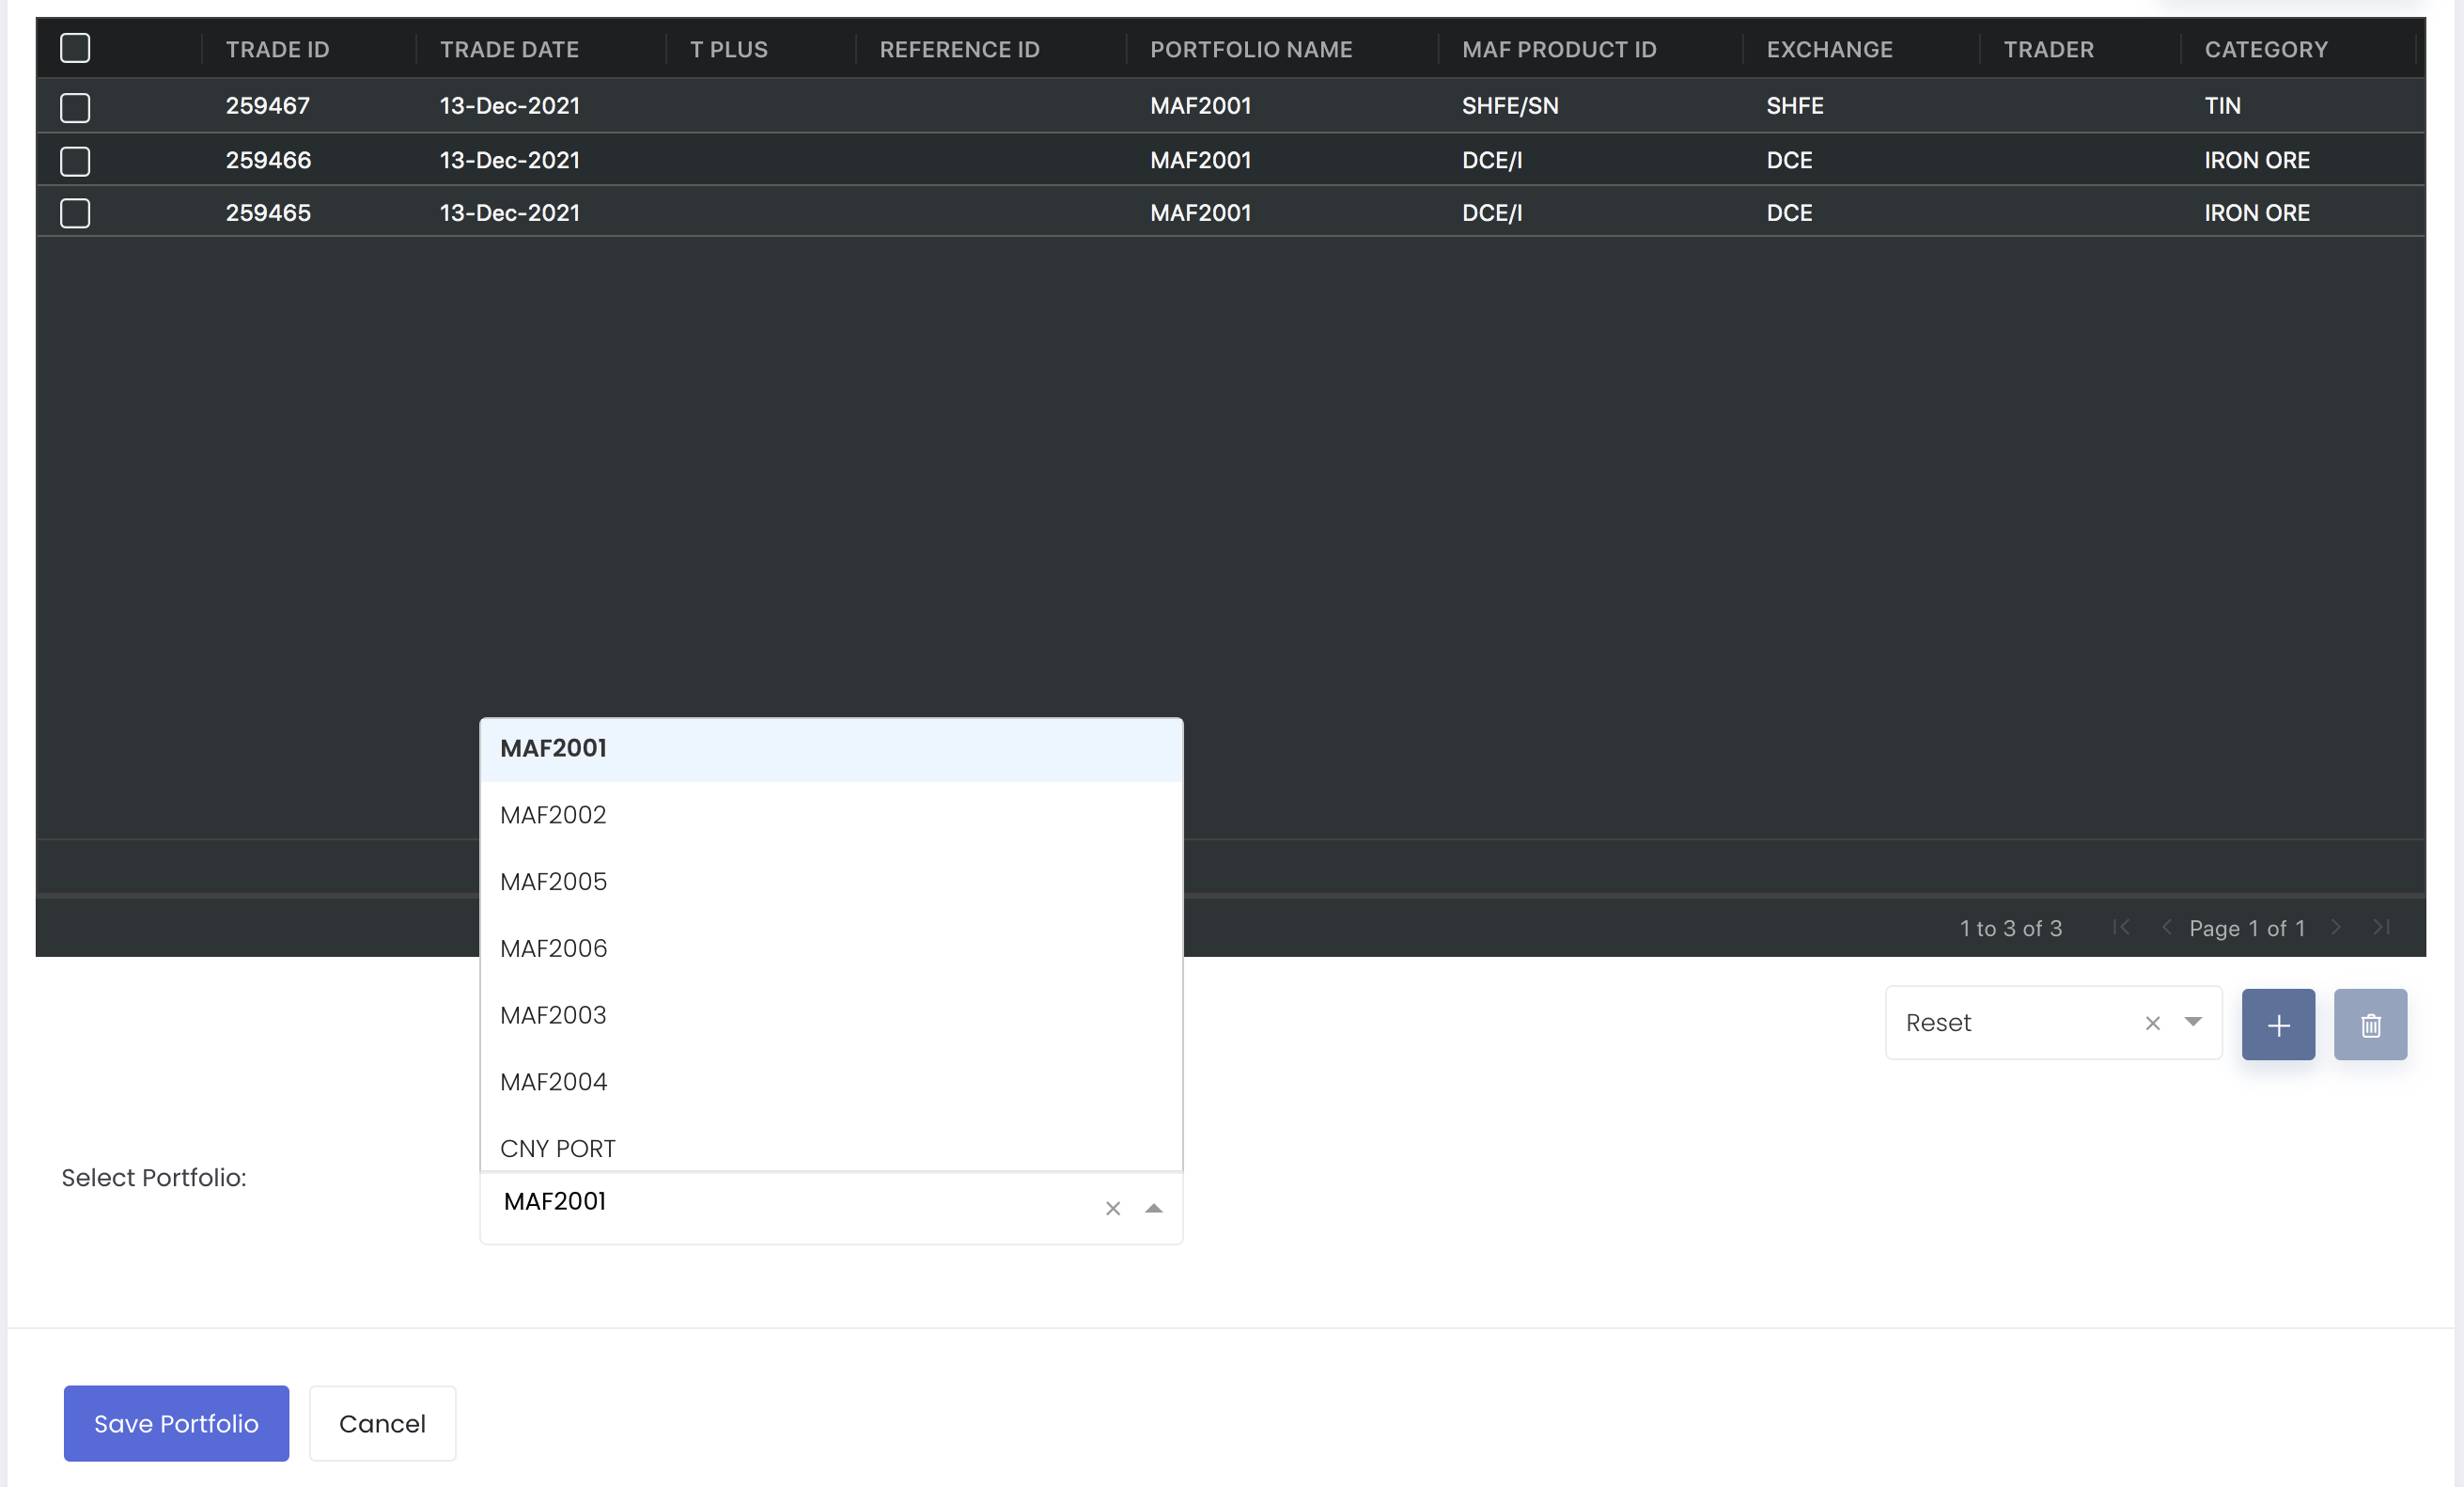
You may allocate the trades into your portfolio(s) in this page while viewing them. You may use the search function or filters to search for and filter your trades and click on the checkbox to tick all the trades before allocating to a specific portfolio (all the selected trades can only be allocated to the same portfolio, to allocate into different portfolios, please perform the same action again). Tick the checkbox(es) of the trade(s) you wish to allocate to a specific portfolio, and click on 'Allocate Portfolio' and you will be directed to a new table with all the trades you have selected.
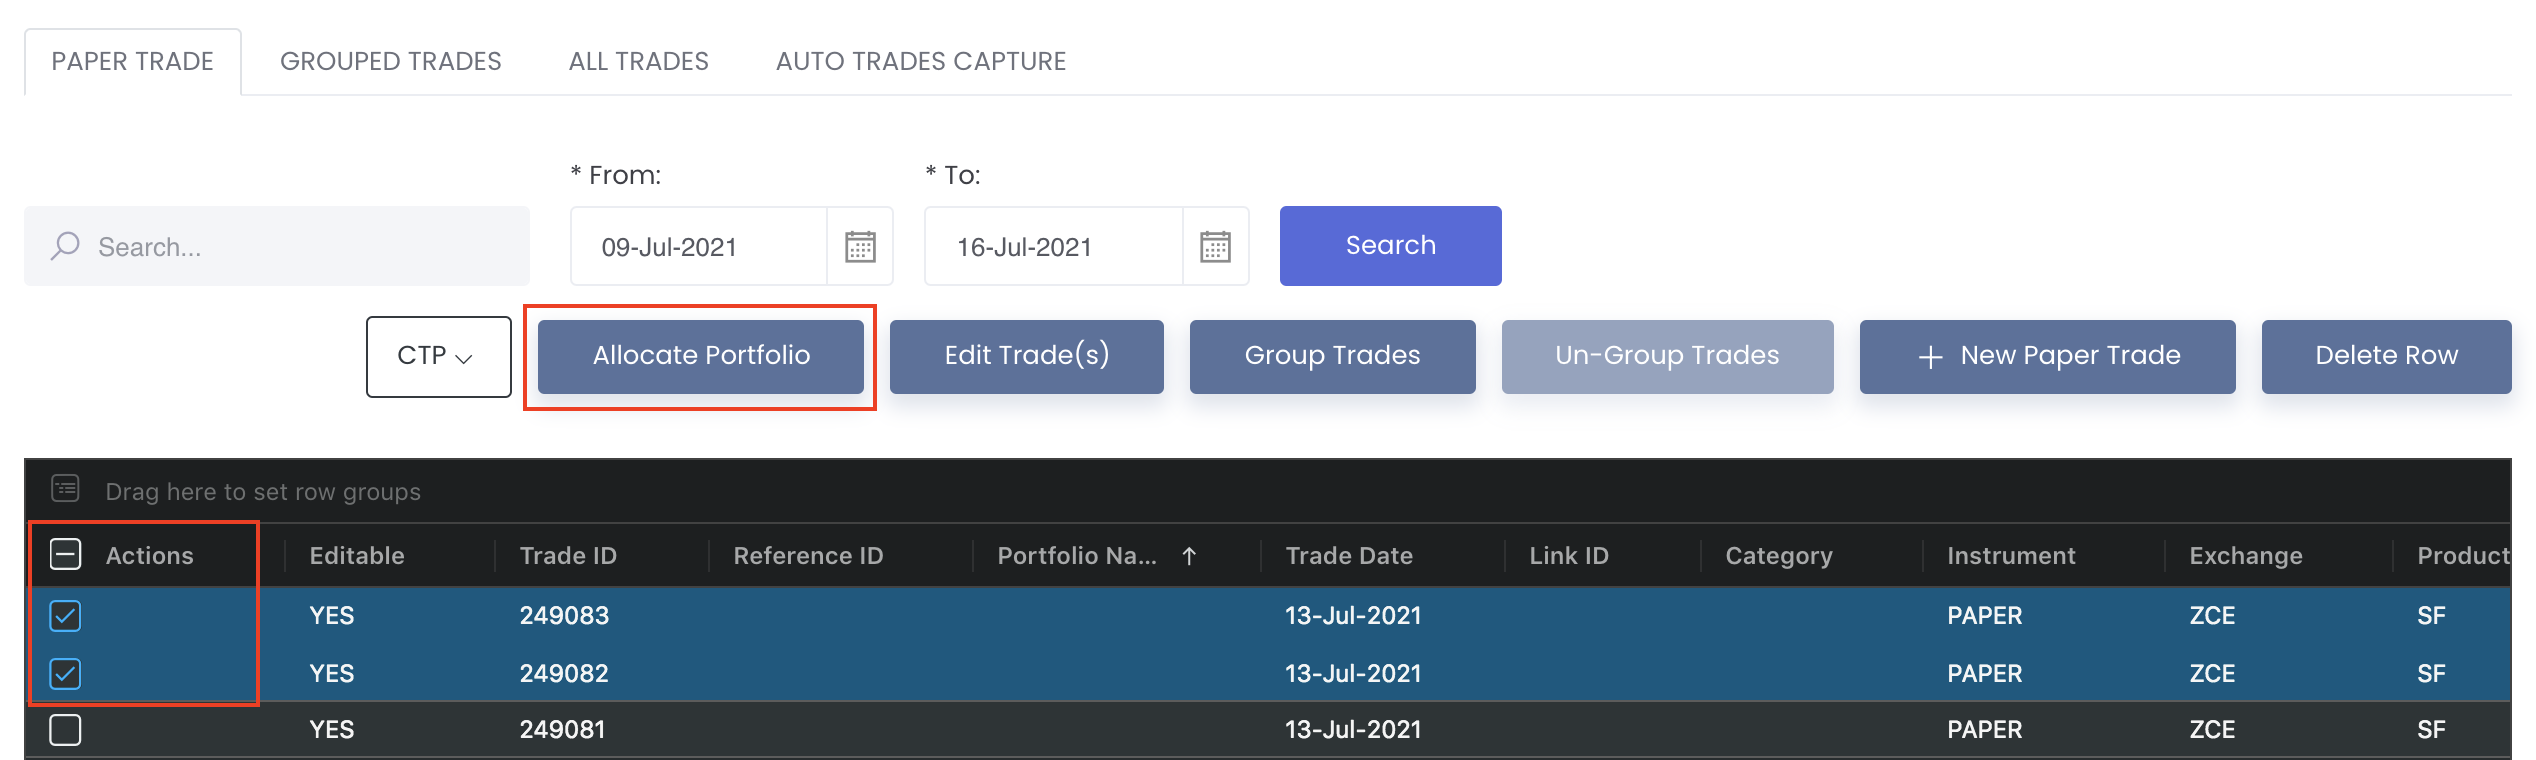
Select the desired portfolio from the drop-down list at the bottom of the page and click 'Save Portfolio' once done. The portfolio will be assigned to the trade(s) accordingly.
You may easily change the portfolio allocation of (allocated) trades here as well, with the same procedures. To remove the allocated trade(s) from the portfolio, tick the checkbox(es) of the trade(s) you wish to unallocate, and click on 'Allocate Portfolio' and select 'Remove Portfolio' from the drop-down list ('Select Portfolio') at the bottom of the page.
Please note that all the trades you have selected, followed by clicking 'Allocate Portfolio', will allow you to allocate to 1 specific portfolio only. You can click on 'Remove Row' to remove the trade that you do not want to allocate to the portfolio.
Once you select the portfolio from the dropdown list, it will appear in the "Portfolio Name" column. Click 'Save Portfolio' once done, and the trades will be allocated into the portfolio accordingly.
Editing Paper Trades
You may edit your paper trade's details by ticking the checkbox(es) of the paper trades (editing of multiple paper trades are allowed), and clicking on the 'Edit Trade(s)' button at the top of the table.
Please note that price and IDB Commission can be negative value, but Commission and Quantity cannot be negative value
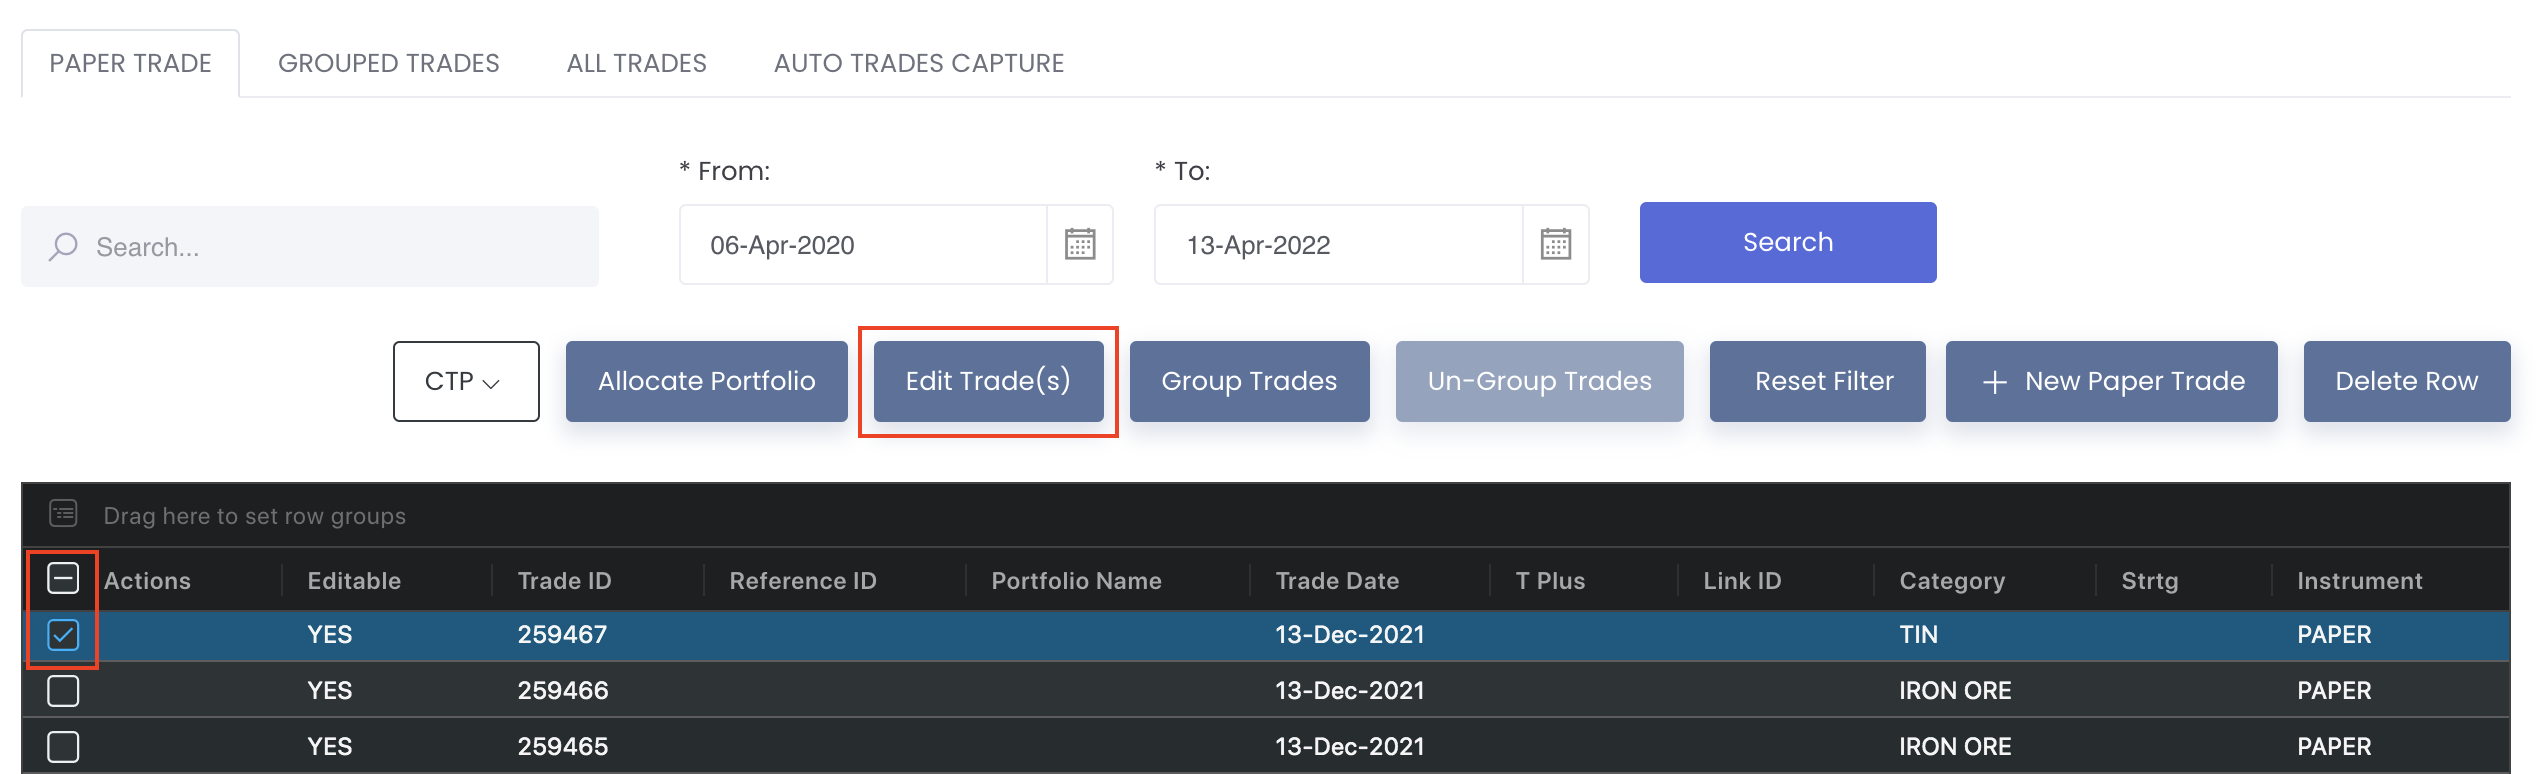
You will be directed to a new page to edit the table. Double-click on the field to edit directly and click 'Submit' once you are done. Otherwise, click 'Cancel' to return to the previous page.
Deleting Paper Trades
You may delete your paper trade(s) by ticking its checkbox and clicking 'Delete Row' (located at the top right corner above the table). Do note that this is an irreversible action. If you do not wish to delete the data, click 'No, cancel!’.
Creating New Paper Trades
You may also create paper trades directly on this page. Click '+ New Paper Trade' button at the top right corner above the table. You will be directed to the 'Create New Paper Trade' page. The procedures are exactly the same as Creating New Paper Trade(s).
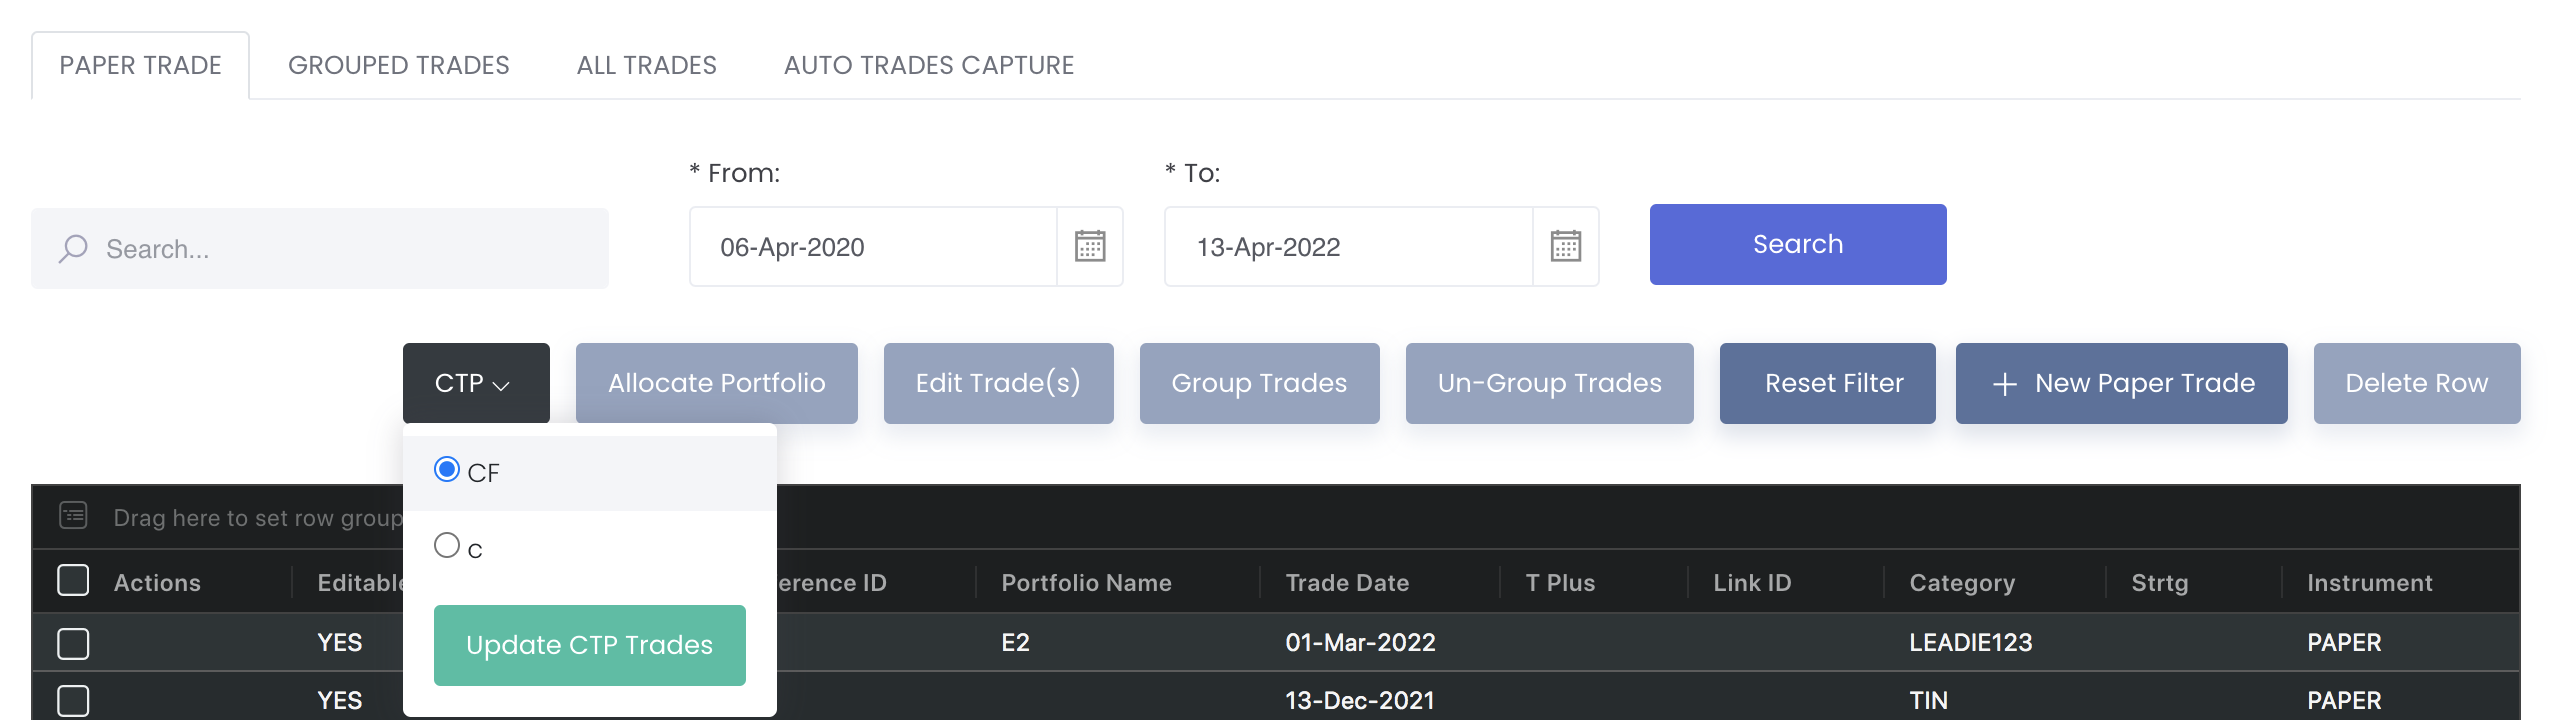
Updating CTP Trades
- If you trade any Chinese futures instruments via CTP (click here to learn how to link your CTP account), you may update your CTP trades here. Simply select the CTP account and click 'Update CTP Trades'.
- Once updated, any of your (new) CTP trades may be found in the table, along with other trades you may have captured earlier and/or from elsewhere.
- Do note that the cut-off time for capturing is 5.30pm Beijing Time (GMT+8) for each trading day. Please update trades for that day (including those in the previous evening) before the cut-off time to ensure that they are captured.
Please refer to CTP Accounts for more information.
Grouping and Un-Grouping Trades
Users may find it useful to group similar trades together, for the created trade combination(s) to be treated as single trade(s) for calculating trade size, price, P/L etc.
1. Selecting Trades to be Grouped
To group trades together, select the relevant trades by ticking their respective checkboxes under the 'Actions' column (You may find it useful to use the sort/filter functions in the table headers to find all the trades you wish to group together). Once done, click on the 'Group Trades' button.
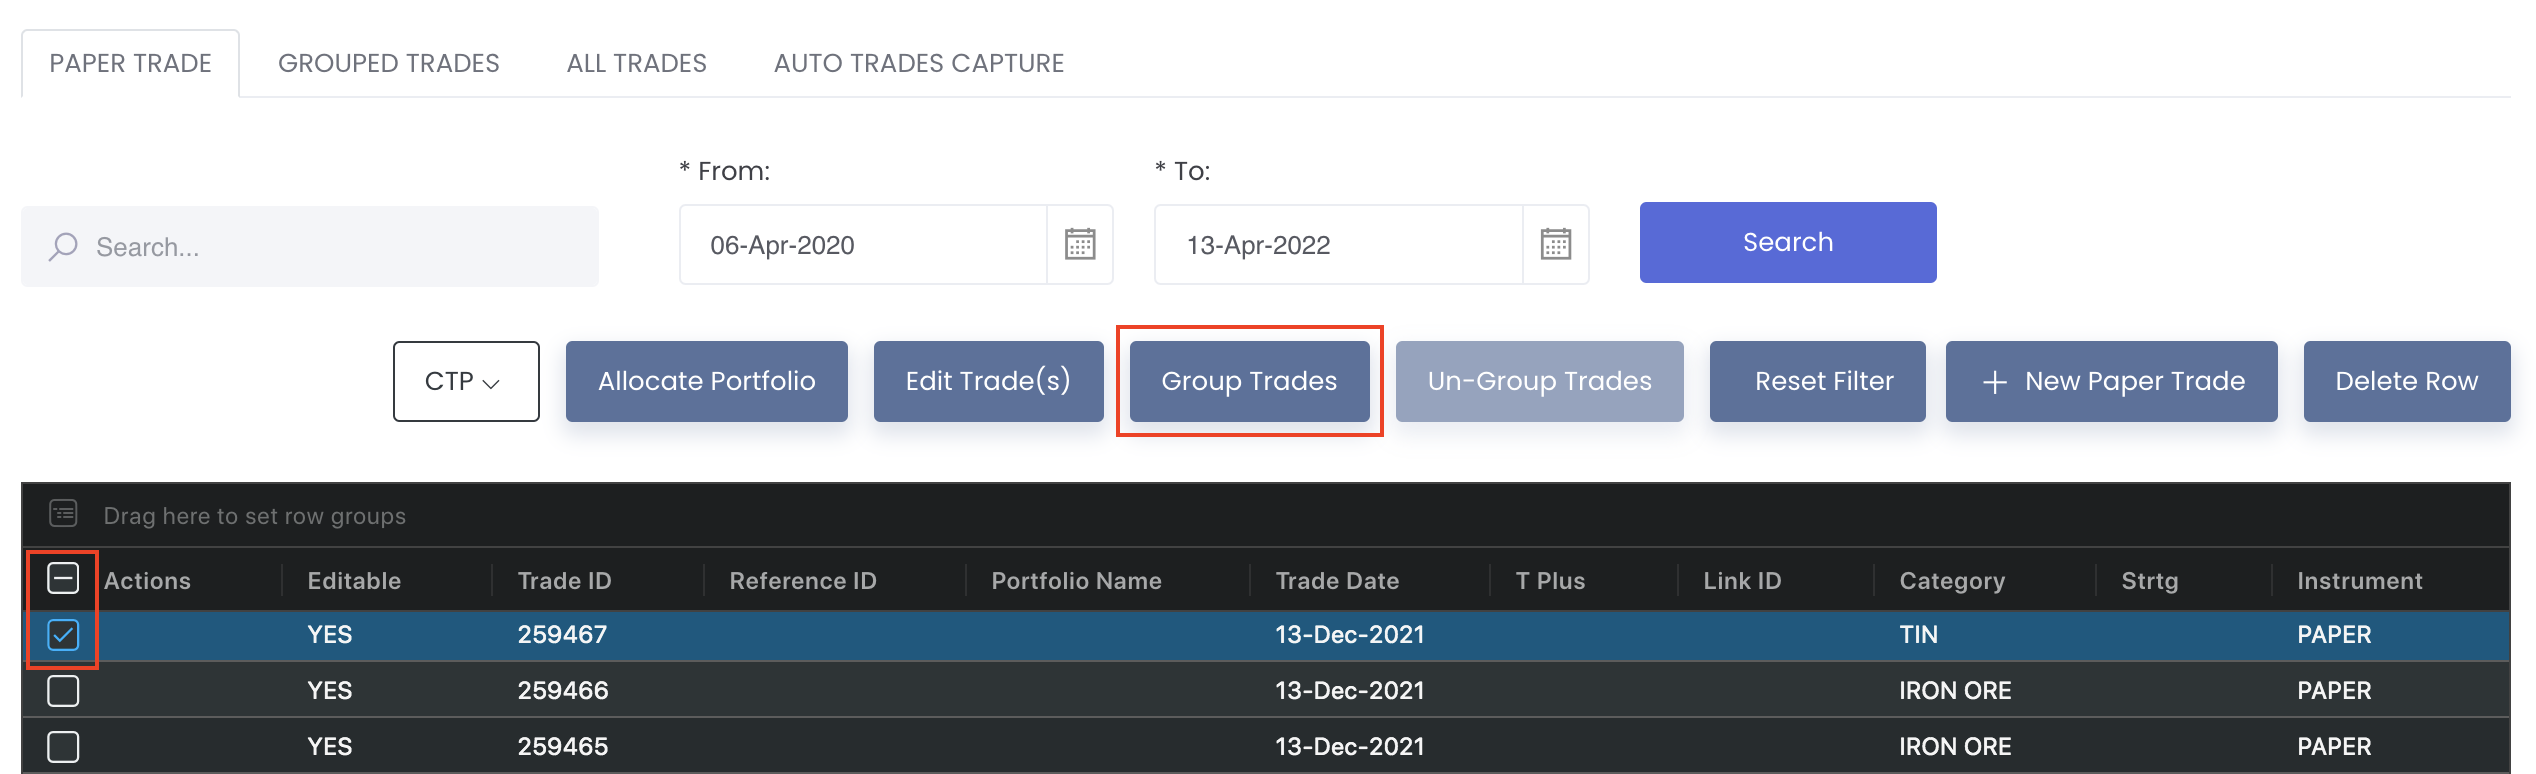
In order for your trades to be grouped together, please ensure that the following are the same for all the trades:
- MAF Product ID (ie. the trades must involve the same product, traded in the same exchange)
- Buy/Sell Position
- Contract Month & Contract Year (for futures products)
- Valuation Date (for forwards products)
In addition, the trades to be grouped together must be unallocated trades (ie. not part of any portfolio and have no 'Link ID'). You may allocate a Grouped trade to a portfolio, though.
Furthermore, you can only group trades that have the same Category. For trades with different Trader, Account and Broker, they can be grouped together. Otherwise, you cannot click on the 'Group Trades' button.
2a. Grouping all the Trades Together
After clicking on 'Group Trades', you will be directed to a page such as the one shown below:
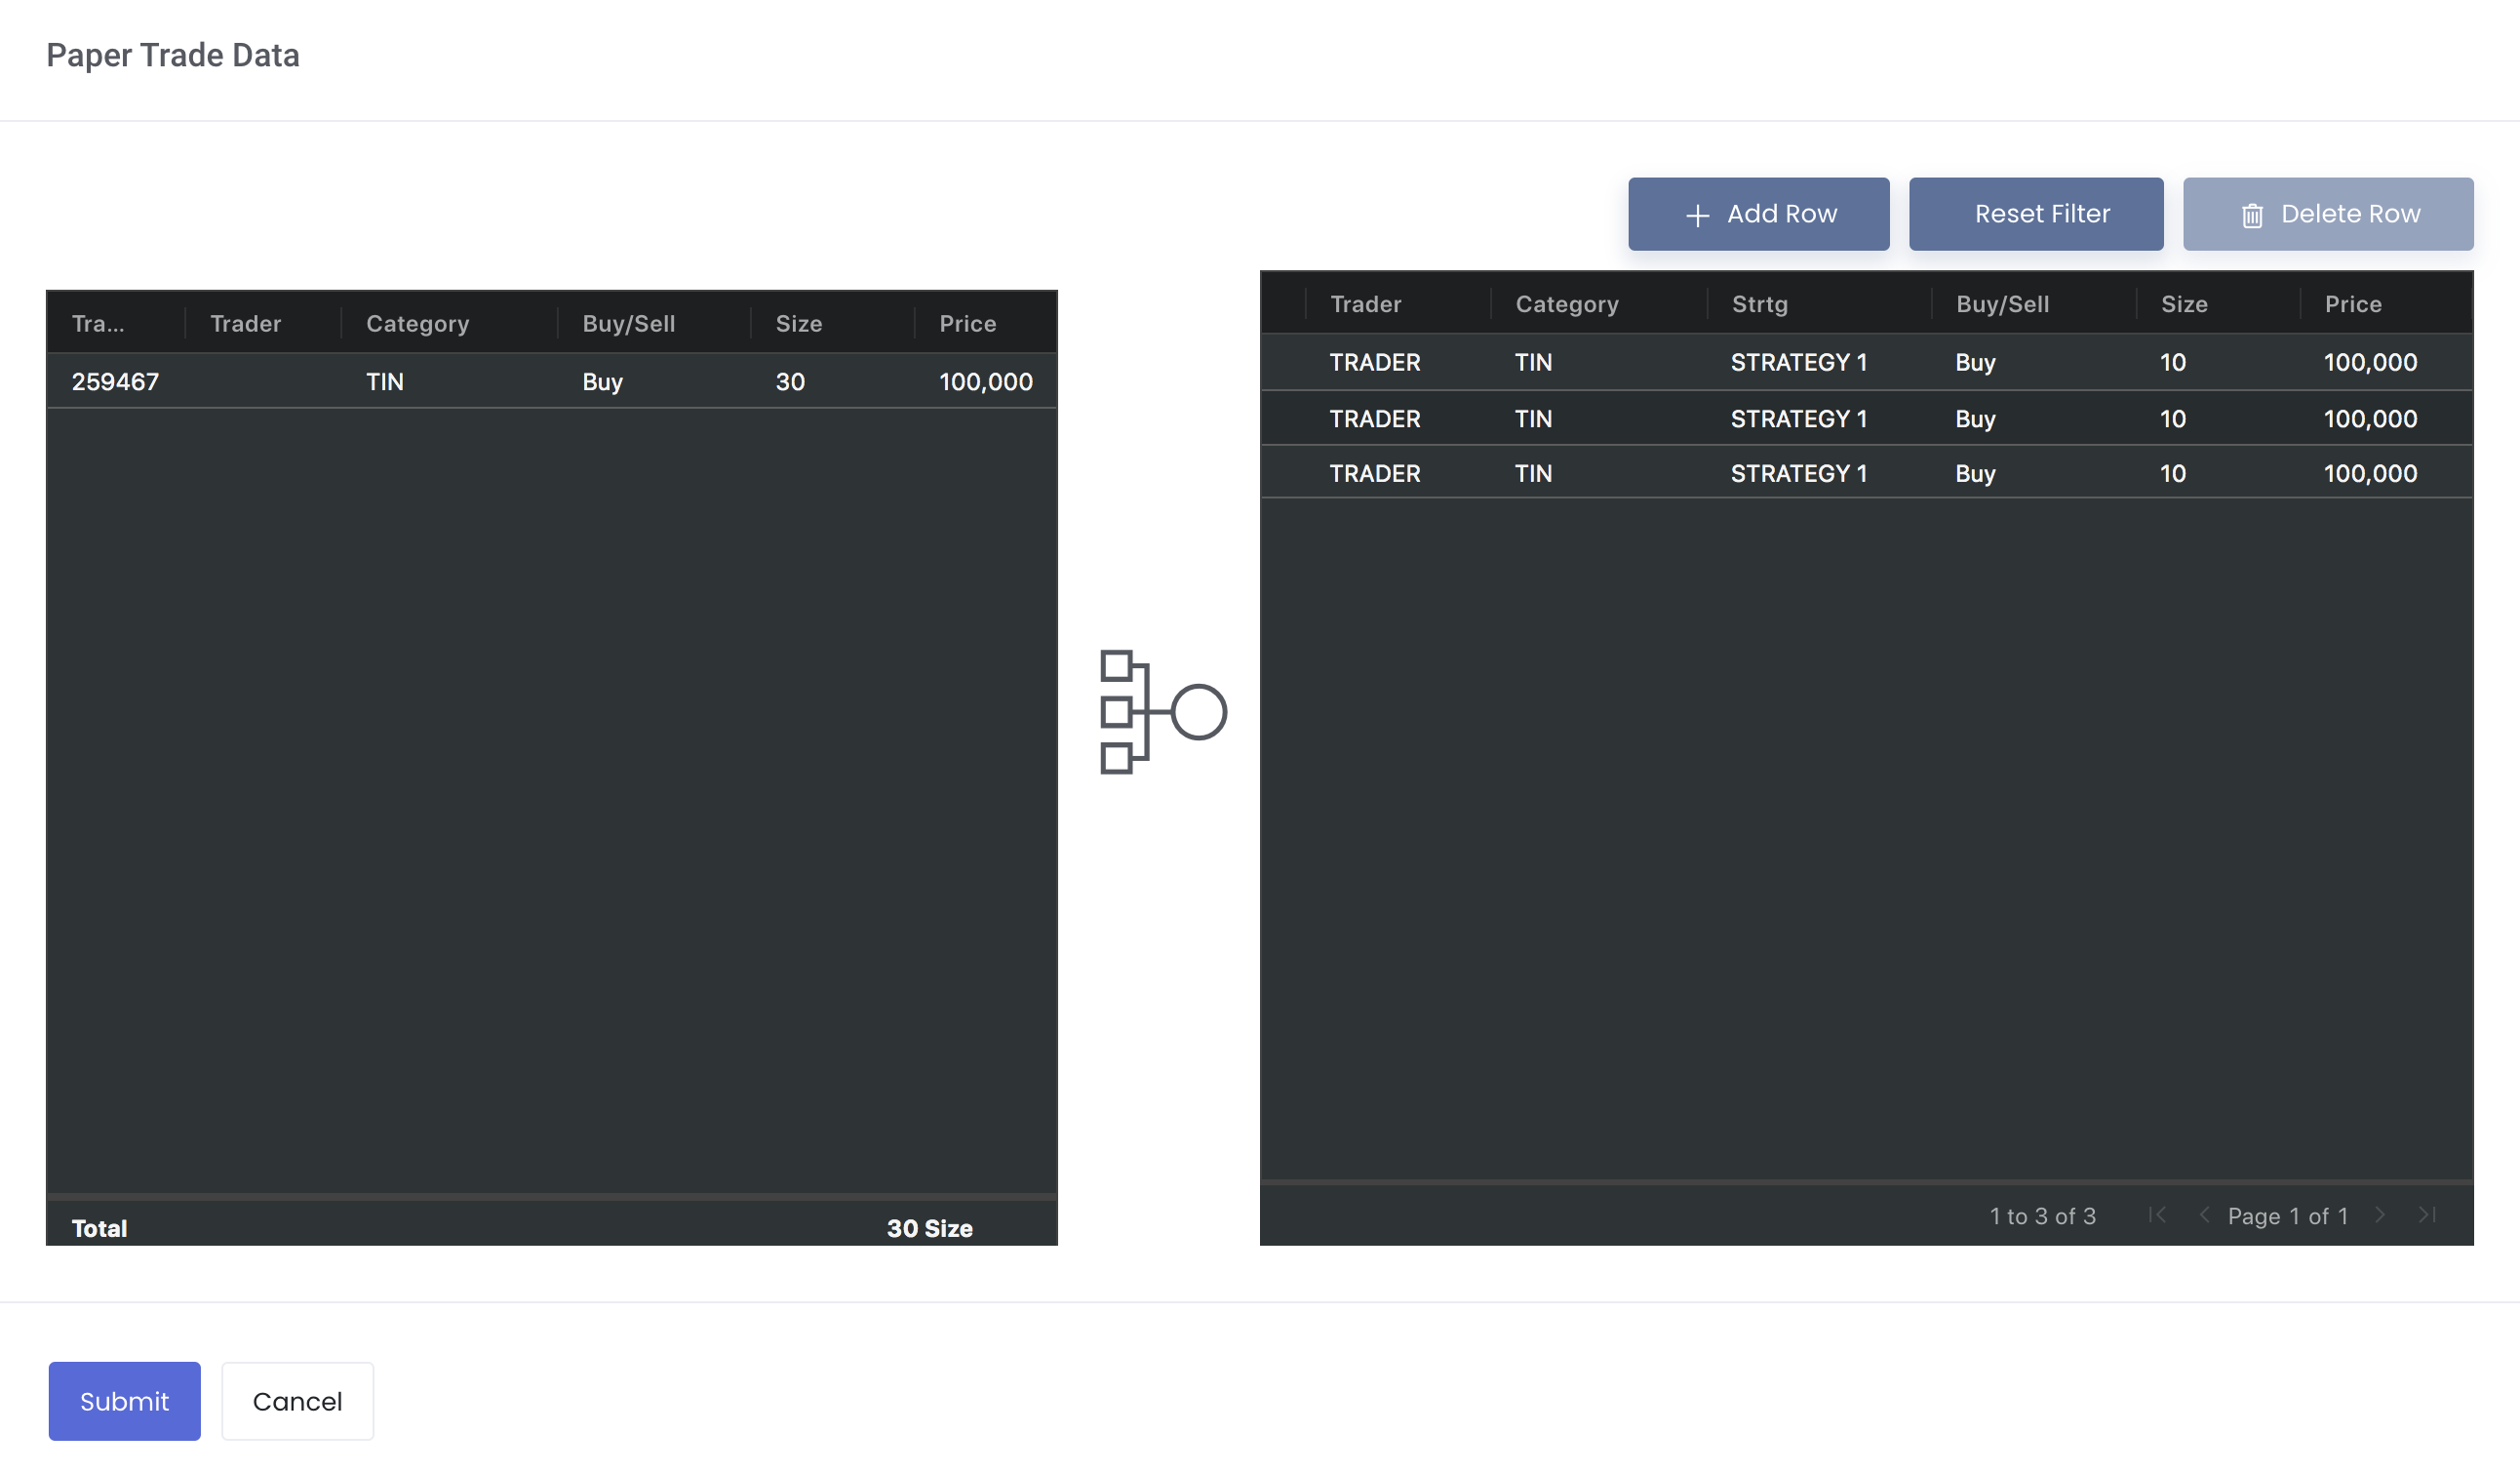
The trades to be grouped together are shown on the left. On the right are 3 empty rows (default). If you wish to combine all trades into 1 trade, simply select any 2 empty rows in the right panel and click 'Delete Row'. Once done, only 1 row will remain, and the grouping calculations will be done automatically.
You can choose to fill in the TRADER, CATEGORY and STRATEGY columns on the right (the result will supersede the trader/category column on the left) and the trades will be grouped accordingly.

- Size = Sum of sizes of individual trades
- Price = Weighted average of prices of individual trades (such that total price*size on both sides are equal)
Once done, click 'Submit'. These trades will be treated as a single trade from now on!
2b. Many-to-Many (or One-to-Many) Trade Grouping
Users may also wish to combine/split the selected trade(s) into more than 1 new trades.
In this case, select as many rows as required using the 'Add Row' and 'Delete Row' functions on the right panel. Users should manually key in Size and Price for all but the first row (The first row is used for calculating the balance).
The details for the first row will then be automatically calculated.
You may also manually edit the details (of all but the first row) directly afterwards.
Click 'Submit' to confirm the details.
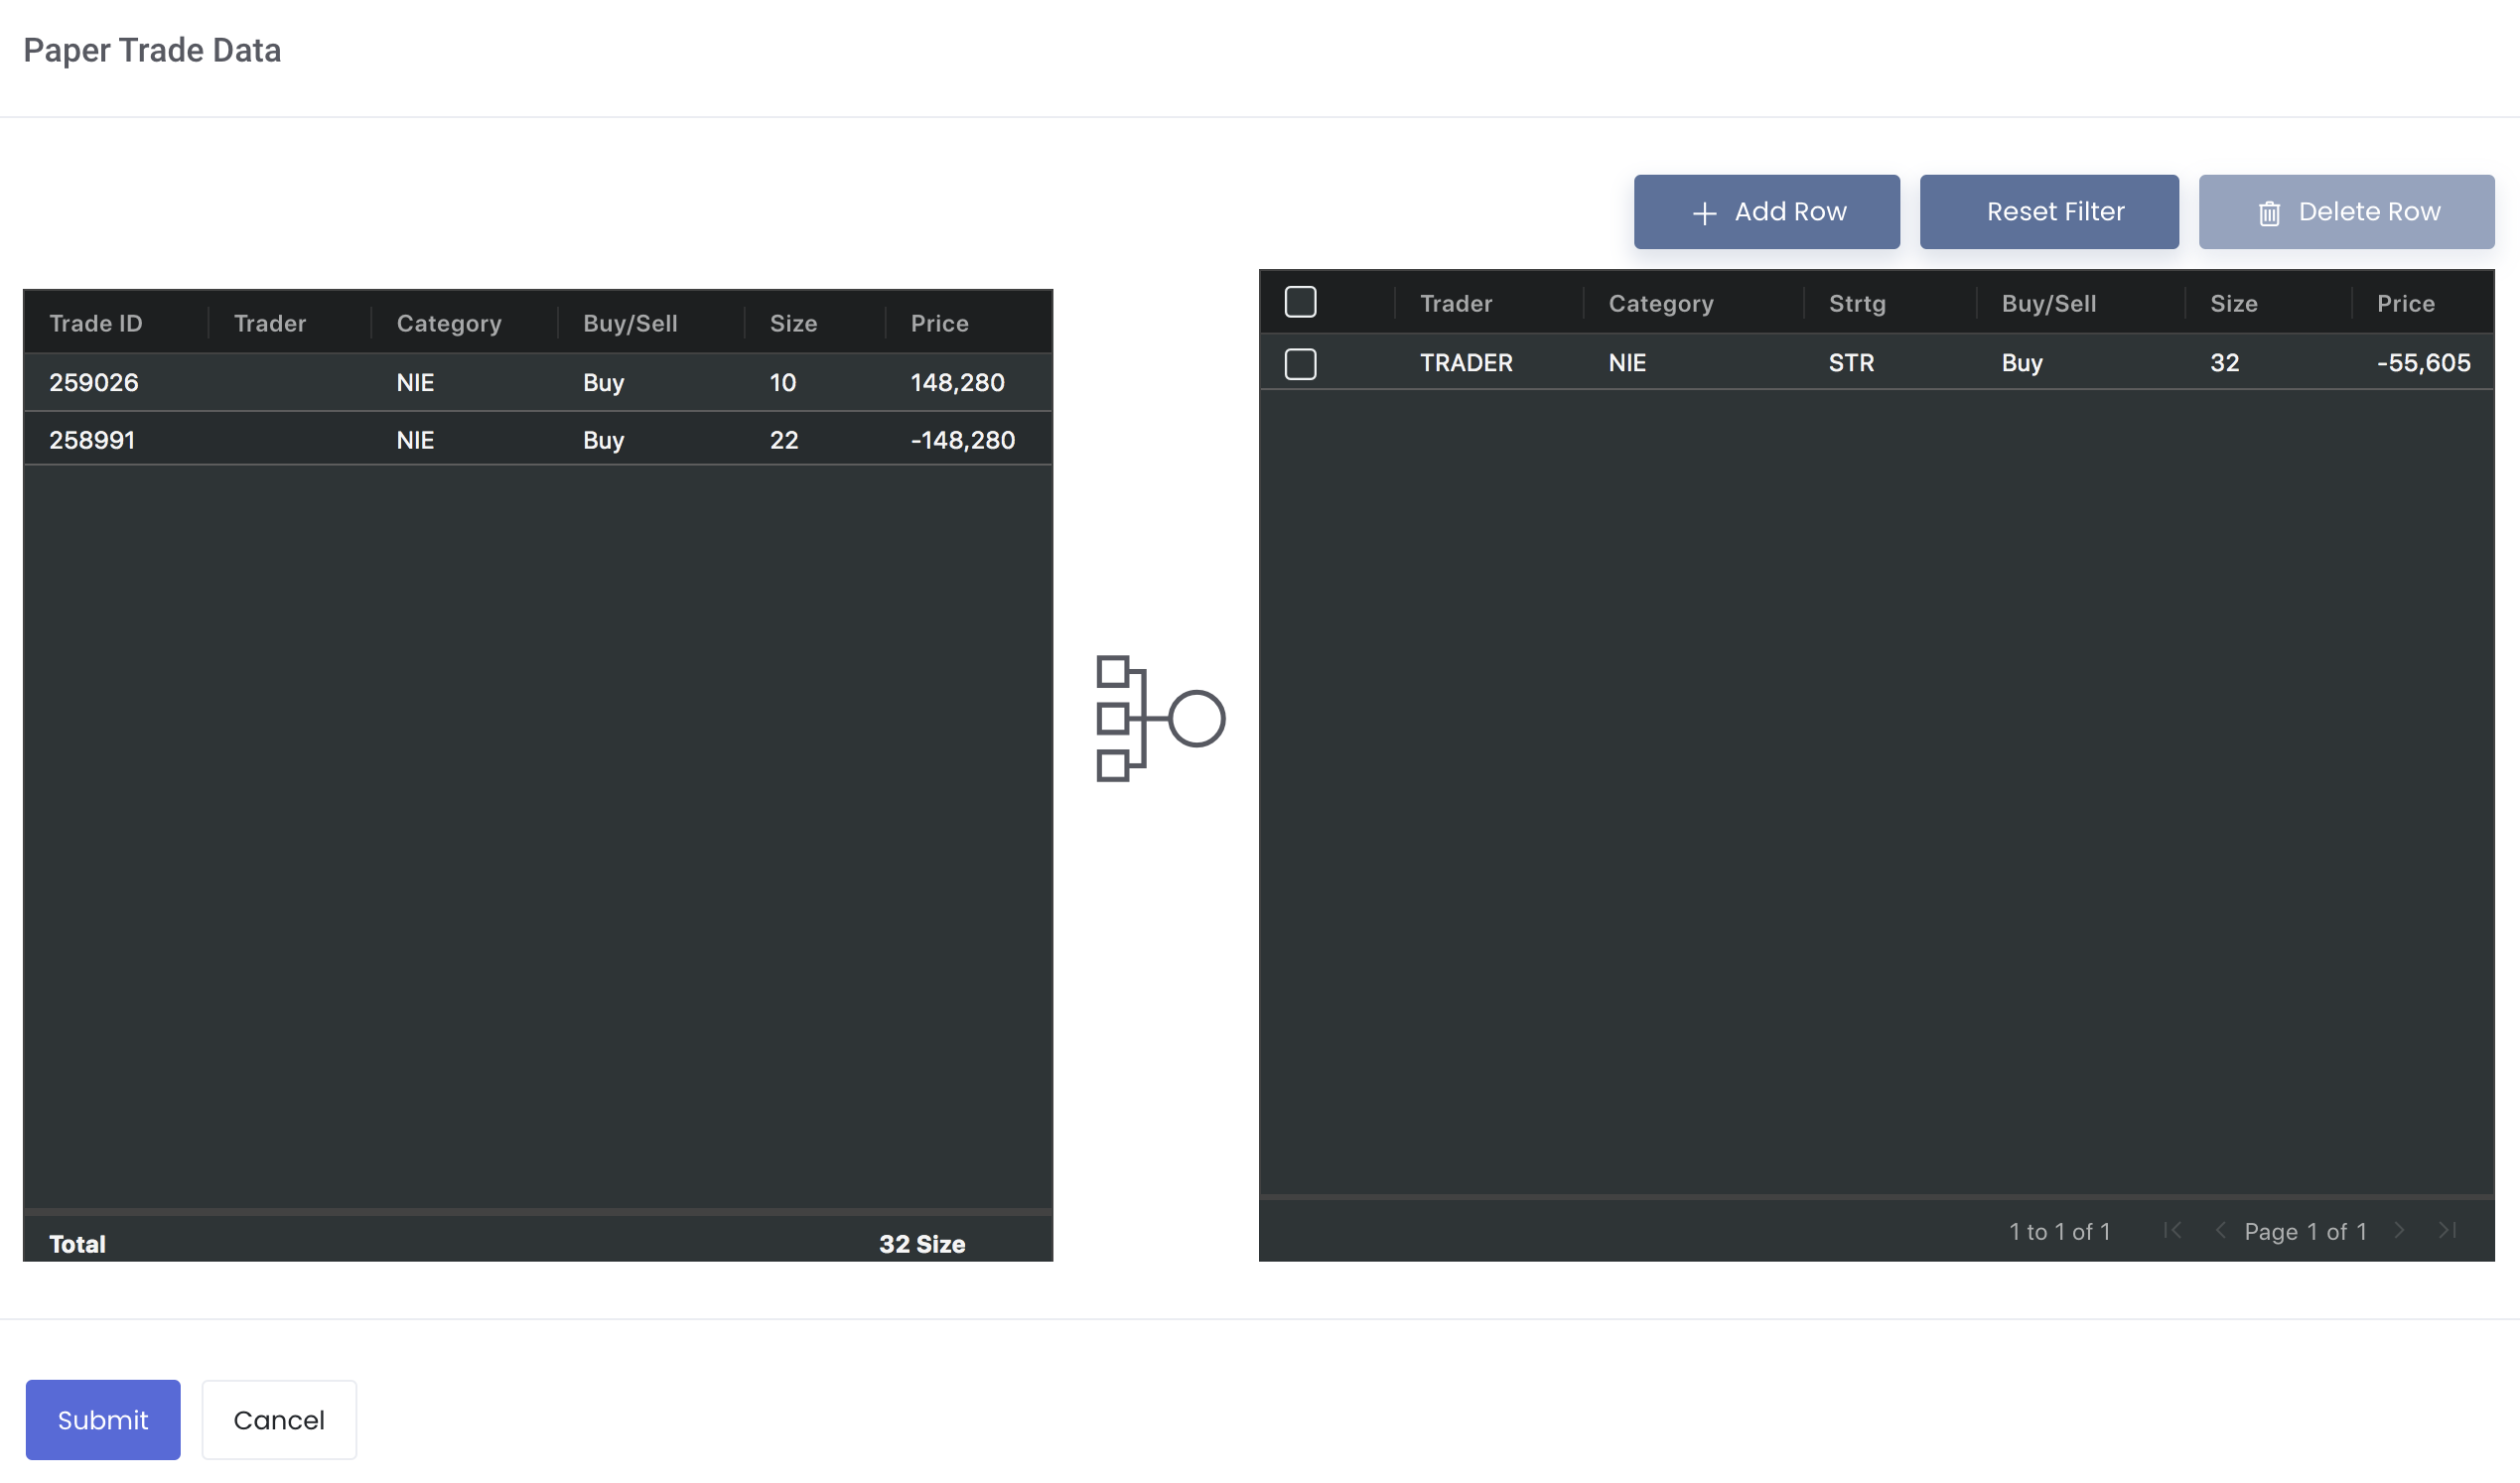
Note: Please ensure that total size of manually grouped trades in the other rows < total size of original individual trades
3. Using Grouped Trades

Once grouping is done, the new trade(s) will be assigned their respective Trade ID(s), as well as Link ID(s). Only Grouped trades have a Link ID; if more than 1 Grouped trades were created from a single grouping procedure, they will share the same Link ID. (You may find it useful to use the sort/filter functions in the table headers to find all your grouped trades)
The time at which the Grouped trade(s) was/were created is visible under the 'Last Updated On' column.
Please note that you can only edit the details of a Grouped trade by clicking on the Grouped Trades tab (refer to below Editing Grouped Trades). You may use the Grouped trades just like any other trades captured (such as allocating them into portfolios).
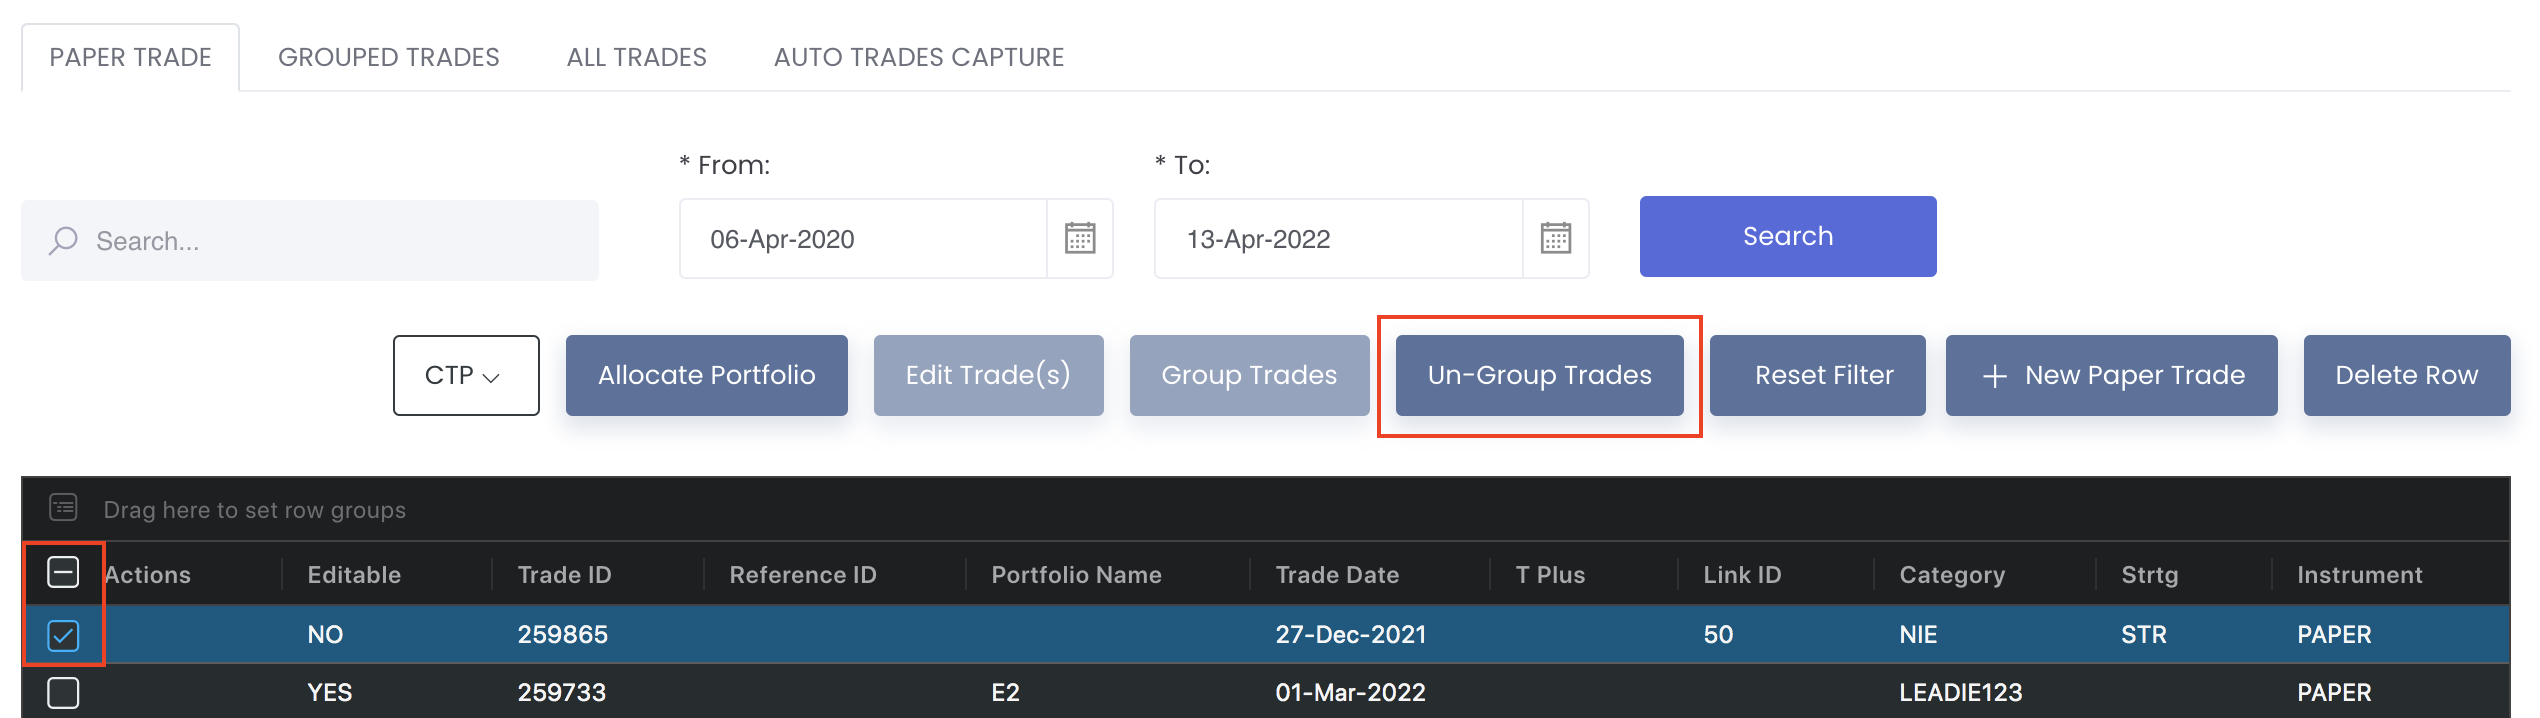
4. Un-Grouping Trades
To un-group trade(s), simply select them by ticking their checkbox(es) and click on the 'Un-Group' button. Please note that trades allocated into portfolios cannot be ungrouped. You will be required to remove the portfolio from the trades first before you can ungroup the trade.
(If more than 1 Grouped trades share a Link ID, you only need to select any 1/few of the trades with that particular ID to un-group all the relevant Grouped trades.
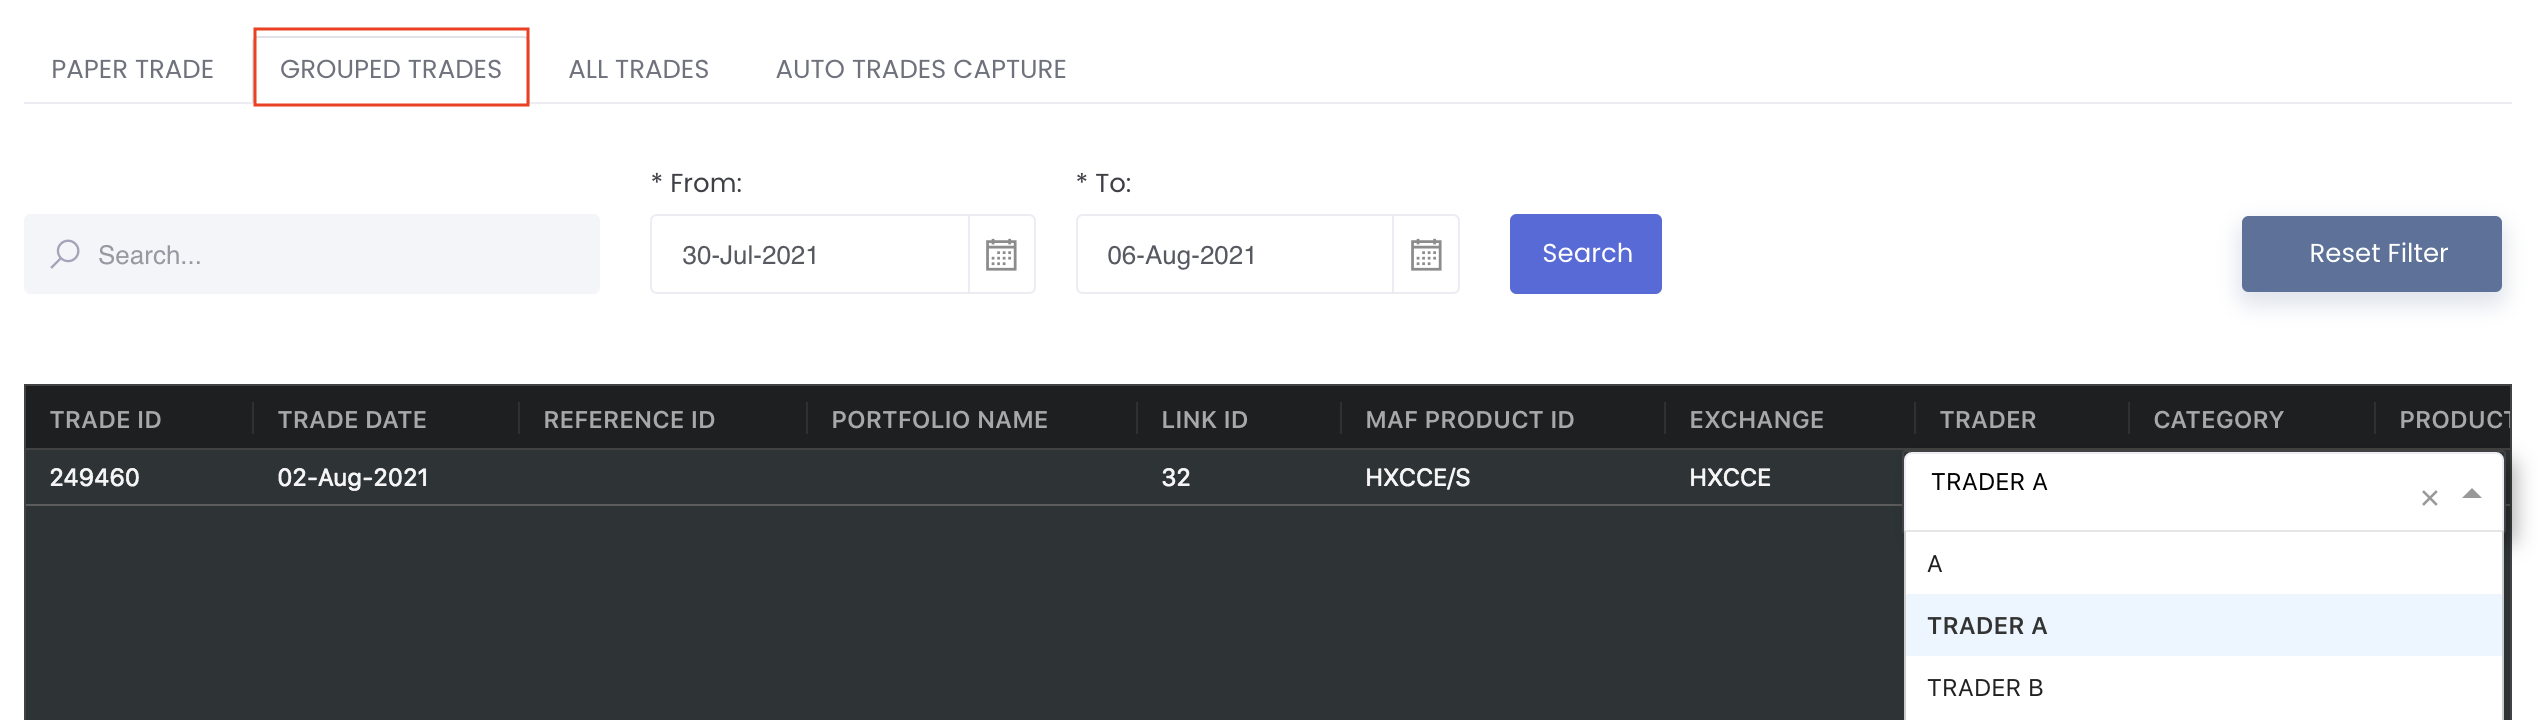
The original trade(s) will then be automatically recovered! Please note that if you have input/edited the grouped trades details eg T+1, TRADER, CATEGORY, BROKER, ACCOUNT, STRATEGY and TRADE TYPE column in the Grouped Trades tab, the details will pertain to the grouped trades only. Once you ungroup the trades, the details of the original trades will be automatically recovered and replace any grouped trades input/edits. For example, if the original trade's TRADER is TRADER A and you group this particular trade and input trader as TRADER B, then the trader for the trade will be saved as TRADER B. But once you ungroup the same trade, the trader will revert to the original and show as TRADER A.
5. Editing Grouped Trades
To edit grouped trades (namely; T+1, TRADER, CATEGORY, BROKER, ACCOUNT, STRATEGY and TRADE TYPE column), click on the GROUPED TRADES tab at the top of the page. You can then proceed to edit the fields and click SAVE once done.
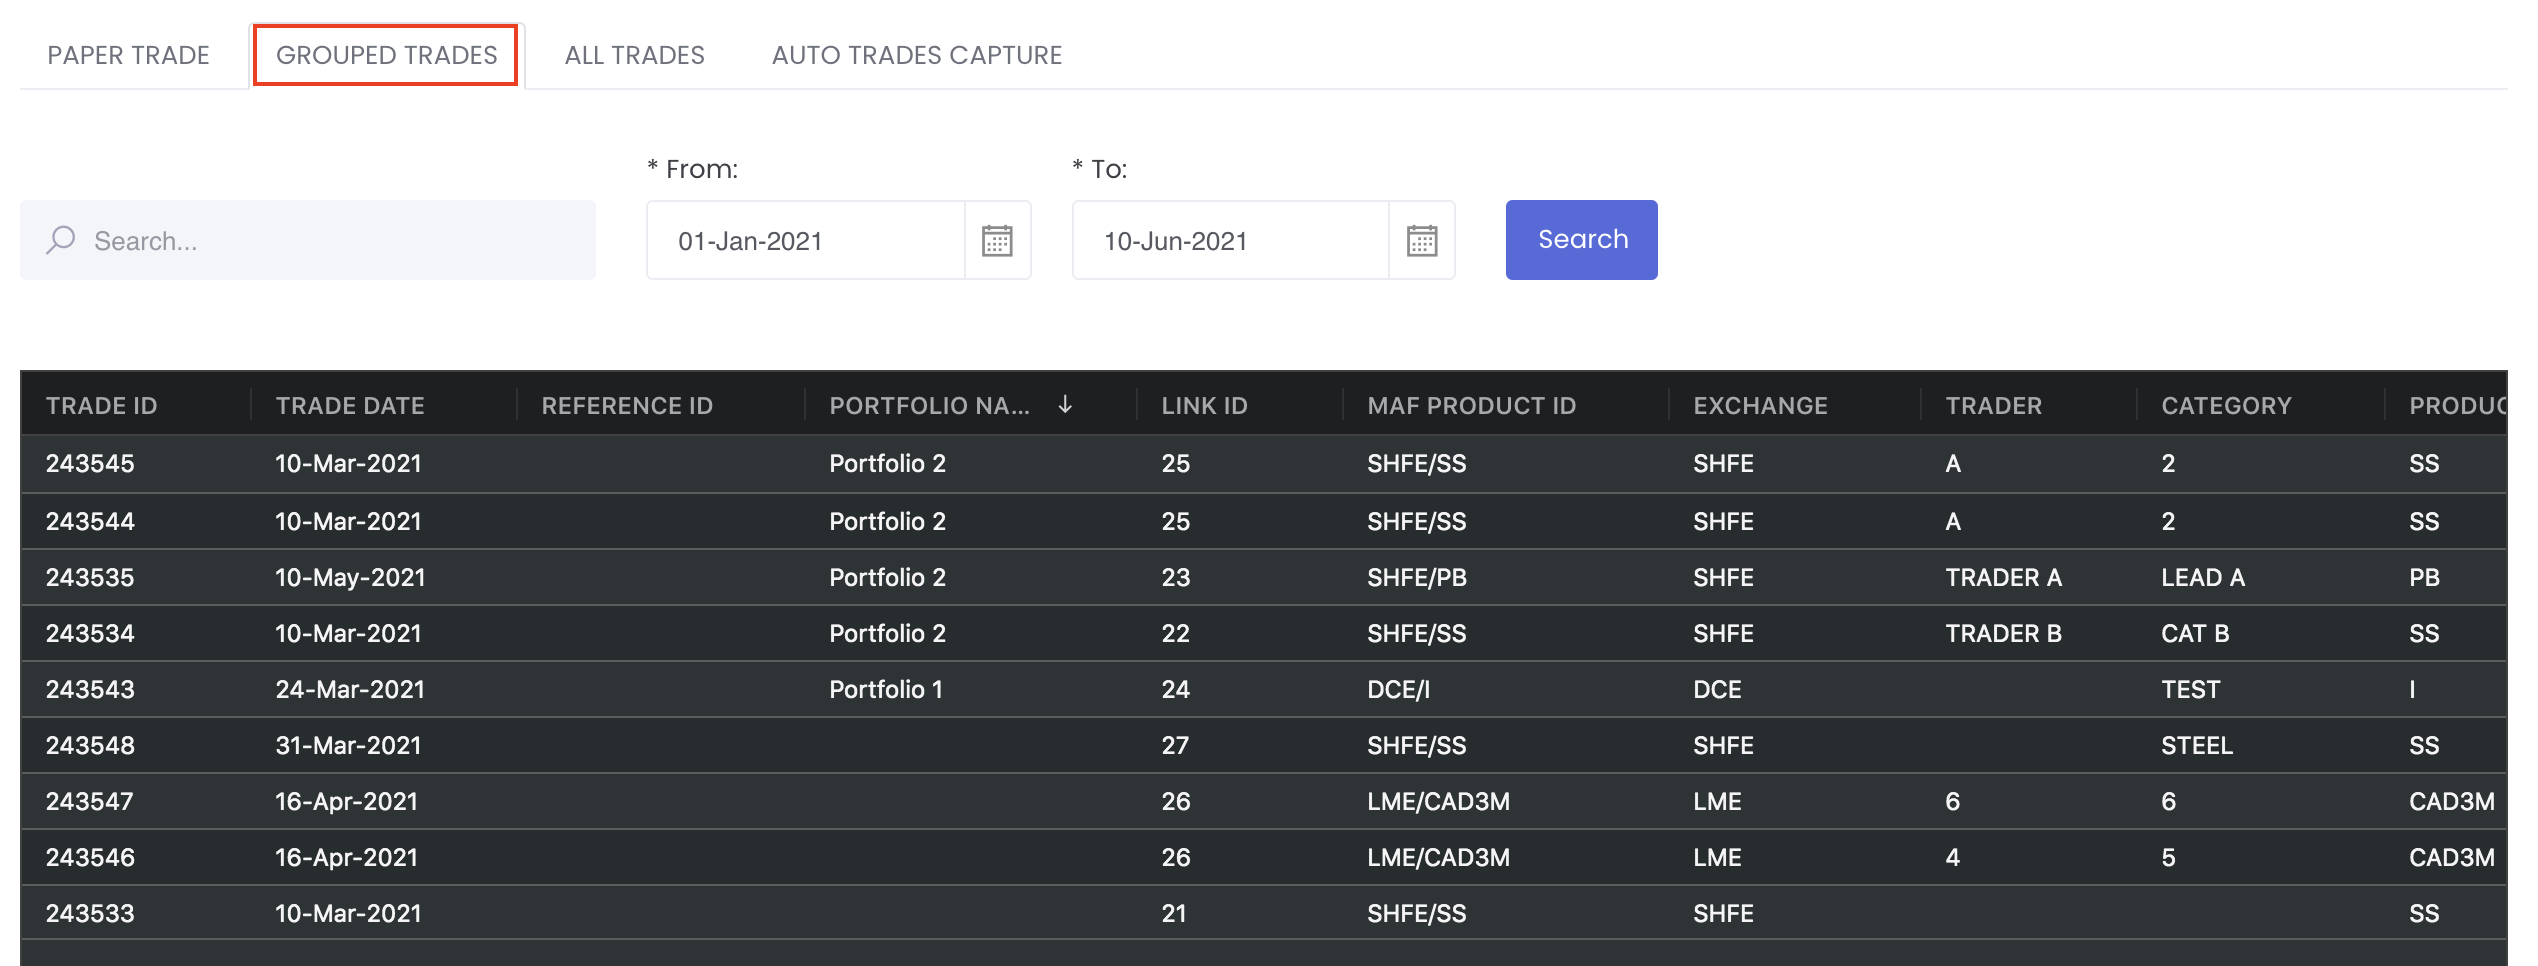
Grouped Trades Tab
You will be able to edit your grouped trades here. All your grouped trades will be displayed in the table. Double-click on the fields; namely, TRADER, CATEGORY, ACCOUNT and BROKER and edit the fields. Click on 'Save Trade' at the bottom left of the table to save the updates. The updated details will be displayed in the Paper Trades table accordingly.
Note: You cannot group trades of different Category, but can group if the trade has different Account, Broker or Trader.
All Trades Tab
Displays the details of both your paper and physical trades in the table (non-editable table, for viewing purposes only).
Several functions are available to assist in the selection and usage of the market data:
- 'Search': Search for keywords in the search bar for relevant data to be displayed.
- Table Headers: 'Sort' and 'Filter' data using the functions in the table headers (Please refer to Table Settings for table functionalities).
- Export Data: Right click in the table to export all the data into .CSV or Excel file.
The 'From' and 'To' dates are set 1 week by default, ranging from 1 week before to today's date. You may adjust the dates and click 'Search' for the data to be filtered and displayed in the table accordingly. Note: The dates you set will remain unchanged unless you log out and re-login, and the dates will reset to default.
Please note: The dates you set will remain unchanged unless you log out and re-login, and the dates will reset to default. You can also utilise the filters function at the top of the table to filter your paper trade. Please refer to https://mafint.atlassian.net/wiki/spaces/MCUGX/pages/248316127 to learn more.
Various information on each of your trades is provided in the table. You may refer to the List of Definitions: Trades page for a list of definitions for the column headings.
Auto Trades Capture Tab
Displays the details of your paper trades data captured automatically from your email via Straight-Through Processing (STP).
To opt in for capturing of your paper trades data automatically from your email via STP, click on the 'AUTO TRADES CAPTURE' tab. Click on 'Add Row' and fill in:
- 'Broker': Name of Broker
- 'Account': Name of account with Broker
- 'Portfolio Name': Name of portfolio (in MAF Cloud) to capture and store the paper trades data from the email via STP (select from drop-down list)
- 'Password' (optional): Password to open the excel spreadsheet in your email, if any
Once the fields are filled, click 'Save Trade(s)' at the bottom of the page to save the details. Once STP is successful, you will receive a pop-up notification at the top right corner of the page to inform you that the trades have been captured into your portfolio successfully.
Manage Pop-Up Notification Messages
Once the trades have been uploaded successfully or unsuccessfully, you will receive a notification pop-up message from the top right corner of the page. Tick to select the notification(s) and mark them as "Read" or "Unread", or to delete.
Functionality
Please refer to Table Settings for table functionalities.
Definition of Terms
Please refer to List of Definitions: Trades.
Click to access: