...
TABLE OF CONTENTS
| Table of Contents | ||||||
|---|---|---|---|---|---|---|
|
...
Adding your Own Market Data
Creating New Market Data
Click "Create ‘Create Market Data" under "Market Data" Data’ under ‘Market Data’ in the navigation list on the left.
Fill in your own "Data Name" ‘Data Name’ (e.g. 螺纹钢:HRB400 20mm:唐山).
Fill in " 'Exchange"', which refers to the Exchange the product is traded in (e.g. 唐山).
Fill in "Product Code" ‘Product Code’, which helps you to identify the data easily by its product code (e.g. HRB400_20_TS).
Fill in "'Contract Code"', which helps you to identify the data easily by its contract code (e.g. HRB400_20_TS).
Fill in "'Data Source"', which refers to the source of data (e.g. Self).
Select the data's "'Product Type"', in which four options are available (e.g. "Fundamental"). Different product types require inputting of different types of data. Click Market Data Structure to find out more.
You are able to fill in “Frequency” ‘Frequency’ (e.g. Daily).
"Frequency", "Unit" and "Description" ‘Frequency’, ‘Unit’ and ‘Description’ are optional fields.
Example:
...
Select the column of your own dataset that you wish to copy into the table.
Paste into the relevant and required column in MAF Cloud’s table. For different product types, the table requires different information. Click Market Data Structure to find out more.
Ensure that the required column has a value in every row (e.g. Date column = YYYY-MM-DD; Settlement column = if null, 0).
After inputting the relevant and required data into the table, click “Save”‘Save’.
You will be able to see the newly created market data by clicking "‘View Market Data" under "Market Data" ’ under ‘Market Data’ in the navigation list on the left. Search for the dataset that you wish to view (e.g. 螺纹钢:HRB400 20mm:唐山) and click on the “View” ‘View’ button (represented by an ‘eye’ “eye” icon).

Example:
| 1 | 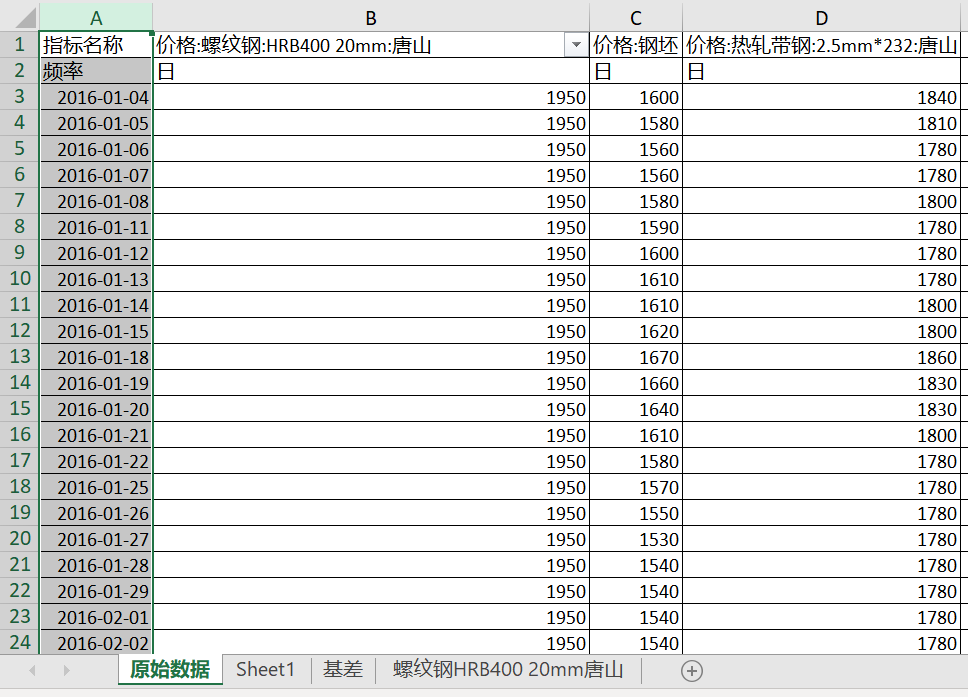 | Open your file in Microsoft Excel. Select and copy the column you wish to transfer into MAF Cloud. |
| 2 | 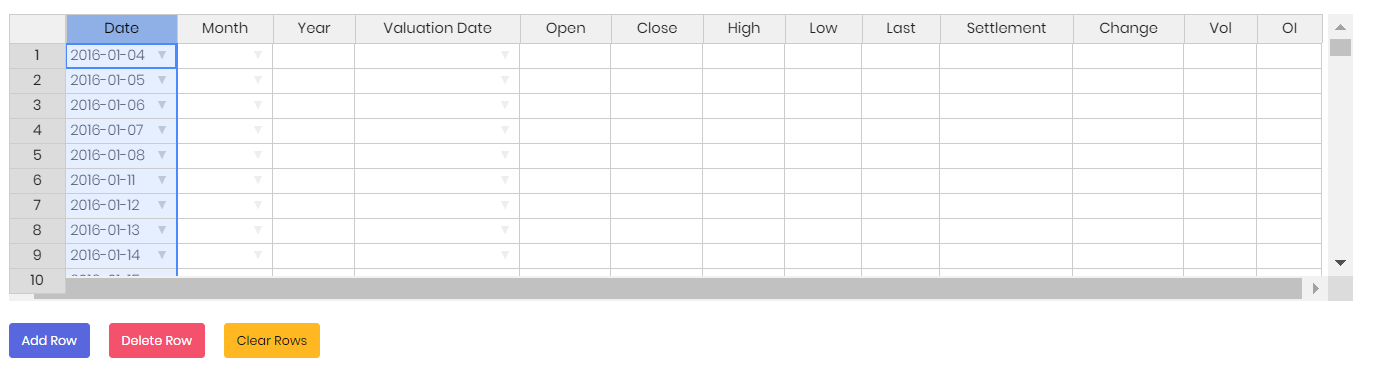 | Return to MAF Cloud and select column header (in this case, “Date”‘Date’), and paste the copied data. All the information would immediately be transferred onto the table. |
| 3 | 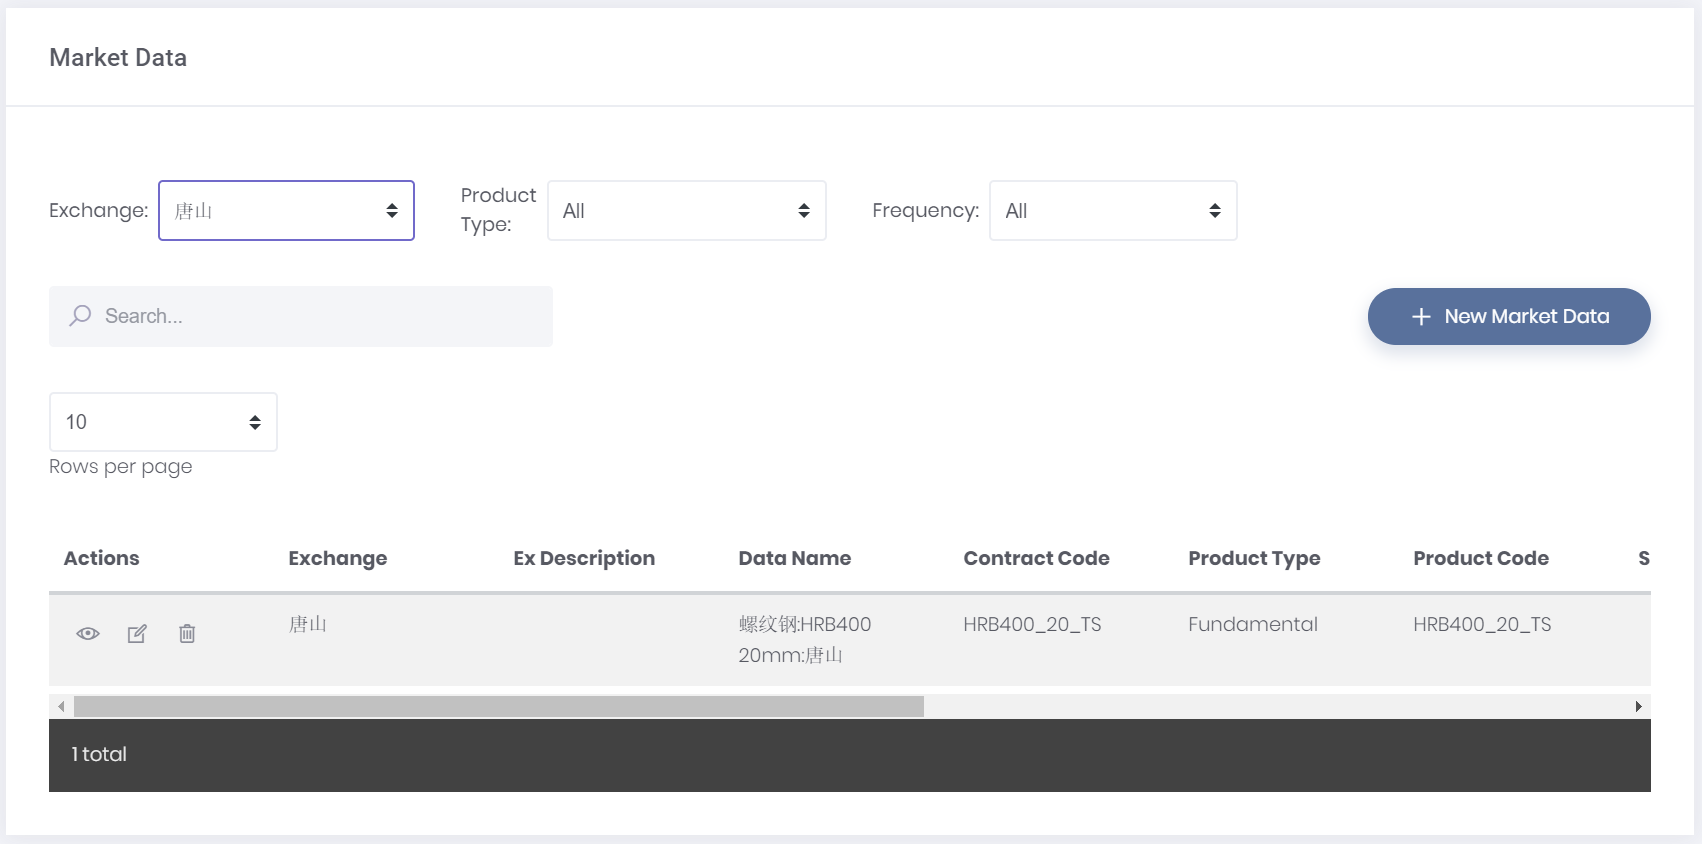 | After clicking “Save”‘Save’, you would be able to view your newly created market data by clicking "View ‘View Market Data"' under "'Market Data"Data’ in the navigation list on the left. Simply search for the dataset that you wish to view (e.g. 螺纹钢:HRB400 20mm:唐山) and click on the “View” button (represented by an ‘eye’ icon). |
...
Ensure that your file is in .CSV format, following MAF Cloud’s table format.
In order to do so, open your file in Microsoft Excel.
Arrange your information according to MAF Cloud’s table format. For different product types, the table requires different information. Click Market Data Structure to find out more. Ensure that the required column has value in every row (e.g. 0).
Columns in Microsoft Excel that corresponds with MAF Cloud’s table format are as follows:

After rearranging the required information, export it as a .CSV file.
Return to MAF Cloud and import the file by clicking “'+ Import from CSV”CSV'.
Click “Save”'Save'.
You will be able to see the newly created market data by clicking "View ‘View Market Data"', followed by "Market Data" ‘Market Data’ in the navigation list on the left. Search for the dataset that you wish to view (e.g. 螺纹钢:HRB400 20mm:唐山) and click on the “View” 'View’ button (represented by an ‘eye’ “eye” icon).
Example:
| 1 | 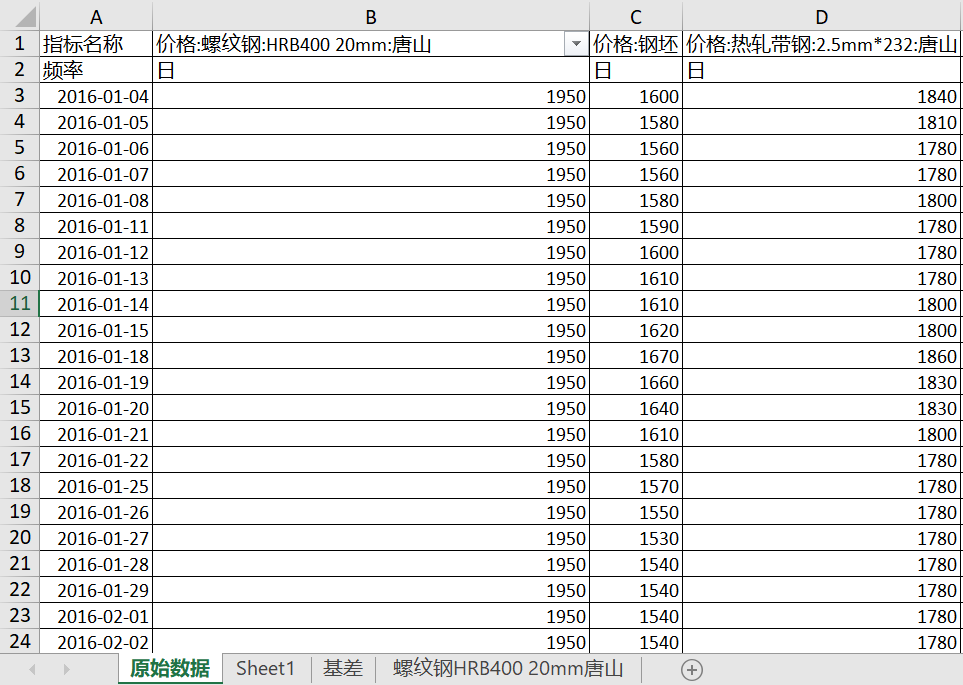 | This is the original data (including other datasets) after exporting into Microsoft Excel. You have to rearrange it to fit the format in MAF Cloud’s table. |
| 2 | 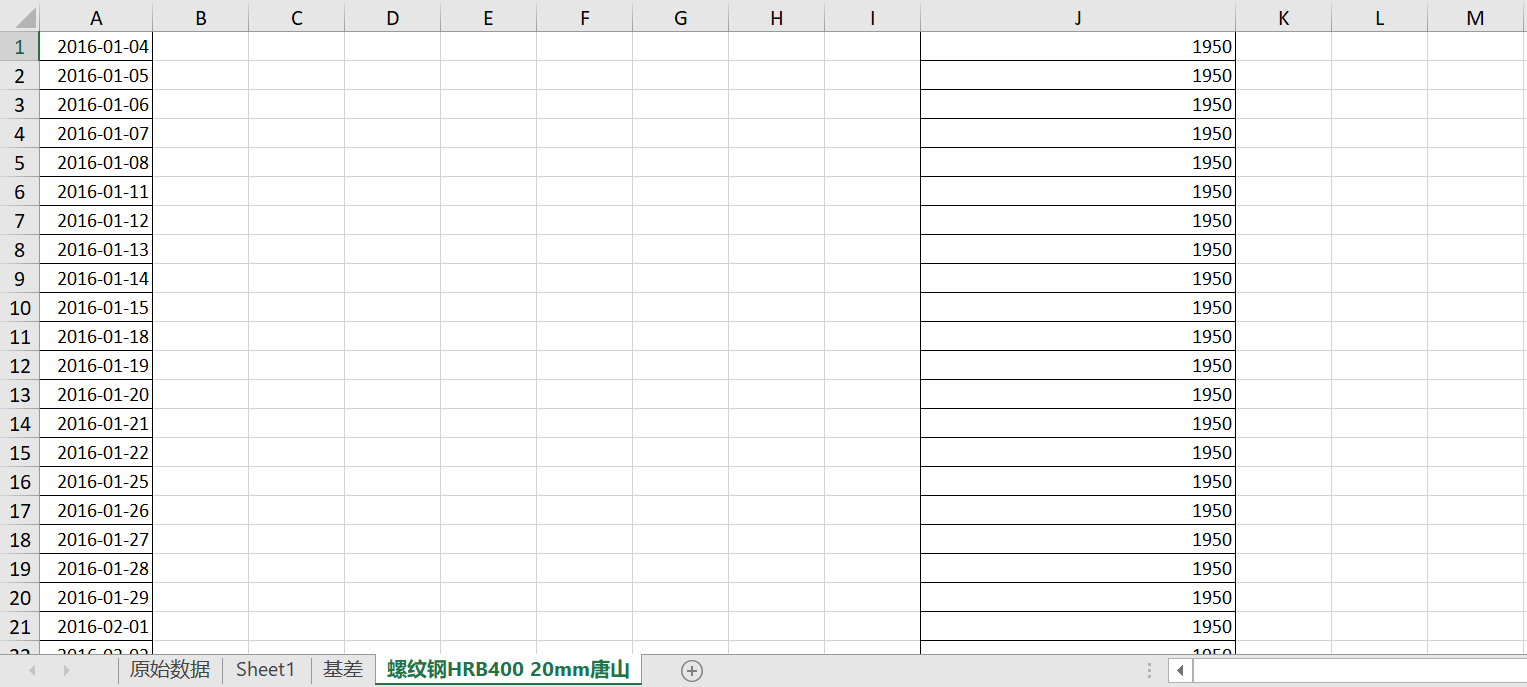 | This is how it should be rearranged. Since this is a “Fundamental” ‘Fundamental’ product type, only the “Date” (A) and “Settlement” (J) column are needed. The rest can be left empty. |
| 3 | | Click “Save” ‘Save’ to save your Market Data, which will be available under “Market Data”‘Market Data’, ”View ‘View Market Data”Data’. |
Keying in your Data Manually into the Table
Key in all the relevant and required column manually into MAF Cloud’s table. For different product types, the table requires different information. ClickMarket Data Structure to find out more. Ensure that the required column has a value in every row (e.g. 0).
Click “Save”'Save'.
You will be able to see the newly created market data by clicking "'View Market Data"', followed by "Market Data" ‘Market Data’ in the navigation list on the left. Search for the dataset that you wish to view (e.g. 螺纹钢:HRB400 20mm:唐山) and click on the “View” button (represented by an ‘eye’ icon).
...
After saving your market data and information, you will be able to edit it:
Click "'View Market Data"' under "‘Market Data"’ in the navigation list on the left.
Search for the dataset that you wish to edit (e.g. 螺纹钢:HRB400 20mm:唐山).
Click on the edit button under the “Actions” 'Actions' column (represented by a ‘pen “pen and paper’ paper” icon).


After editing the information, click “Save”‘Save’.
Example:
| 1 |  | After searching for your “Market Data”‘Market Data’, you will be able to edit by clicking the edit button under the “Actions” ‘Actions” column (represented by a ‘pen “pen and paper’ paper” icon). |
| 2 | 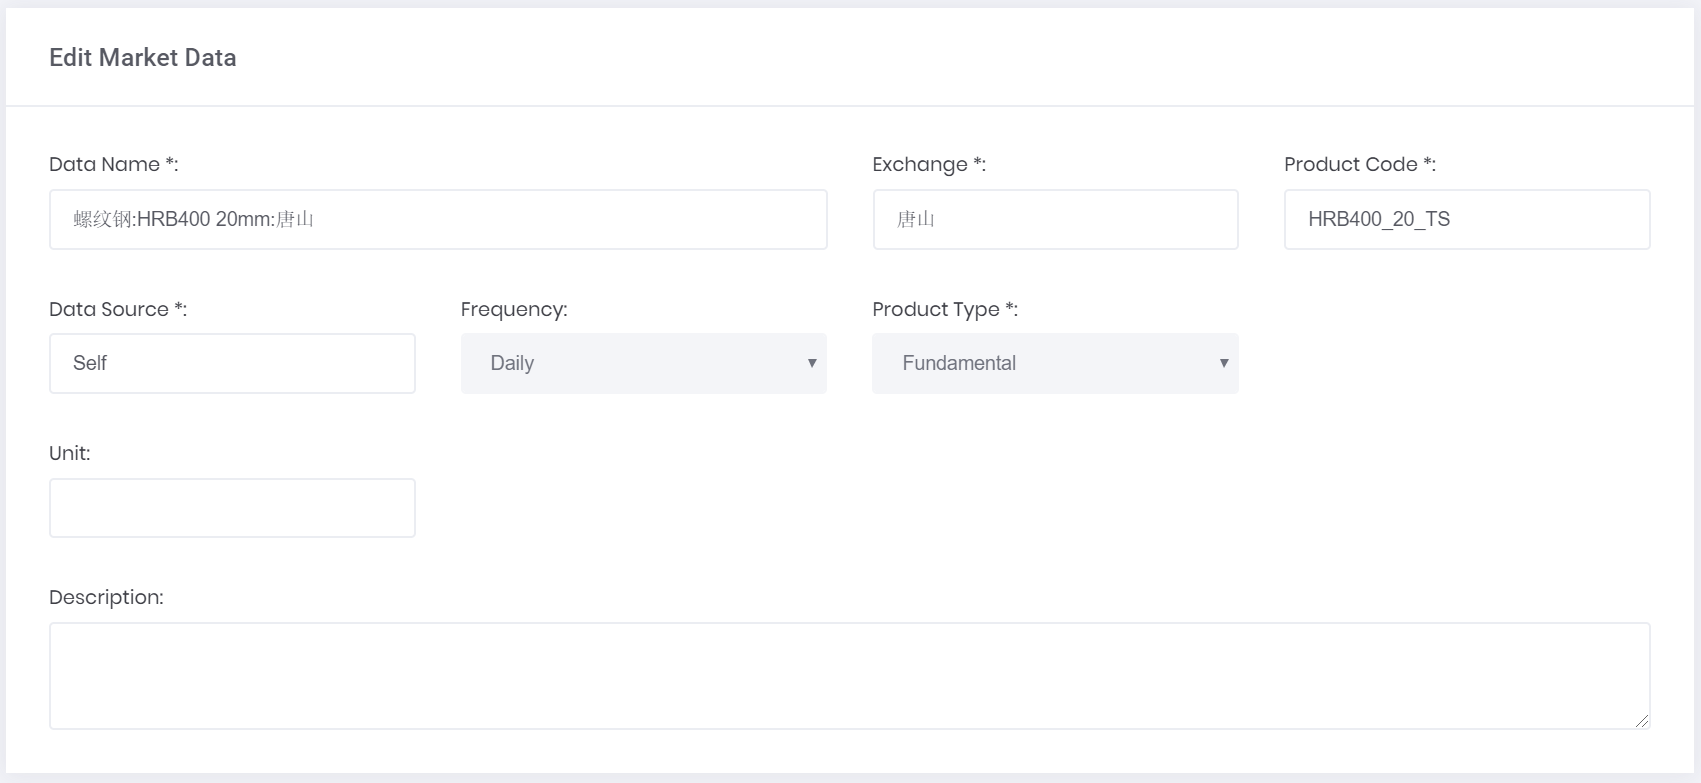 | You will be able to edit the information in the selected “Market Data”‘Market Data’. *Fills Fields are compulsory. Note: Once the “Frequency” ‘Frequency’ and “Product Type” ‘Product Type’ have been set, they cannot be changed. |
| 3 | 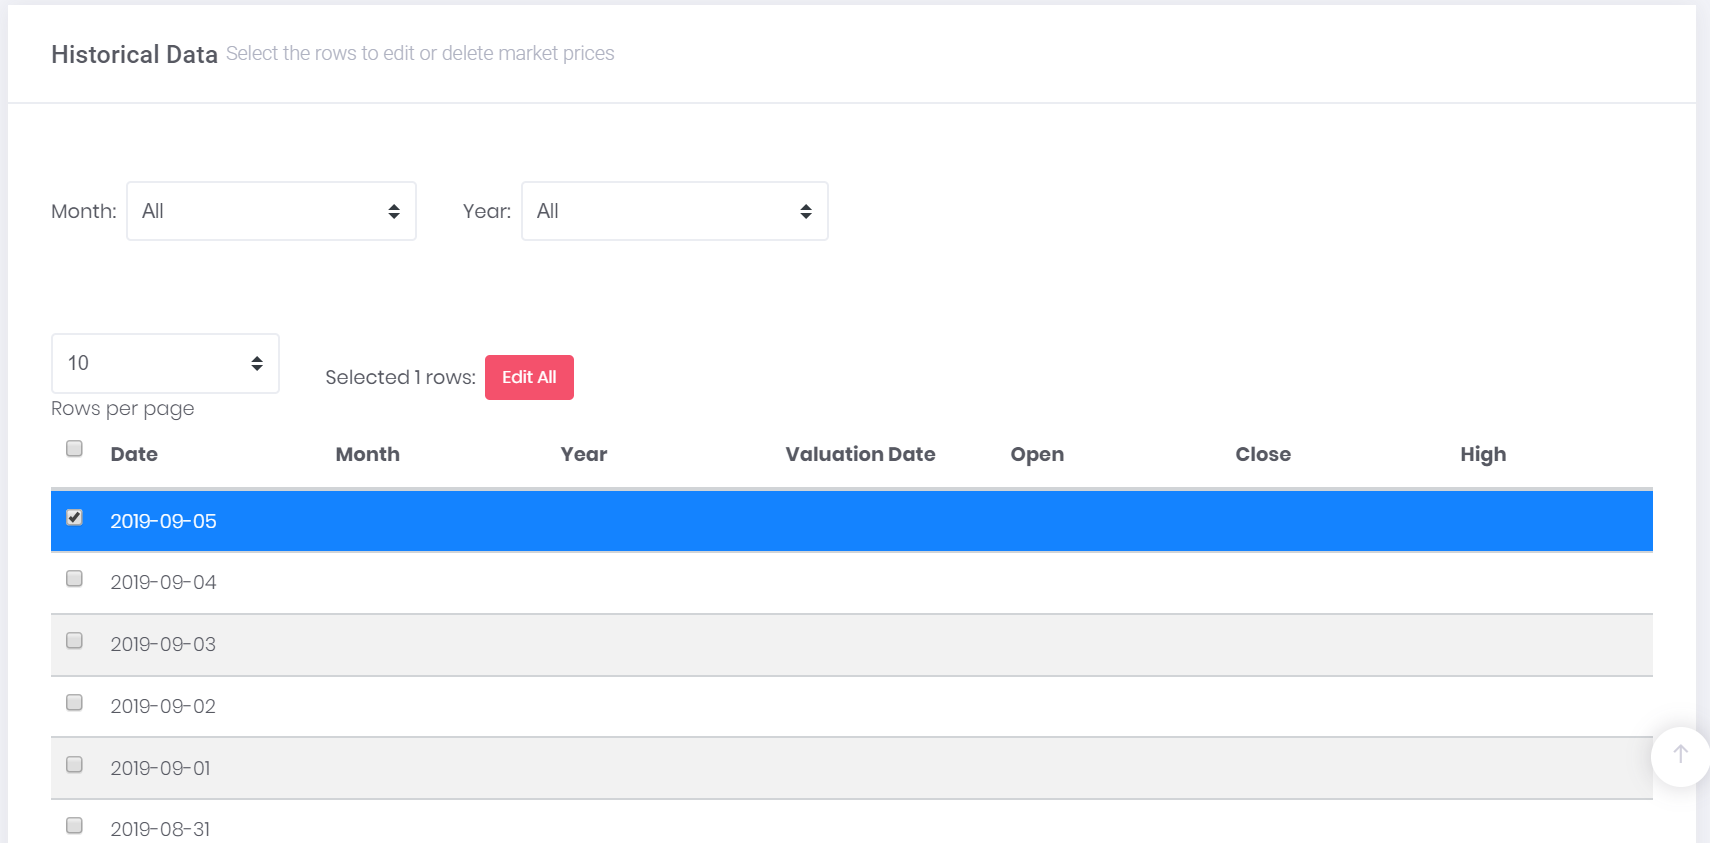 | As you scroll down, you will be able to edit the “Historical Data” ‘Historical Data' as well. Click on the checkbox in the row you wish to edit and then press “Edit All”'Edit All’. |
| 4 | 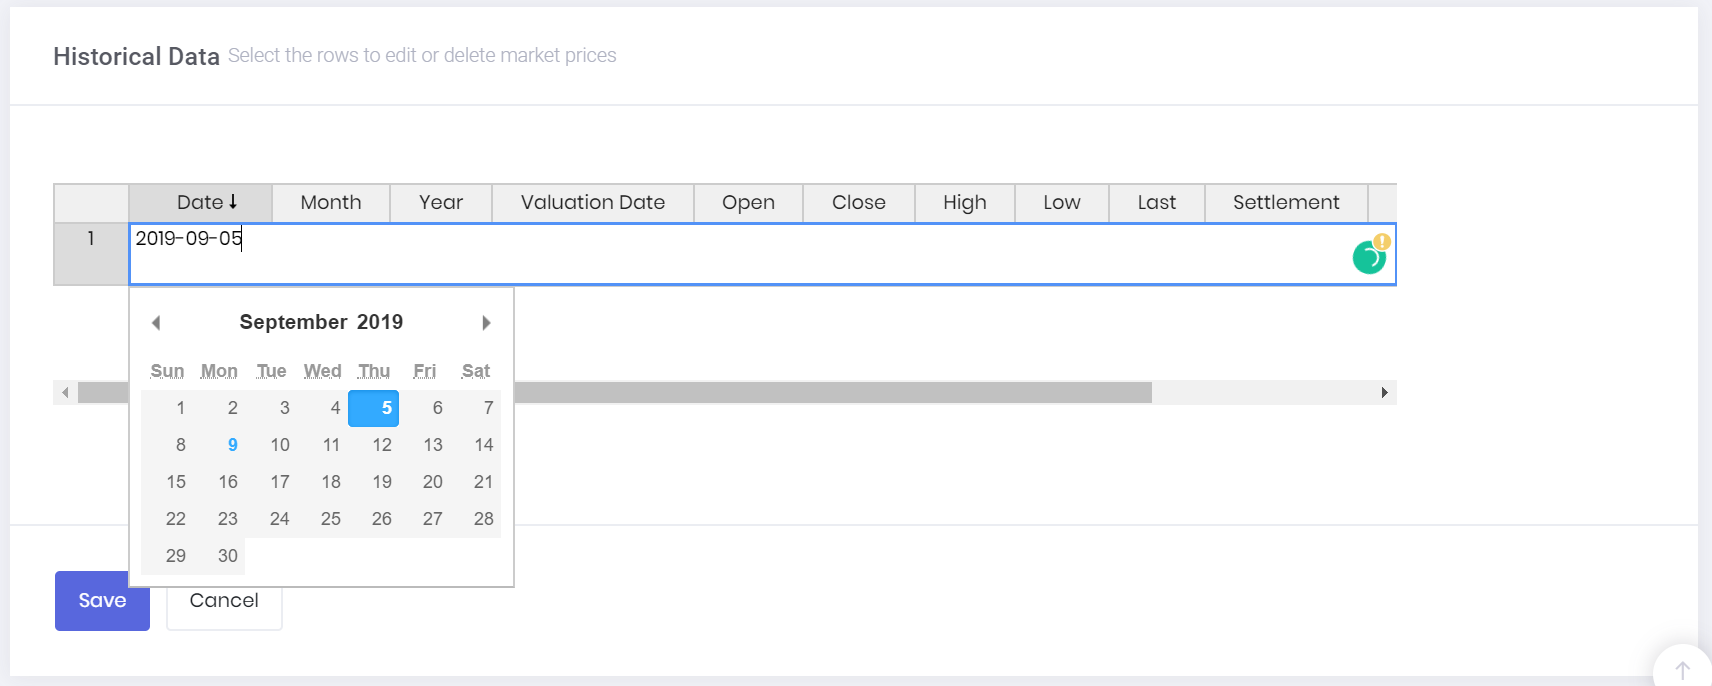 | Then, double click the cell you wish to edit and key in the updated detail. After editing, click “Save”‘Save’. Note: Please ensure that the data in each column is formatted correctly (e.g. date format must be YYYY-MM-DD; number format must be used in the “Settlement Price” column; and 0 represents null value) |
...
If you wish to add additional market prices into an already-created market data, you are able to do so:
Click "View ‘View Market Data"' under "'Market Data"Data’ in the navigation list on the left.
Search for the dataset that you wish to edit (e.g. 螺纹钢:HRB400 20mm:唐山).
Click on the edit button under the “Actions” ‘Actions’ column (represented by a ‘pen “pen and paper’ paper” icon).
Under Historical Data, click “Add 'Add New Market Prices'.”
Add the relevant information into the table to add new market data. Delete the rows if they are not used (highlight the rows by clicking on the header of the row e.g. 1, 2, 3 etc)
Click “Save”'Save'.
...
Deleting Market Data
If you do not require the Market Data anymore, you will be able to delete it:
Click "View ‘View Market Data"’ under "'Market Data"' in the navigation list on the left.
Search for the dataset that you wish to edit (e.g. 螺纹钢:HRB400 20mm:唐山).
Click on the “delete” ‘delete' button under the “Actions” 'Actions’ column (represented by a ‘bin’ “bin” icon).

If you want your Market Data to be deleted, click on “Yes‘Yes, delete!” ’ and it would be deleted. Do note that this is an irreversible action.
If you do not want your Market Data to be deleted, click on “No‘No, cancel!” ’ and it would not be deleted.
...
An example would be using the Spread Analysis Model which can be found under “Dashboard” ‘Dashboard’ from the navigation list on the left.
...
Exporting Data from Historical Data
Click "‘View Market Data"' under "'Market Data"Data’ in the navigation list on the left.
Search for the data you wish to export.
Click the “View” ‘View’ button (represented by the ‘eye’ “eye” icon).
Click on “Export Data” 'Export Data' from the right corner of the page and you would be able to export this as a .CSV file.
...
Select the model you wish to export from your “Dashboard”‘Dashboard’.
Click on the export icon (represented by a ‘cloud “cloud and arrow’arrow”).

You will be able to export the data as a .CSV file or as an image.
...