With MAF Cloud, commodity trading businesses can seamlessly integrate the front, middle and back office activities to manage their physical commodities trading transactions, cargo & vessel operations and shipping logistics efficiently. The lifecycle of physical trades and deals can be monitored closely, beginning from the contractual and execution phase to the risk monitoring and settlement phase. This allows you and your team to collaborate on trade contracts and manage your paper and physical trading books/portfolios, and monitor their performance, positions, settlement and risks exposure according to your business requirements efficiently.
The features include:
- Capturing, recording and monitoring of physical trades, deals, trade executions and pricing strategies
- Providing auto-calculations of P/L positions and inventory management
- Performing hedging through paper trades to mitigate associated risks
- Organising and managing of paper and physical trades in portfolios to monitor P/L positions and exposures
- Generating of quantitative analysis models such as Position Matrix and VaR model to monitor portfolio performance and risks
To access the 'Physical Trade' page, click 'Trade' from the navigation sidebar on the left, followed by 'Physical Trade'.
TABLE OF CONTENTS:
| Table of Contents |
|---|
...
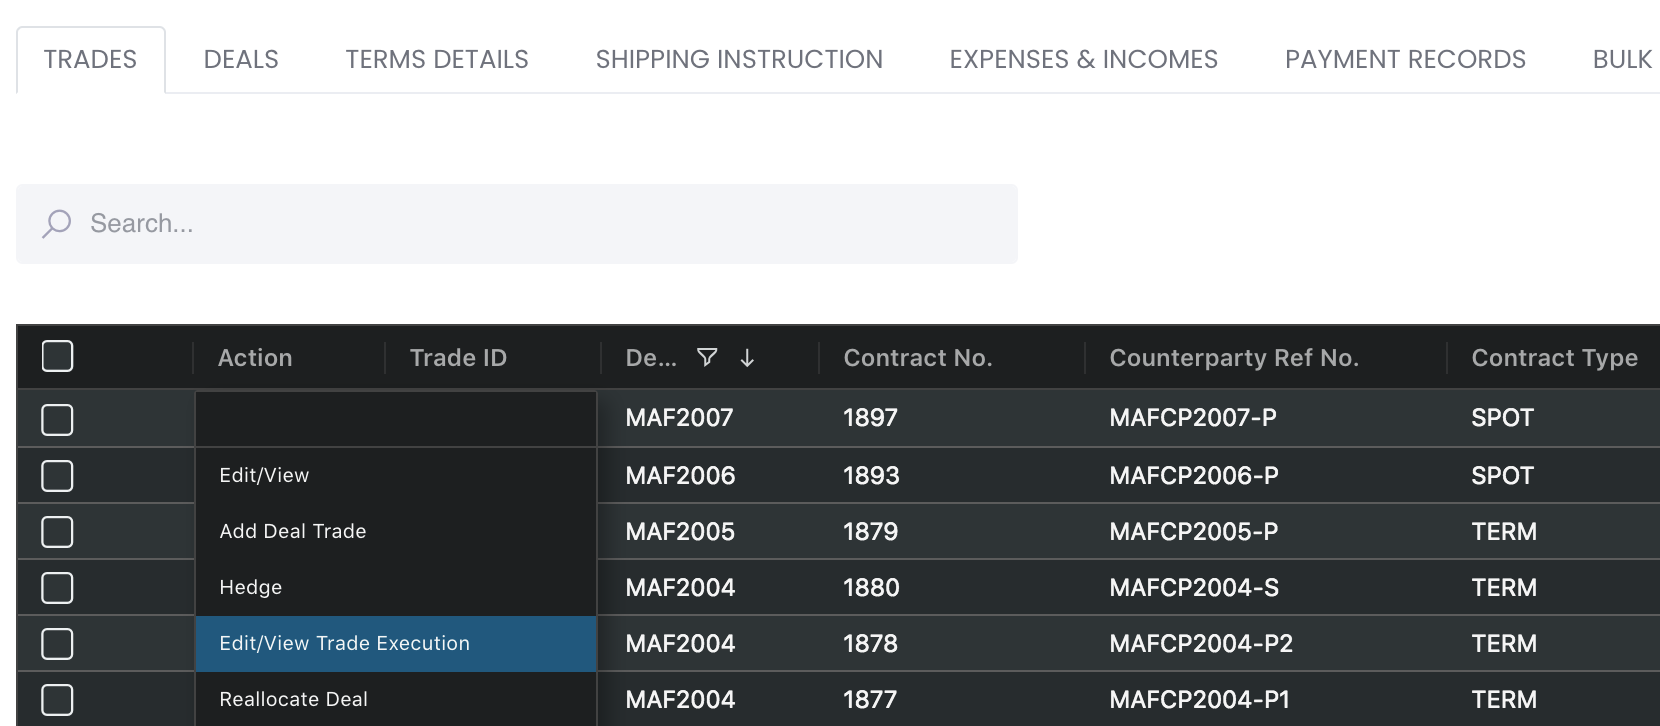
All physical trades created will be displayed in the 'Physical Trade Data' table.
There are 5 tabs to select from:
- TRADES: Manage your trades and their associated trade executions.
- DEALS: Display the details of your deals and their associated trades.
- TERMS DETAILS: Manage the details of your term contracts.
- SHIPPING INSTRUCTION: Display the details of shipping instructions.
- EXPENSES & INCOMES: Display the details of your expenses and incomes.
- PAYMENT RECORDS: Display the details of your payment records.
- BULK TRADES UPLOAD: Upload physical trades in bulk.
- PHYSICAL PRICING SETTINGS: Pre-set pricing index for physical trades.
...
- Search bar: Search for keywords in the search bar for relevant data to be displayed
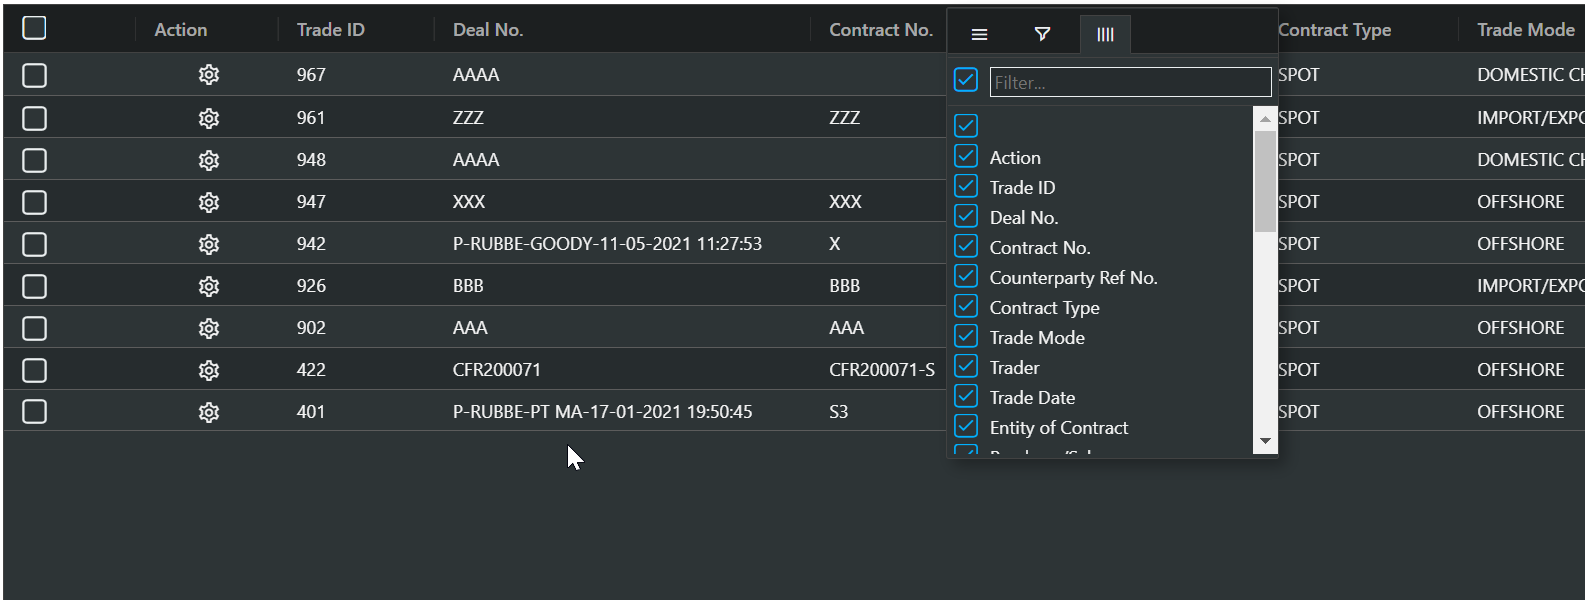
- Table Headers: 'Sort' and 'Filter' data using the functions in the table headers (Please refer to Table Settings for table functionalities).
...
1. TRADES TAB
Viewing Physical Trades Table
To access this section, click on 'Trade', following by 'Physical Trades' from the navigation sidebar on the left. Click on the 'TRADES' tab at the top of the page to access this section.
Various information on each of your trades is provided in the table. You may refer to the List of Definitions: Trades page for a list of definitions for the column headings.
Note: 'Outstanding Qty' with any value above "0" infers that the trade is un-settled (no title transfer date - title of goods has not been transferred or received). So if the trade has been settled/completed, you will need to input the 'Title Transfer Date' in trade execution page for the 'Outstanding Qty' to be displayed as "0".
To add a new physical trade, click '+ New Trade' and you will be directed to Creating New Physical Trade(s).
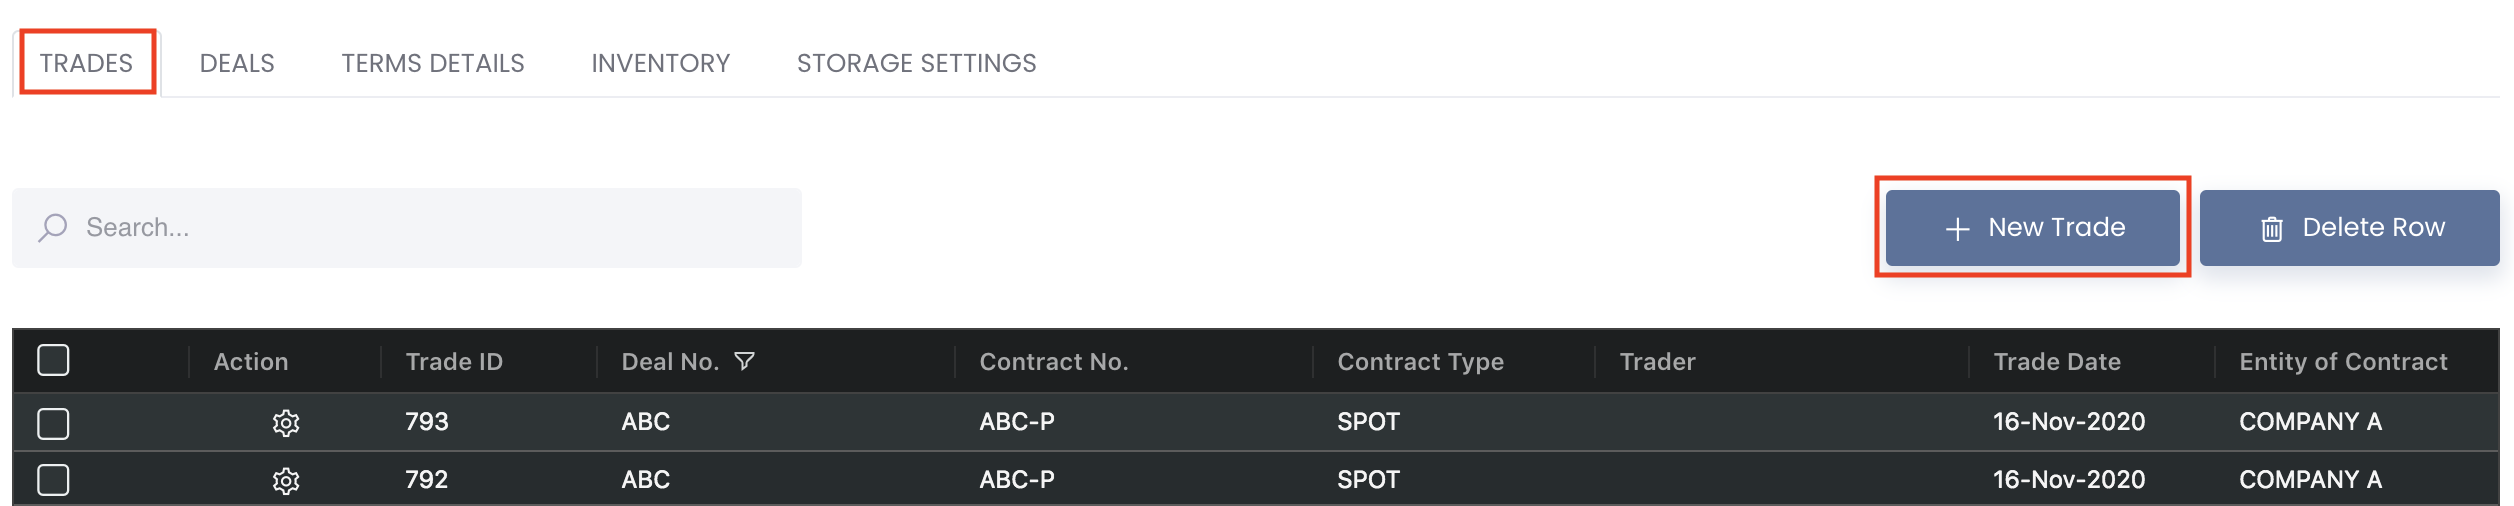
To delete your trade, tick the checkbox of the trade and click 'Delete Row'.

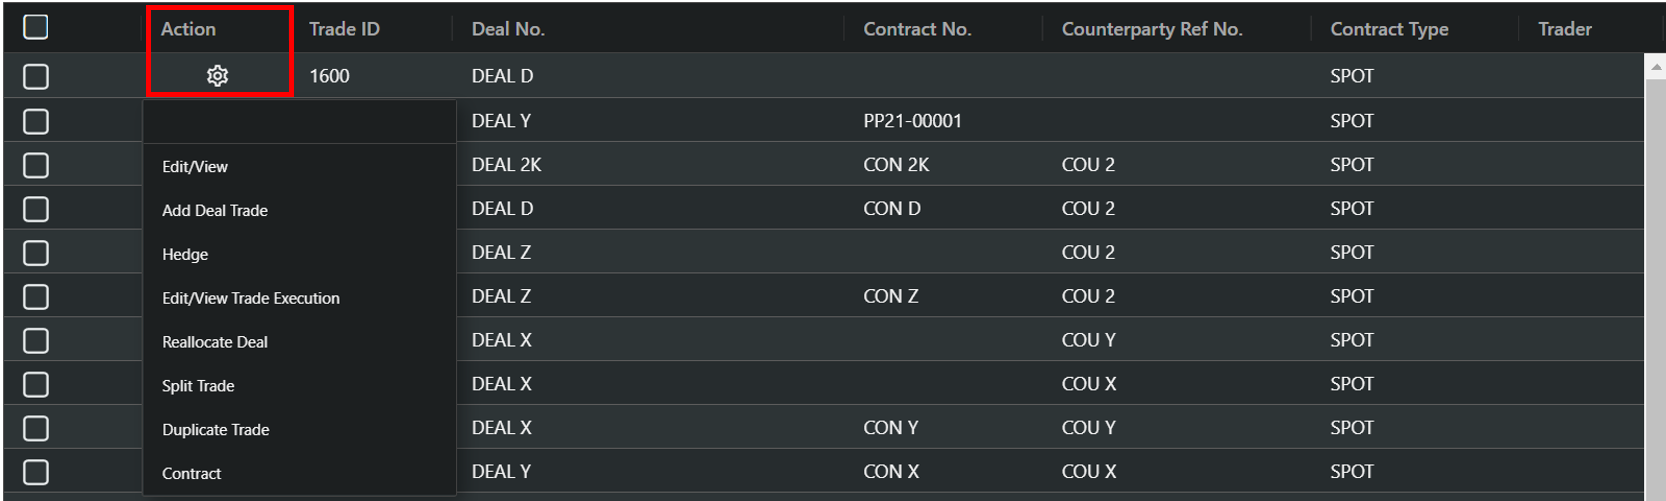
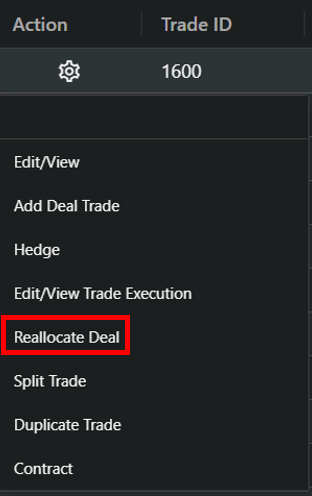
Under 'Actions' in the table, click the 'Settings' button (represented by a 'gear' icon) in each row to display all types of functions.
...
A. Edit/View
Clicking this button will direct you to edit or view your physical trade. Follow through the steps to modify your data and click 'Submit' to save the changes.
...
Click on the Edit/View Trade Execution button will direct you to the 'Physical Trade Execution' page. This allows you to add/edit/view associated physical trade execution to record and monitor the execution of your trades.
To add new trade execution, click on 'Add New Trade Execution' and select the pricing block and fill in the details accordingly. To, delete the trade execution, click on the 'Delete' button at the bottom of each trade execution.
Note: If you only have 1 trade, the pricing block will auto-select that trade. If you have multiple trades, you will need to select each trade in the pricing block in each trade execution panel (click 'Add New Operation Execution at the bottom of the page).
...
Fill in the necessary details required for the execution of your trade. All fields are optional and you may fill in as per normal. Once done, click 'Save' to save the trade execution details.
Split Quantity: To split the quantity in the trade to allow each quantity to have its own trade execution, click on the 'Edit' button and key in the quantity to split out from the total quantity. A new pricing block with the split quantity will be generated. You will need to click on the 'Add New Operation Execution' button at the bottom to select the new pricing block to create its trade execution.
The following fields will generate values automatically:
- 'Pricing Block' will automatically be selected if you only have 1 pricing on your physical trade pricing page. Otherwise, you will need to manually select the pricing block to create its trade execution.
- Provisional Value = 'Provisional Qty' * 'Provisional Price'
- Final Price = Actual Price + Premium
- Final Value = ('Actual Qty' or 'Converted Actual Qty') * 'Final Price' (quantity used will depend on the unit matched). Once you key in 'Actual Quantity', you will not be able to click 'Edit' to adjust the pricing quantity.
- 'Demurrage Rate' can be obtained directly from Demurrage.
Note: If your pricing mode is FIX, you do not need to update the actual price in the trade execution page as it will be displayed automatically. If your premium/discount pricing mode is FIX, you can only edit your premium/discount details in the pricing page, and not in the trade execution page. If you have already keyed in "premium/discount" amount in the pricing page, the "actual price" you key in the trade execution page should exclude the "premium/discount" to prevent double counting.
Inputting 'Title Transfer Date' will replace 'Trade Date' in PORTFOLIO page (under TRADES table). If 'Title Transfer Date' is removed, the original 'Trade Date' will be displayed. 'Title Transfer Date' cannot be after Today's Date.
Note: Title transfer date cannot be earlier than the physical trade date and cannot be after today's date.
Note: If ACTUAL QUANTITY, ACTUAL PRICE and TITLE TRANSFER DATE are not filled yet, the cells will be in red to remind you to fill in to settle the trade fully.
QTY DSP (Quantity Discrepancy) column: Sometimes, in one deal, buy and sell actual qty could not be 100% matched, e.g, bought 1001 MT, and sold 1001.2 MT (sometimes, weight could be changed due to some reasons like package changes, transportation issue etc). But for the system, it does not know if it is real difference or key wrongly, so it shows DEAL QTY DSP (dsp = discrepancy) for user to double check.
Shows Deal Qty Dsp column in red will indicate either:.
Actual qty of purchase and sale contract is not equal, so prompts user to check, or
Actual qty of either purchase or sale contract is filled in, but not closed yet as either corresponding sale or purchase is not available yet. Will show in red as long as one trade has actual qty
...
This issue only comes when user fills up all the key information and we do final check for them to make sure the trade is done
CURRENT LOGIC:
- If the contract is not sold yet, P/L will remain as unrealised P/L, even when TITLE TRANSFER DATE is input. So once contract is sold, it will be closed and P/L will be realised P/L
- To close a contract, ACTUAL PRICE and TITLE TRANSFER DATE must be input
- Only contracts with the same CATEGORY can close each other
- For contracts under the same CATEGORY, sales contract must have TITLE TRANSFER DATE and ACTUAL PRICE to close purchase contract; purchase contract will be closed on a FIFO basis; CLOSE DATE of the closed contract will be the same as the sales contract's TITLE TRANSFER DATE
- HEDGE RATIO, POSITION MATRIX and PHYSICAL TRADE INVENTORY app will only show outstanding positions. If ESTIMATED PRICE or ACTUAL PRICE is input, the contract will not show in the app
...
cargo value before tax = 5,000,000 * 10 (ex rate) + 5 (custom tax) = 500,005
3 WAYS TO SPLIT QUANTITY OF TABLE
- Split quantity using pricing blocks in physical trade pricing page: Split quantity in trade to allow each quantity to have its own trade execution but physical trade details (eg counterparty) remain the same. This works the same as point 2. Click here to learn more.
- In physical trade pricing page, click on the '+ Add Block' button and key in the quantity. You will need to ensure that the total quantity in the pricing blocks in this page match the 'Quantity' in the previous page (click the 'Back' button at the bottom to go back to the previous page).
- Split quantity using pricing blocks on trade execution page: Split quantity in trade to allow each quantity to have its own trade execution but physical trade details (eg counterparty) remain the same. This works the same as point 1.
- In trade execution page, click on the 'Edit' button and key in the quantity to split out from the total quantity. A new pricing block with the split quantity will be generated. Click here to learn more.
- Split quantity using button in physical trade table: Split quantity in trade to allow allocation to different counterparties. Click here to learn more.
- In physical trade table, click on the 'Settings' button followed by 'Split Trade' and key the quantity to be split to the new counterparty.
...
E. Reallocate Deal
To reallocate a trade into another deal, under 'Actions' in the table, click the 'Settings' button (represented by a 'gear' icon) of the row and click 'Reallocate Deal'.
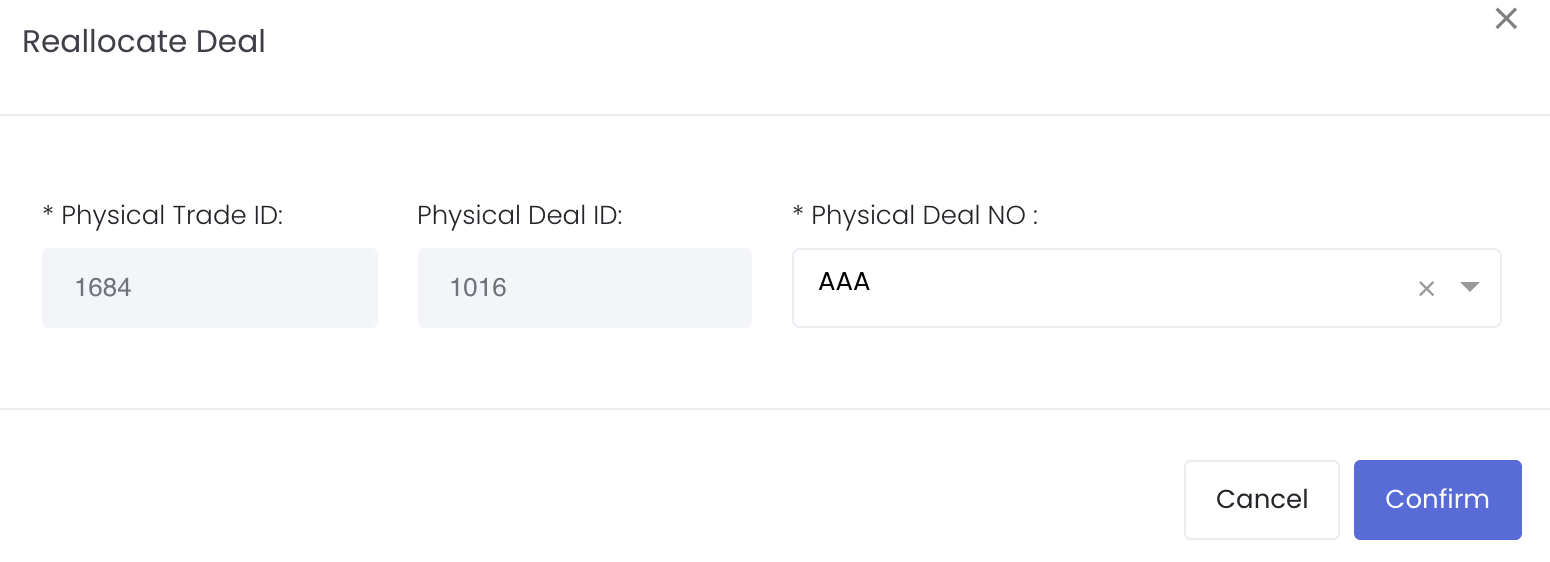
You can choose to fill in:
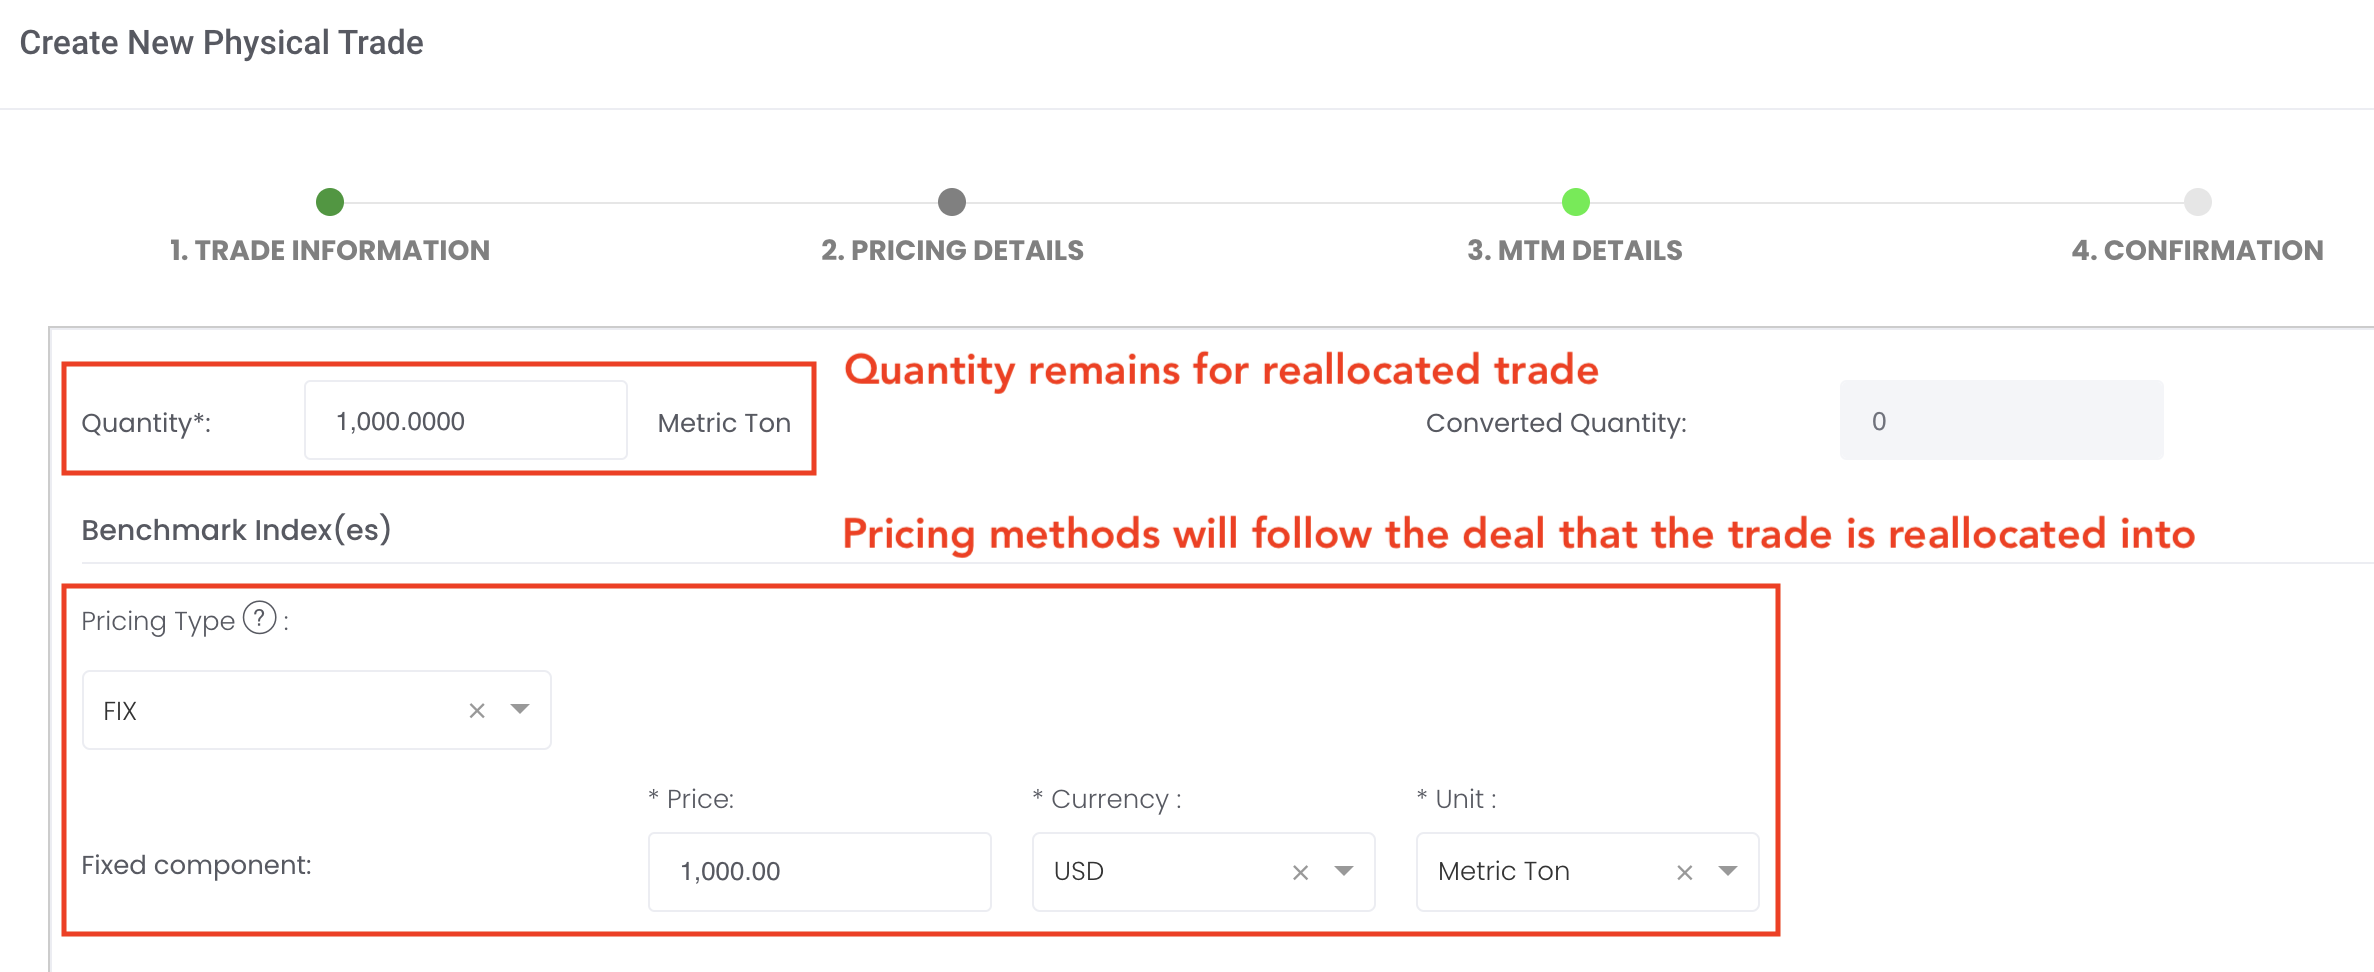
a. Existing 'Physical Deal No': Trade will be reallocated directly into the existing deal. Note: If the to-be-reallocated trade's pricing details (BENCHMARK & MTM) have been filled or empty and the trade is reallocated into an existing deal with an existing pricing details, the quantity and the pricing method (BENCHMARK) of the trade will remain but the pricing method (MTM) will follow the deal that it is reallocated to.
b. New 'Physical Deal No': Trade will be reallocated directly into the newly created deal (new deal number that you input).
'Physical Deal ID' will be automatically generated once you input the deal number. Click 'Confirm' when done and the trade will be allocated successfully into the deal.
...
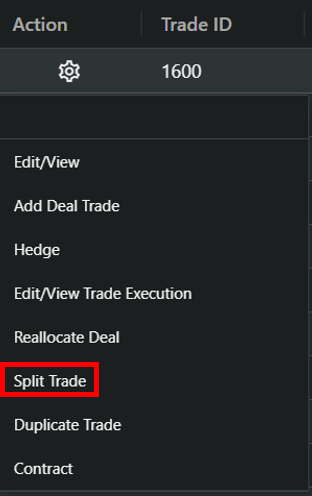
F. Split Trade
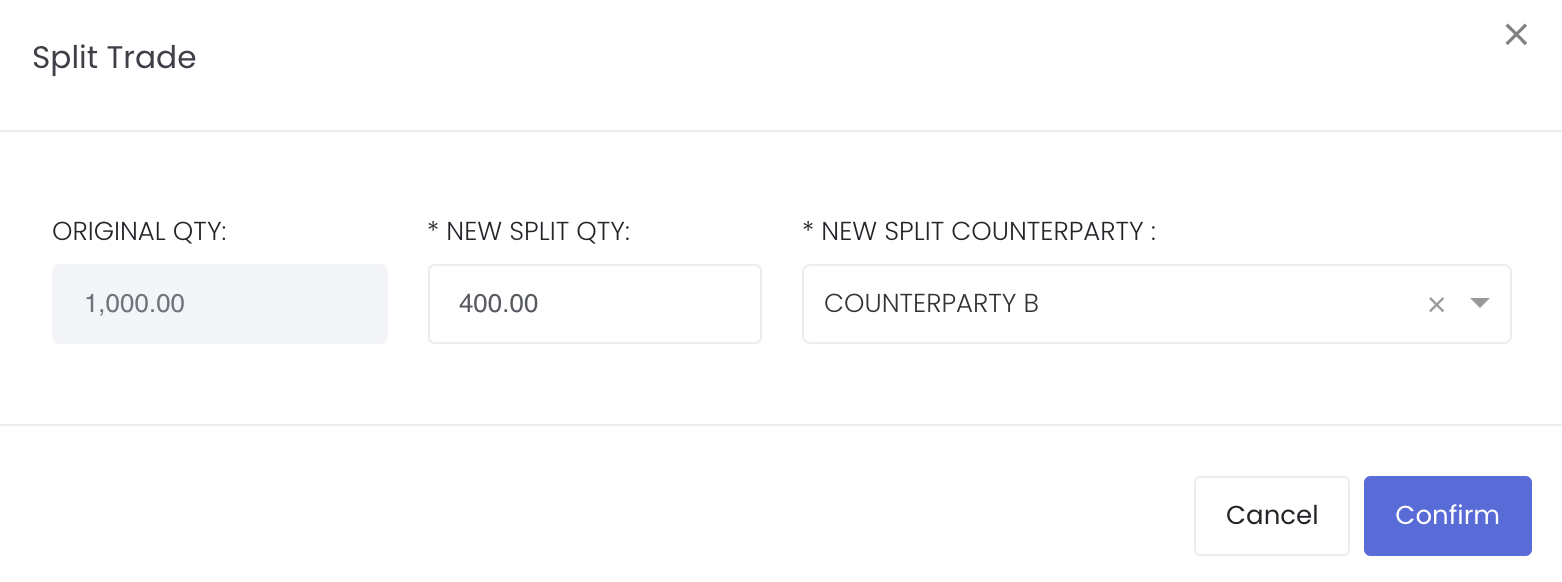
To split the quantity of a single trade and allocate it to another 'COUNTERPARTY', under 'Actions' in the table, click the 'Settings' button (represented by a 'gear' icon) of the row and click 'Split Trade'.
Fill in the 'NEW SPLIT QTY' (quantity to be allocated to new counterparty) and the 'NEW SPLIT COUNTERPARTY' (new counterparty name) and click 'Confirm' when done. This will give rise to two trades with the same details but of the adjusted quantity.
There are 3 ways to split quantity of a trade:
- Split quantity using pricing blocks in physical trade pricing page: Split quantity in trade to allow each quantity to have its own trade execution but physical trade details (eg counterparty) remain the same. This works the same as point 2. Click here to learn more.
- In physical trade pricing page, click on the '+ Add Block' button and key in the quantity. You will need to ensure that the total quantity in the pricing blocks in this page match the 'Quantity' in the previous page (click 'Back' button at the bottom to go back to previous page).
- Split quantity using pricing blocks in trade execution page: Split quantity in trade to allow each quantity to have its own trade execution but physical trade details (eg counterparty) remain the same. This works the same as point 1.
- In trade execution page, click on the 'Edit' button and key in the quantity to split out from the total quantity. A new pricing block with the split quantity will be generated. Click here to learn more.
- Split quantity using button in physical trade table: Split quantity in trade to allow allocation to different counterparties. Click here to learn more.
- In physical trade table, click on the 'Settings' button followed by 'Split Trade' and key the quantity to be split to the new counterparty.
...
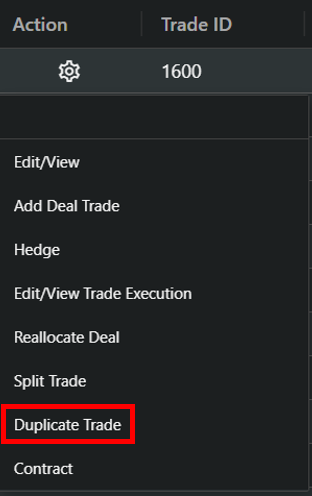
G. Duplicate Trade
To duplicate a single trade, under 'Actions' in the table, click the 'Settings' button (represented by a 'gear' icon) of the row and click 'Duplicate Trade'.
Only the 'DEAL NO.' is a compulsory item and you can choose to fill in:
a. Existing 'DEAL NO'': Duplicated trade will be allocated directly into the existing deal. Note: If the duplicated trade's pricing details (BENCHMARK & MTM) have been filled or empty and the duplicated trade is allocated into an existing deal with an existing pricing details, the quantity and the pricing method (BENCHMARK) of the trade will remain but the pricing method (MTM) will follow the deal that it is allocated to.
b. New 'DEAL NO': Duplicated trade will be allocated directly into the newly created deal (new deal number that you input).
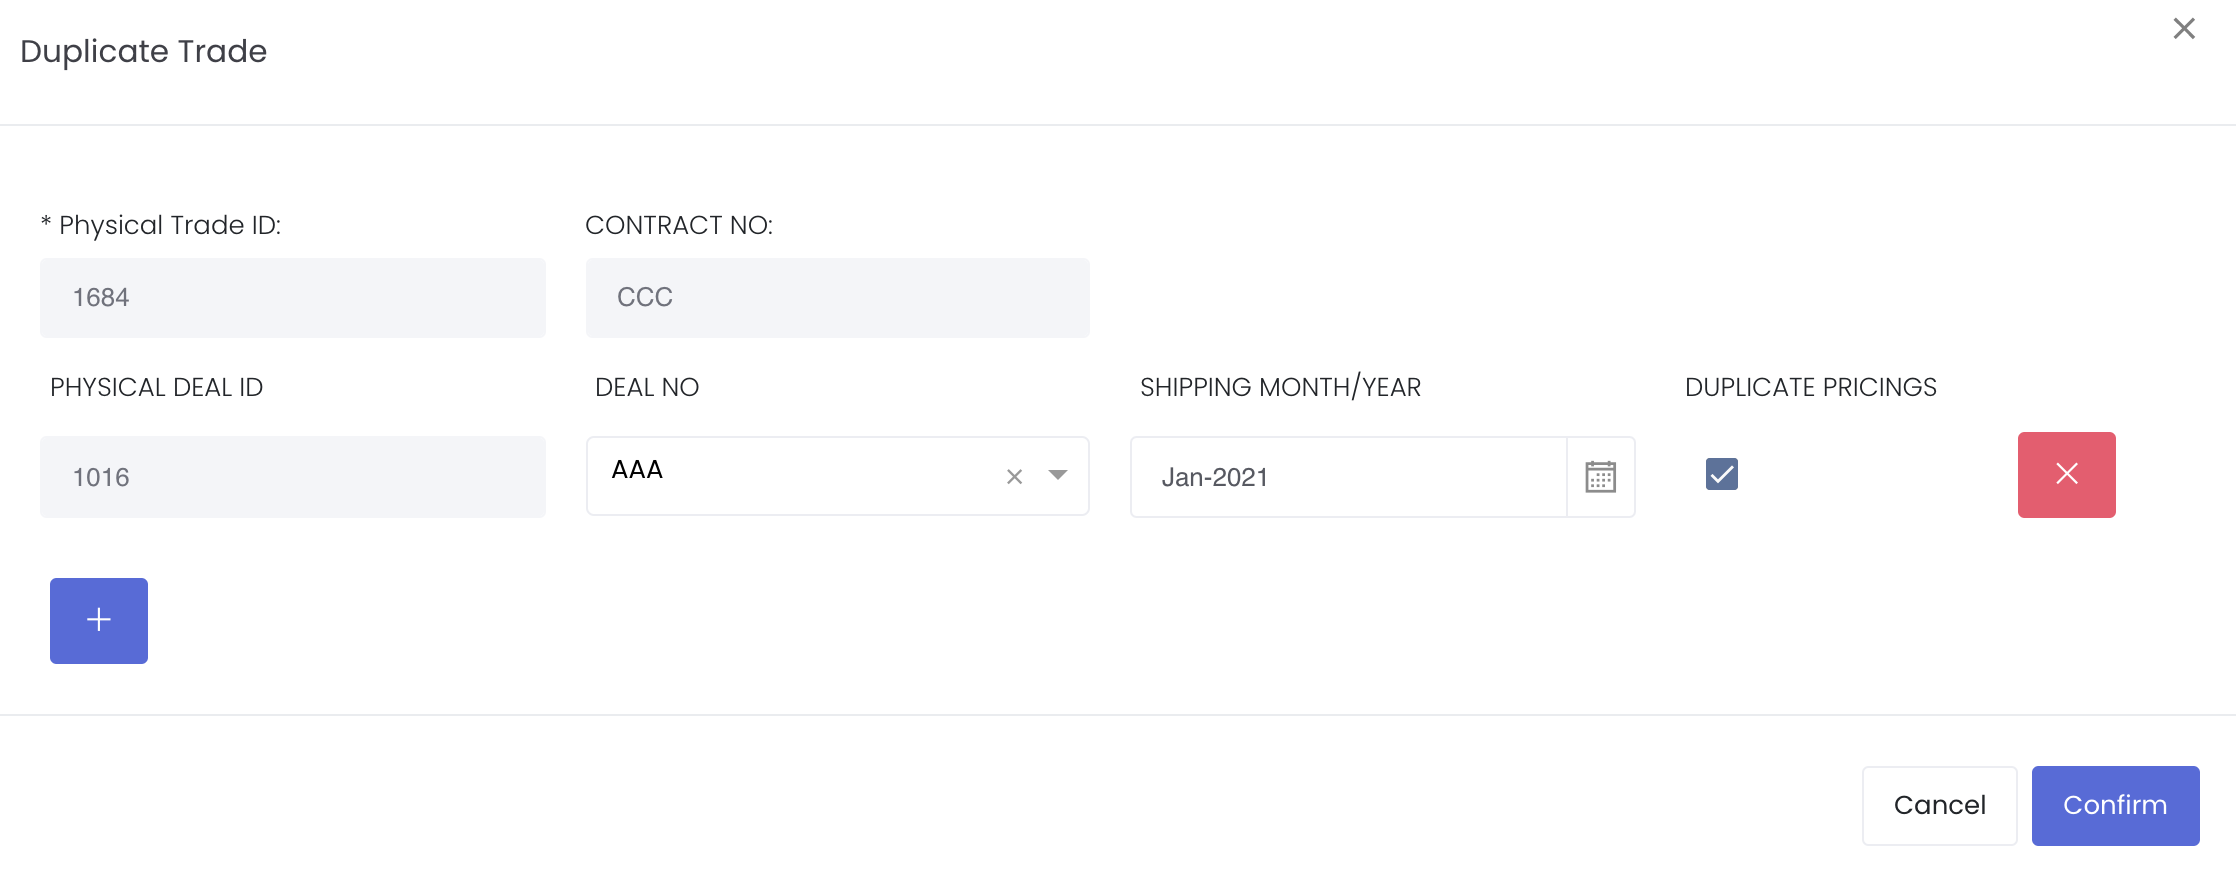
SHIPPING MONTH/YEAR: Input the shipping month/year for your duplicated trade if necessary.
...
To edit the shipping instructions document, click on the 'Edit' button (represented by a 'pen and paper' ![]() icon) located on the left of each row. To delete the shipping instructions document, tick the checkbox of the row and click on the 'Delete Row' button located above the table. You may also select multiple rows to delete.
icon) located on the left of each row. To delete the shipping instructions document, tick the checkbox of the row and click on the 'Delete Row' button located above the table. You may also select multiple rows to delete.
...
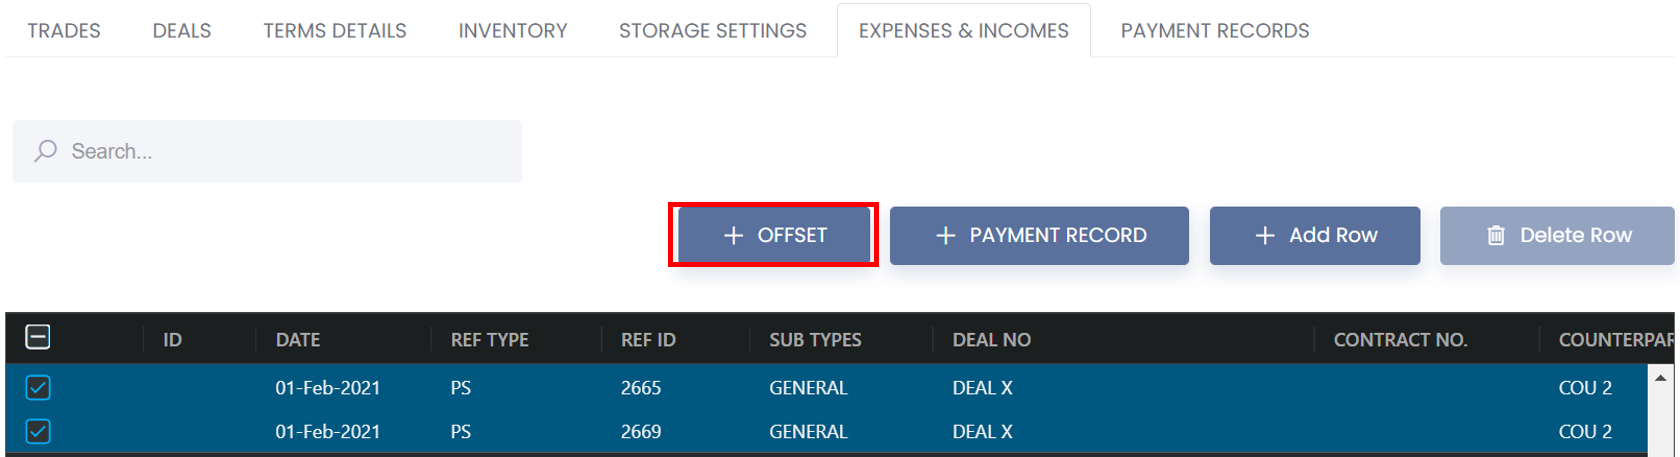
To delete a row, tick the checkbox of the row and click on the 'Delete Row' button located above the table. You may also select multiple rows to delete. You can scroll down to view the 'SUMMARY' table which acts like a pivot table and can be categorised and organised by groups according to your needs. You can click here to learn how to customise the table by arranging and filtering the columns based on your preference.
Several functions are available to assist in the selection of data:
...
Please note that you can only combine/offset 'PURCHASE/SALE (PS)' transactions (does not apply to transactions with REF TYPE: EXP/INC) that have the same 'DEAL NUMBER' and 'QUANTITY'.
Only 'EXP/INC DESCRIPTION' and 'COUNTERPARTY' are compulsory items and you can only click 'Confirm' after these fields are filled. 'COUNTERPARTY REF NO.' is an optional field that can be keyed in when necessary.
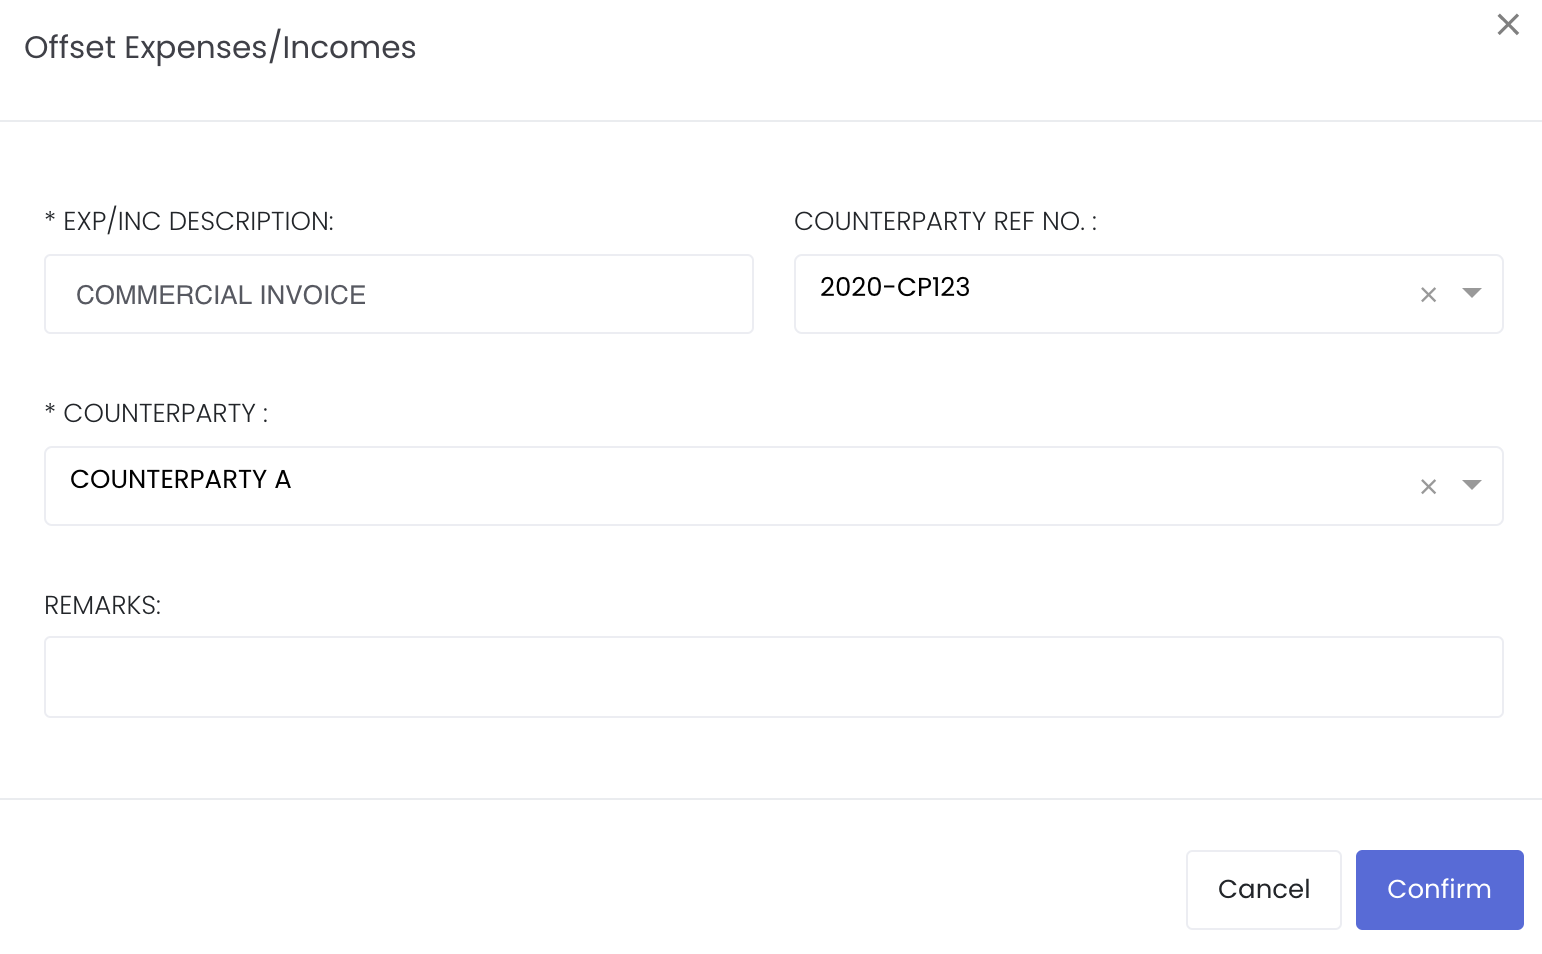
Once you offset/combine the transactions successfully, the quantity and unit price of the transactions will be offset/combined together. You can then tick the checkbox of the offset transactions and click 'Payment Record' to generate an invoice including the offset/combined transactions. Please note the following:
...
To edit the payment record, click on the 'Edit' button (represented by a 'pen and paper' ![]() icon) located on the left of each row. To delete the payment record, tick the checkbox of the row and click on the 'Delete Row' button located above the table. You may also select multiple rows to delete.
icon) located on the left of each row. To delete the payment record, tick the checkbox of the row and click on the 'Delete Row' button located above the table. You may also select multiple rows to delete.
To duplicate the payment record, click on the 'Copy' button (represented by '1 paper overlapping another paper') located on the left of each row. You will be directed to a duplicated page of the payment invoice for you to edit as necessary. Please be reminded to change the 'PAYMENT RECORD REF NO' (INVOICE NO.) as duplicated invoice number is not allowed, and please note that the 'ISSUE DATE' (INVOICE DATE) and 'CREDIT' items will not be duplicated. Click 'Save' once done to save your payment record.
...
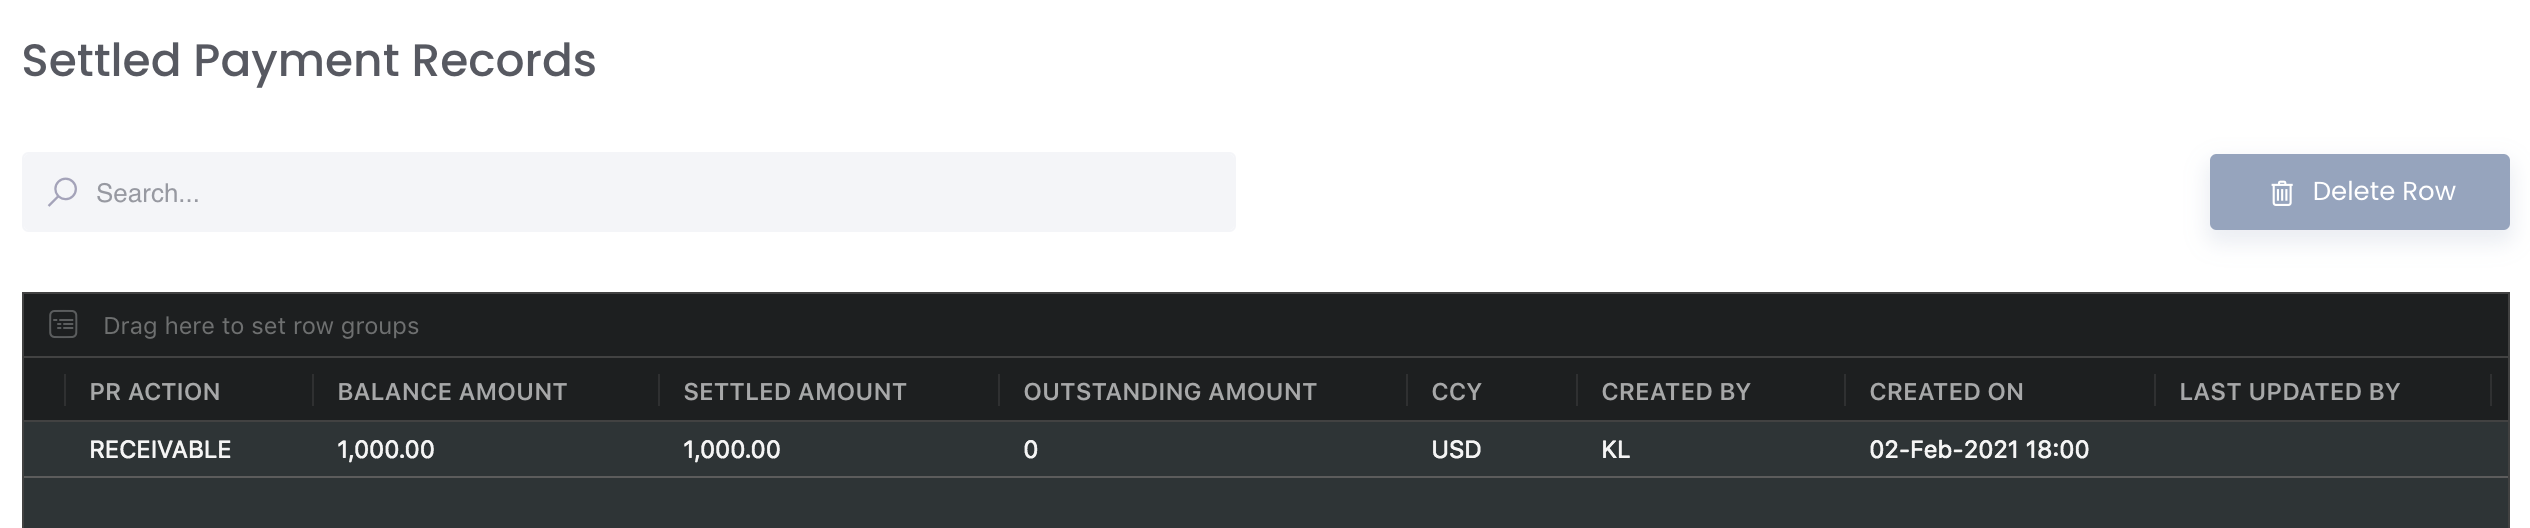
For the 'SETTLED AMOUNT' to be filled, the Accounts/Finance team can input the received/paid amount in 'Bank Transaction' table under the 'Accounting' section and allocate to the invoice. Click here to learn more.
Please refer to List of Definitions: Trades for the definitions of the fields.
...
6. BULK TRADES UPLOAD
This section allows you to bulk-upload your physical trades by simply uploading your excel file. Your physical trades will be captured directly into the system and managed according to your business requirements efficiently.
...
Trade Date: Physical trade date on which trade was created
Deal ID: Unique Deal ID tagged to each portfolio, auto-generated by system
Deal No.: Deal number of the trade. Please note that if a deal number is an existing deal number, the MTM pricing will follow that of the deal number and so it will not be fillable. If the deal number input is new, you will be able to input the MTM pricing
...
Deal CCY: Currency of deal
Title Trans Date: Title transfer date cannot be earlier than physical trade date and cannot be after today's date
Benchmark Pricing: Benchmark PRICING CODE of your product which has been pre-set in the physical pricing setting tab. The pricing index code selected will be used to benchmark the pricing of your trade. Please note that to set the pricing for each trade, you can only choose either benchmark pricing or fixed price. Fixed pricing will be empty if you select benchmark pricing. Tax rate for benchmark pricing has already been pre-set in physical pricing setting tab.
Premium: Premium to your benchmark pricing index
Fixed Price: Fixed price of trade. Please note that to set the pricing for each trade, you can only choose either benchmark pricing or fixed price. Benchmark pricing will be empty if you select fixed pricing.
...
7. PHYSICAL PRICING SETTING
This section allows you to set up your physical trade pricing index (Benchmark & MTM - pricing mode = Float/Ave, WMA & Spot) here, which will be used in bulk trade upload. If you have FIXED price, there is no need to create a pricing index.
...
Trade Type: Financial instrument(s) used as an index to benchmark the pricing of your trades (Benchmark or Potential (MTM)
Premium: Premium to your benchmark index/MTM
Pricing Start: Start date of pricing, applicable for forward products
...
Once done, please click 'Save' and the Pricing Code will be available for you to input in the 'Benchmark Pricing' or 'MTM Pricing' fields in the bulk trade upload
Please note that this section is equivalent to the pricing index setting as shown in the screenshot when manually creating your physical trade.
...